If you are looking to use “
Facial Recognition” to unlock your Windows 10 PC, you would need Windows Hello Compatible Webcams.
Windows 10 is a unique ecosystem in itself. It offers you a host of new features, and the regular updates have been adding in extra features over the years. From the security point of view, we would consider it one of the excellent operating systems – thanks to a host of security elements included in the package. One such classic security feature is
Windows Hello. Which webcams should you opt for if you are looking to find the best for your facial recognition option?
Also Read: Windows 11 Windows Hello Webcams
Windows Hello Compatible Webcams – An Overview
Have you updated your device to Windows 10 recently have been on the latest version of the operating system? In that case, you should invariably be using Windows Hello as an added security. Setting it up may not be an issue as such, but you would need a compatible webcam for the feature to work.
Before we would consider webcams worth their salt, let us check out what exactly Windows Hello is.
What is Windows Hello?

Some PCs and laptops with fingerprint readers can work with Windows Hello. However, our post is specific to the Windows Hello Facial recognition feature, where some devices can recognize your face and fingerprint to log you in. Moreover, you can also sign in to your Windows PC using Windows Hello companion devices, such as the Microsoft Band and some Windows 10 smartphones.
Windows Hello provides you a password-free, cognitive facial recognition-based login functionality available on Windows 10. In effect, you would use it for logging into your Windows without having to type in the password.
Since Windows Hello lets you log in to Windows 10 through face unlocking methods, you need supported devices. A few options for biometric functionality include iris scanning, fingerprint scanning, and facial recognition. The feature will require you to have access to accessories like a fingerprint scanner or webcam.
Related: Microsoft Teams Certified Webcams
Apart from logging in to your Windows 10, Windows Hello would also help you sign in to a few Windows 10 apps. Dropbox and One Drive are a couple of examples in that regard. However, not all apps are supported, and that can be something disappointing for techies out there.
Having understood those basic concepts, here are a few compatible webcams you can give a try:
Best Windows Hello Compatible Webcams
We also do have some webcams which we do not highly recommend. But they are out there and it is something you can buy. See below:
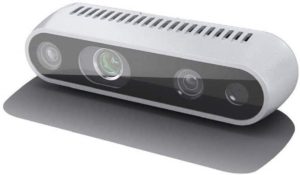
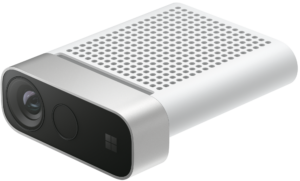
The RealSense camera is more developer focussed and less of a Windows Hello fit. There is an open-source Realsense SDK works that work on both Windows and Linux. If you are a dev and plan to incorporate 3d point clouds or similar use cases, this camera is for you.
Now, let us go through the individual devices in more detail to know them better.
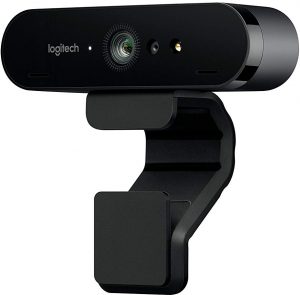
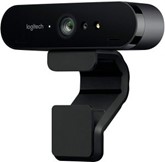
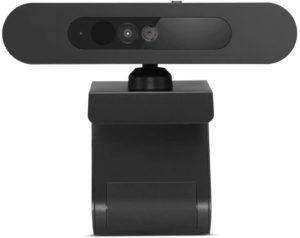
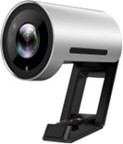
1. Logitech Brio Webcam
Check on Amazon Microsoft Store Amazon India
One of the most advanced webcams, the Logitech Brio Webcam, is quality personified regarding the image quality that it offers you. An astonishing 2160p resolution and HDR compatibility would make it an excellent choice in every right.
Some of the features we would focus on include.
- A stunning 4K + HDR compatibility
- The RightLight™ 3 light correction technology for quality video quality, streaming, and recording.
- Assured true-to-life HD video with autofocus and premium glass lens.
- Support for multiple connectivity options, including USB 2.0 Type-A and USB 3.0 Type A and C connections
- Certified for Skype for Business and Cisco, it offers you excellent enterprise functionality.
Equipped with an easy-to-use stand, that is the best you can opt for. You have access to a 5X zoom compatibility. Here are some of the technical specifications of the device:
| Specifications |
Logitech Brio 4K |
|
4K Ultra HD video calling (up to 4096 x 2160 pixels @ 30 fps)
1080p Full HD video calling (up to 1920 x 1080 pixels @ 30 or 60 fps)
720p HD video calling (up to 1280 x 720 pixels @ 30, 60, or 90 fps)
Plug-and-play USB connectivity
Field of View:
- Diagonal: 90°
- Horizontal: 82.1°
- Vertical: 52.2°
|
| Zoom |
5x digital zoom in Full HD
RightLight™3 with HDR |
| Autofocus |
Yes, |
| Lens |
Glass Optics |
| Microphone |
2 Omni-directional mics |
| Compatibility |
Windows Hello
Plug and play USB connectivity
Certified for Skype for Business and ready for Teams |
| Weight |
63 grams |
| Cable Length |
2.2 meters |
| DIMENSIONS |
27 mm x 102 mm x 27 mm |
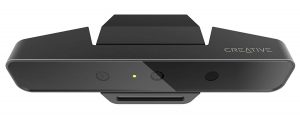
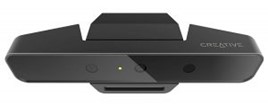
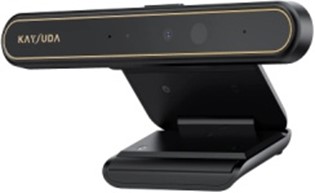
2. Creative Labs Senz3D
Check on Amazon
Creative is a manufacturer well known for audio accessories for your laptops and PCs. However, they also have a name carved for itself in the webcam segment as well. It comes with almost all features that you would look ahead to in a capable webcam.
Here are some of its high-level specifications:
| RGB Video Resolution |
Full HD 1080p (1920 x 1080) |
| IR Depth Resolution |
VGA (640×480) |
| RGB Frame Rate: |
- 60 fps @ 720p,
- 30 fps @ 1080p
|
| IR Frame Rate |
60 fps @ 640×480 |
| FOV (Field-of-View) |
77° (RGB), 85° (IR depth) |
| Range |
0.2m ~ 1.5m |
| Microphones |
Dual Mic:
- CrystalVoice Noise Reduction,
- Beam Forming,
- Echo Cancellation and
- Voice Morph Omni-directional
|
| Frequency Response |
20Hz – 20kHz |
| Sensitivity (1kHz) |
37�3 dB |
| Signal-to-noise Ratio (SNR) |
65dB |
| Power |
USB 3.0 Interface |
| Projector Type |
Class 1 IR Laser Projector |
| Dimensions (H x W x D) |
44 x 100 x 157mm |
| Weight |
350g |
A few features we loved with the webcam include.
- Utterly futuristic in its appearance and functionality.
- It incorporates high-end 3D scanning and facial recognition technology.
- Best suited for both AR functionality and gaming.
- It offers you practically unlimited possibilities.
- Communicate in a crystal clear voice with Cortana and get things done.
It may be a little expensive, yet it can be the best you can go with if you look to the future.
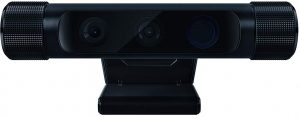
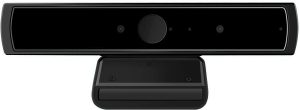
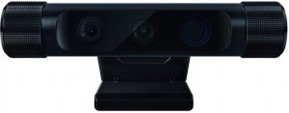
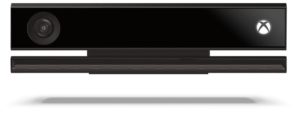
3. Razer Stargazer Depth-Sensing HD Webcam
Check on Amazon
Have you ever given a thought to opting for the affordable version of the webcam? The Razer Stargazer Depth-Sensing HD Webcam should be one of the best options in that case. It offers you a high capture rate and provides you with lifelike video capability.
The webcam also comes with 3D scan compatibility for faces and objects. Get ready for advanced facial and gesture recognition for the best experience regarding camera performance.
A couple of features that we would consider a good option for your webcam requirements can be
- The USB 3.0 compatible camera supports Windows Hello functionality and offers you a high-end 60 fps shooting capability.
- The dynamic background removal feature lets you have the best gaming experience ever.
- Enjoy lifelike streaming with the best quality camera functionality.
- It lets you enjoy multiplayer games in a purely new way.
- Unique depth-sensing capability.
Refer to the specs table below:
- Ultra-high 60 frames per second capture optimized for streaming capped at 720p Max 1080p HD video capture
- Automatic noise-canceling dual array mic
- Dynamic Background Removal
- 3D scanning
- Facial & gesture recognition
- Flexible clip for laptops and desktop monitors
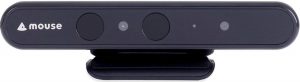
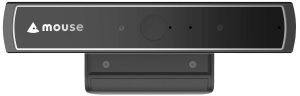
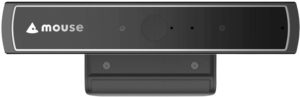
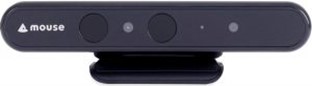
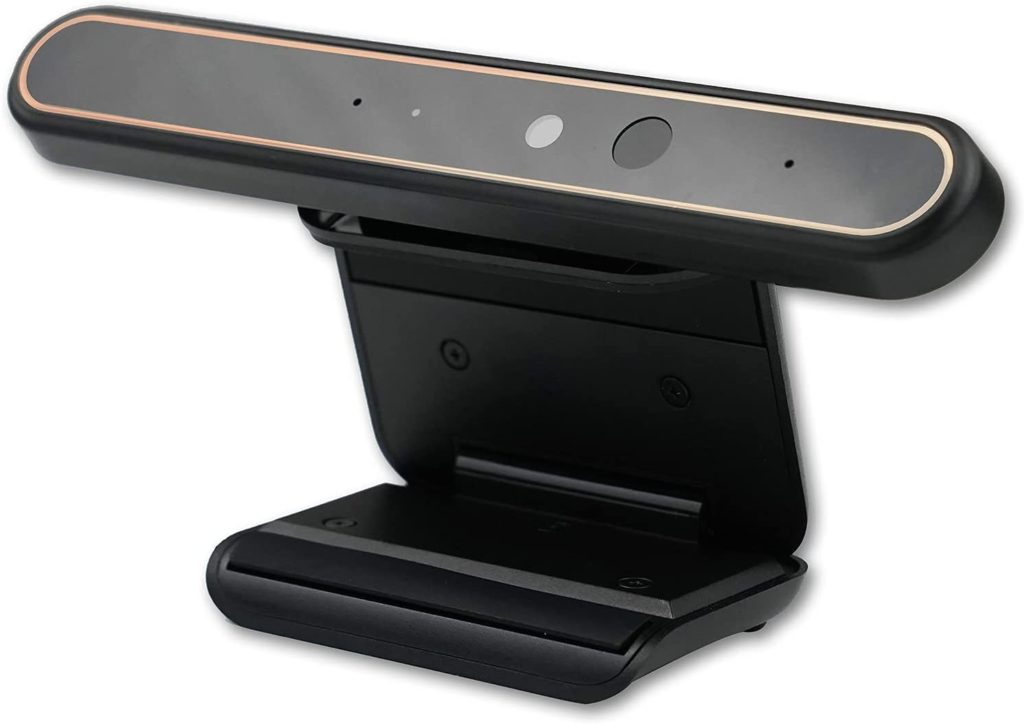
4. Mouse Facial Recognition Web-Camera for Windows Hello (Cm01-A)
Check on Amazon
“Mouse” is a lesser-known brand when it comes to webcams, but the camera is designed specifically for the Windows 10 operating system. The device is compatible with any Windows 10 installation, including a small footprint PC, laptop, or desktop.
A few features that we loved the most include
- Fully compatible with Windows 10
- It can unlock your PC through facial recognition in just under 1 second.
- It uses 3D identification, and thus masquerading through the use of photographs can easily be avoided.
- If your PC is a multi-user device, you can easily add a family member for perfect usability.
- Easy to set up and configure
- You can use it for Skype and similar other web conferencing tools.
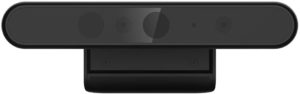
5. LilBit Face Recognition USB IR Camera
Check on Amazon
Another affordable option, the LilBit Face Recognition USB IR Camera, should be your best bet for Windows Hello compatibility. The multi-user functionality should allow you to configure it for your family members as well.
Some of the features you would include.
- It comes with dual microphone support.
- Works exceptionally well with USB 3.0
- You have access to HD 720p resolution, which should be ideal enough for Skype.
- Masquerade detection, along with depth-sensing functionality.
| Features |
Specs |
| IR Camera resolution: |
640×480 pixels |
| IR Camera Max Image Transfer Rate: Max Image Transfer Rate |
100fps @ 640×480 |
| RGB Camera resolution: 1280×720 |
1280×720 HD |
| RGB Camera Max Image Transfer Rate: Max Image Transfer Rate |
30fps@1280×720 |
| Camera resolution (max): 1280×720/30fps (around 920,000 pixels) |
1280×720/30fps (around 920,000 pixels) |
| IR LED Emission Wavelength: Centroid wavelength |
850nm |
| Digital microphone: |
Digital microphone*2 |
| I/O Port: |
USB2.0 or USB 3.0(recommended) |
| Operating Temperature: |
-30℃ to +70℃ (-22F to +158F) |
| Stable Image Temperature: |
0℃ to +50℃ (32F to +122F) |
| Distance Range: |
30cm-100cm |
| Product Dimension(LxWxH): |
135mm*22mm*53mm (5.31×0.87×2.09 inch) |
| Net Weight: |
115g (0.253 Ibs) |
| USB cable length: |
4.92ft (1.5 m) |
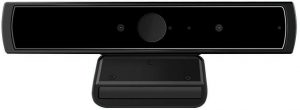
Mouse Facial Recognition Anti-Spoofing CM02-A
Check on Amazon
Specially designed for Windows Hello integration on Windows 10, the CM02-A is also adaptive for multiple users. It also supports masquerade detection utilizing an InfraRed camera. The high-speed recognition within one second makes it an exceptional choice by many standards.
A few features that should make it one of the excellent choices would include
- A perfect hands-free solution for your needs.
- It can capture 3D identification of all the facial features.
- Easy to set up and use.
- Works effectively with even the latest version of Windows 10 viz 1903
- An excellent video quality.
You can check out the webcam at
this link on Amazon.
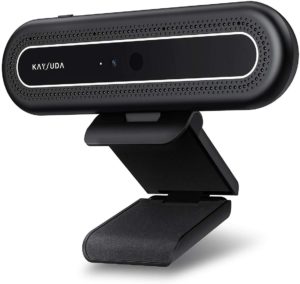
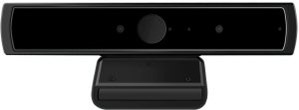
Kaysuda Windows Hello IR Camera
Check on Amazon
It is one of the cheaper options in this list and is quite fast in IR facial detection, especially using Windows Hello. It comes with dual noise cancellation mics and a 720p RGB webcam for your usual video calls.
It also enables you to use it on a shared computer with the primary focus on facial detection. The IR camera comes with a resolution of 640×480, and the on-board RGB camera comes with a video resolution of 1280×720 and a max frame rate of 30fps (around 920,000 pixels).
It supports USB 2.0 or USB 3.0, with the higher version recommended if you have one available.
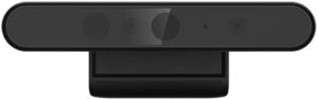
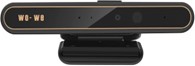
Moomax EC-X1 IR Camera
Check on Amazon
The EC-X1 is a Windows Hello, IR Camera. It comes with a 720p resolution webcam with Dual Mic for ultra-sharp streaming, webcasting, or recording video. The specs are in line with most of the other budget Windows Hello cameras on this list.
The IR Camera allows you to authenticate and login or unlock the windows10 system. The RGB part will enable you to operate it as a regular webcam.
The webcam also supports Windows 7, 32/64 bit OS, but only as a WebCam.
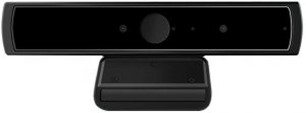
CA20 by Kaysuda – USB IR Camera for Windows Hello
Check on Amazon
Like its older sibling, who is also featured in this list, this webcam also supports Windows 10’s hello feature. However, the native resolution of the webcam gets bumped to Full HD (1920X1080). The IR camera module still supports 640 x360, which does the job just fine. Here are the specification highlights were given in the table below:
| RGB Camera resolution |
- 1920X1080 (default)
- 30fps@1920X1080 (Max Image Transfer Rate)
|
| IR Camera resolution |
640 x360 |
| Video decoding format |
YUY2 / MJPG |
| Capture File Format |
Avi & Asf |
| I/O Port |
USB2.0 or USB 3.0(recommended) |
| Operating Distance Range |
30cm-100cm (1ft-3.3ft) |
| USB cable length |
4.92ft (1.5 m) |
| Field of view: Horizontal |
72.4°, Vertical: 44.7°, Diagonal: 80.0° |
| Power Consumption |
5V/500mA |
| Weight |
140 grams |
| OS Requirements |
- Windows 10
- Windows 8.1,32/64 bit OS, Windows 7, 32/64 bit OS only support WebCam.
|
MouseComputer – CM02A Facial Recognition
Check on Amazon
The MouseComputer CM02A is marketed as a work from home ready, windows hello compatible webcam designed for home office use. Most of the features are identical to their predecessor, with minor tweaks here and there.
Overall, it does the job as advertised at an affordable price point. It offers good competition to the Kaysuda facial recognition camera, which is also a top seller in this category.
Specifications:
- Supported OS: Windows 10
- Camera: IR Camera Resolution 640 × 480
- Web Camera Resolution (max) 1280 × 720 30fps (around 920,000pixels)
- Focus Distance Range: 30cm – 100cm
- Mic: Dual Array Microphones
- Power Source: Standard USB Bus Power
- I/O Interface: USB2.0
- USB Cable Length: 1.5m / 4.92ft
Kiss Fish – Windows Hello Webcam

Check on Amazon
Unlike most of the webcams that we have on the list, this one comes with a 1080p native resolution. It meets the IR security requirements to be ‘Windows Hello’ capable and offers the same cost-effectively. The only downside is the cable length. If you do not have a desktop that sits on the table, this webcam is not recommended. For Laptops, the cable length works out to be just fine.
Also, USB Hubs are not supported if you are planning to extend the cable length. Here are the specs sheet below:
| Webcam Resolution |
1080p |
| Windows Hello |
Yes, Facial Recognition IR camera |
| Viewing Angle: |
88.6° ±3° |
| Pixel: |
2 million |
| USB Cable Length: |
1m / 39.37” |
| Dimensions |
76 x 15 x 8mm / 2.99” x 0.59” x 0.31” |
| Weight |
0.02 KG |
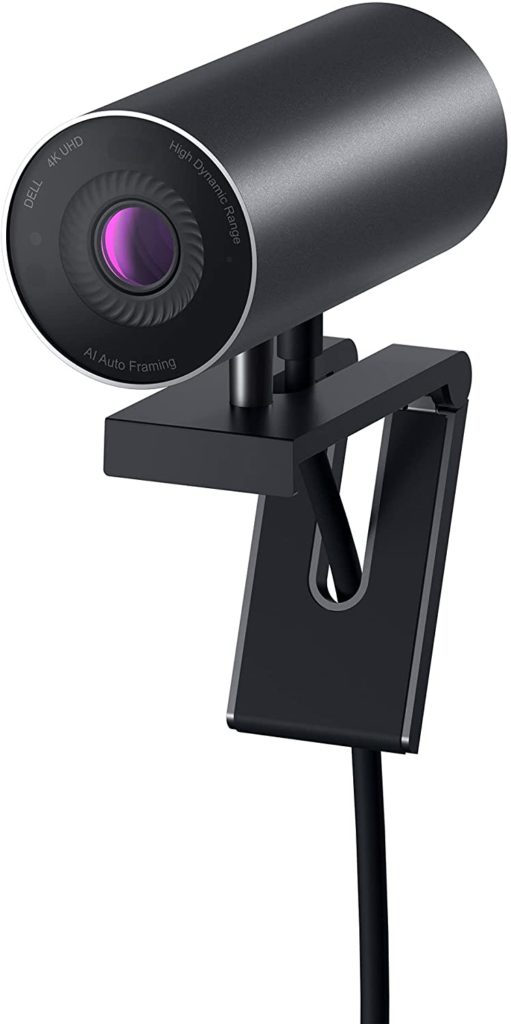
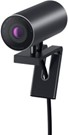
Dell UltraSharp HDR 4K Webcam
 Check on Amazon
The webcam comes with 4K native resolution with AI auto framing 3D/2D video noise reduction to avoid motion blurring. More importantly, it comes with Dell ExpressSign-in that detects your presence and authenticates using Windows Hello to automatically log you in. When you walk away, it locks your system for increased security.
One important thing to note here is that it works seamlessly with macOS. However, the Dell Peripheral Manager Software is supported only on Windows 10 64 Bit OS. The software helps you manage the webcam settings and elements like HDR, AI Auto Framing and Changing Field of View among others.
The Parting Thoughts
Well, those are a few best options for webcams compatible with Windows Hello functionality. If your built-in camera does not support Windows Hello, opt for the featured webcams’ best features. Relieve yourself from the shackles of having to enter a password every time, and as Dell aptly puts it, become “YOU ARE THE PASSWORD”!
Also Read:


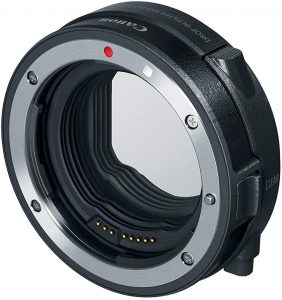
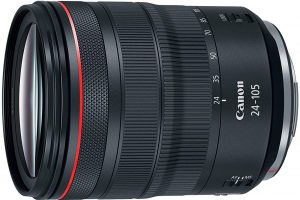
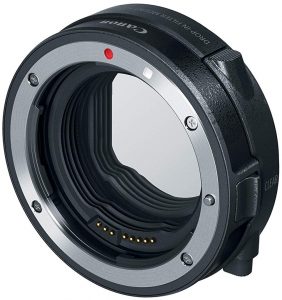 If you are looking for mounts with a variable filter – Check on Amazon
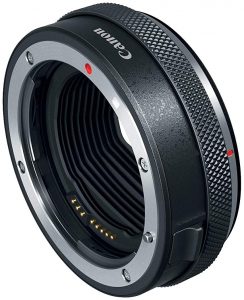

 This is yet another option provided by Canon for the best compatibility of your Canon EF and EF-S lenses on your Canon EOS R cameras. The mount will offer you a choice for a customizable user functionality for EF Lenses and its compatibility with the EOS R camera.
The presence of the control ring would help you have access to a host of customizations options on the go. You can assign a host of functionalities to your control ring. Some of those functions include exposure compensation, ISO, aperture or shutter speed. In essence, the adapter system would help you opt for the control ring functionality on the EF lenses as well, just the way you would be using the feature on your RF lenses.
You need not take your eye off from the camera for accessing the control ring. The ergonomic placement of the ring will help you get the most out of your adapter. The tactile feedback available on the control ring should be quite intuitive enough.
This is yet another option provided by Canon for the best compatibility of your Canon EF and EF-S lenses on your Canon EOS R cameras. The mount will offer you a choice for a customizable user functionality for EF Lenses and its compatibility with the EOS R camera.
The presence of the control ring would help you have access to a host of customizations options on the go. You can assign a host of functionalities to your control ring. Some of those functions include exposure compensation, ISO, aperture or shutter speed. In essence, the adapter system would help you opt for the control ring functionality on the EF lenses as well, just the way you would be using the feature on your RF lenses.
You need not take your eye off from the camera for accessing the control ring. The ergonomic placement of the ring will help you get the most out of your adapter. The tactile feedback available on the control ring should be quite intuitive enough.


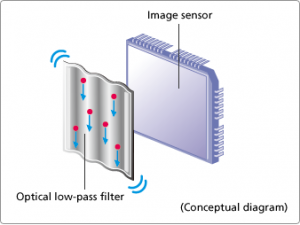 The Optical low pass filter is the perfect answer to the Moire effect. The low pass filter or Anti-aliasing filter would reduce the impact of false colors.
How does it work? Well, it works through a simple procedure. Camera manufacturers employ an optical filter for the purpose. The filter is used on top of the sensor and comes with three layers. The first layer would displace the image slightly in a horizontal direction. The second layer used in the filter would be used for filtering the infrared radiation. The third layer replaces the sample image slightly vertically.
All these effects together would remove the effects of aliasing and Moire effects. However, do note that these changes can affect the image resolution. Your image will be blurred, and as we are well aware of, no one likes blurred images – right?
The Optical low pass filter is the perfect answer to the Moire effect. The low pass filter or Anti-aliasing filter would reduce the impact of false colors.
How does it work? Well, it works through a simple procedure. Camera manufacturers employ an optical filter for the purpose. The filter is used on top of the sensor and comes with three layers. The first layer would displace the image slightly in a horizontal direction. The second layer used in the filter would be used for filtering the infrared radiation. The third layer replaces the sample image slightly vertically.
All these effects together would remove the effects of aliasing and Moire effects. However, do note that these changes can affect the image resolution. Your image will be blurred, and as we are well aware of, no one likes blurred images – right?
 Camera manufacturers have been using the anti-aliasing filters or the blur filters since long to do away the false colors. However, the lack of details is what would make it an unwanted evil in most cases.
That is precisely what would explain the decision of a few camera manufacturers to opt for no low pass filters. On the forefront of this revolution is Nikon, which introduced the concept of no low pass filter way back in 2004. How and why would they do it?
While anti-aliasing is one of the features that would appear to be an excellent option under a few conditions, it remains an evil by no means. Why? Because the pictures get blurred and there is a considerable loss of resolution.
The functionality is quite an efficient one, but if you are someone involved in the landscape photography – you will find that the lack of sharpness is a significant concern. You are not affected by the Moire effect or the false colors, but with the option available by default on your camera you will end up with the lack of details. Nikon introduced the Nikon D800E with no low pass filter keeping the landscape photographers in mind.
Camera manufacturers have been using the anti-aliasing filters or the blur filters since long to do away the false colors. However, the lack of details is what would make it an unwanted evil in most cases.
That is precisely what would explain the decision of a few camera manufacturers to opt for no low pass filters. On the forefront of this revolution is Nikon, which introduced the concept of no low pass filter way back in 2004. How and why would they do it?
While anti-aliasing is one of the features that would appear to be an excellent option under a few conditions, it remains an evil by no means. Why? Because the pictures get blurred and there is a considerable loss of resolution.
The functionality is quite an efficient one, but if you are someone involved in the landscape photography – you will find that the lack of sharpness is a significant concern. You are not affected by the Moire effect or the false colors, but with the option available by default on your camera you will end up with the lack of details. Nikon introduced the Nikon D800E with no low pass filter keeping the landscape photographers in mind.
")
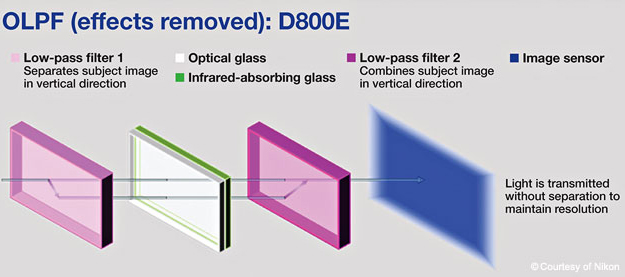
 In a traditional low pass filter, the light rays are moved through the three layers of the filter as indicated in the above description of low pass filter. Thus it is split thrice and removes the Moire effect, but introduces blur effects.
In case of Nikon’s D800E, it takes a slightly different approach. There is no option to remove the complete low pass filter as the camera would need to reflect infrared radiation. Of course, they would have been able to make use of only one layer, but to avoid moving the focal plane – Nikon employed the same three-layer strategy, but the first and last layers cancel each other. The light passes through the first layer (the vertical low pass filter) and splits into two. Then it moves through the infrared filter and finally steps through the next vertical low pass filter. Since the last filter is a reversed vertical low pass filter, you would find it converging back into one line. Instead of blurred images as in the case of a low pass filter, you would not get such issues with the new technology.
In a traditional low pass filter, the light rays are moved through the three layers of the filter as indicated in the above description of low pass filter. Thus it is split thrice and removes the Moire effect, but introduces blur effects.
In case of Nikon’s D800E, it takes a slightly different approach. There is no option to remove the complete low pass filter as the camera would need to reflect infrared radiation. Of course, they would have been able to make use of only one layer, but to avoid moving the focal plane – Nikon employed the same three-layer strategy, but the first and last layers cancel each other. The light passes through the first layer (the vertical low pass filter) and splits into two. Then it moves through the infrared filter and finally steps through the next vertical low pass filter. Since the last filter is a reversed vertical low pass filter, you would find it converging back into one line. Instead of blurred images as in the case of a low pass filter, you would not get such issues with the new technology.


 [amazon_link asins=’B01C3LE716′ template=’PriceLink’ store=’foi04-20′ marketplace=’US’ link_id=’37b58409-9d7f-11e8-8816-d9403b0d69fb’]
 [amazon_link asins=’B06Y125DWZ’ template=’PriceLink’ store=’foi04-20′ marketplace=’US’ link_id=’47e9014b-9d7f-11e8-9775-abd086fe7e8a’]