What Is A Polarizer Filter? When Not To Use One? For Portraits or Landscapes

If you are a photographer, you would have to know what is a Polarizer Filter. It has been considered to be one of the best and essential tools for the landscape photography.  However, some rules govern the use of a Polarizing Filters. In fact, using it in some conditions may end up producing awful results in your photographs unexpectedly. If you are confused about the how and where to use Polarizing Filter (and yes, where not to use it), we are here to provide you with a few inputs on the right usage of Polarising Filters.

What Is A Polarizer Filter?

If you are new to the world of photography, it could be possible that you are not aware of what a Polarising Filter is. Well, if you have been shooting landscapes, you should be mindful of the kind of havoc that direct light can play with your images. Polarizing Filter is an accessory that reduces the effect.
Related Reading: Best Polarising Filters for Canon and Nikon DSLRs
Technically speaking, a Polarizing Filter is a glass that has been specially adapted. When you turn at an angle to a light source, it will help you minimize the glare from the surfaces reflected. Most of the filters are available in the circular form so that you can fit it on any lens. These filters can address the sharpness and variance between the different objects. Removal of reflection and improving the contrast are a couple of features that would necessitate the need for a Polarizing Filter. In fact, they can go a long way in reducing the post-production efforts you may need to go through if you have not used a Polarizing Filter.

How Does The Filter Works?

The Polarizing Filters are available in different shapes and sizes. In fact, the circular filters are the most preferred ones – thanks to the ease with which they can be fitted onto any lens. The filters are available in multiple sizes so that it can be used on different types of lenses. The working principle is quite simple enough. You can rotate the polarizing filter as per your requirements. This would be helpful in blocking specific wavelengths of the light. These wavelengths will thus be blocked and will not be able to reach the sensor. You can achieve the results of your preference by rotating the filter until you get the effect that you are looking for. The exact manipulation should be dependent upon the source of the light and your subject.

What are the Conditions that you Should not Use Polarizing Filters?

Well, that should have let you understand what Polarizing Filters are and how they work. They are indeed quite useful and practical for enhancing the shots you take. In fact, they reduce the glare of the reflected light. But, there are a few conditions that you may not want to use a Polarizing Filter. There are some occasions that the reflected light can produce remarkable results. Let us check out a few scenarios that you would want the reflective light in a better way.

Scenario 1 – Waterfalls

When you are shooting the wet rocks and waterfalls, using the polarizing filter can make the image a little dull. How about the scene when you would want a great damp look on the rocks? Using a polarizing filter can reduce the effect of the reflected light that would, in fact, enhance the quality of your image. It would be advisable in such situations to take two snaps – one with no filter and one with the filter. We assure you that you will like the look without the filter. Of course, wetness on the surface can be quite reflective, but in some cases eliminating it can be destructive. If the humidity provides you with a slight reflection, it can be something that you would want in your shots.

Scenario 2 – If the Reflected Light has a Unique Color

Yes, we are talking about that ever beautiful sunrise and sunset views. If those views have the light being reflected on the rocks or any other object, it would advisable to avoid using a polarizing filter. Especially the light coming from the sun has a different color, it will indeed have a tremendous reflecting effect. If the reflected light produces a different color than in the ideal conditions, not using the polarizing filter will provide a more dramatic effect to your shots.

Scenario 3 – If the object has a shallow light

Shaded areas should be a big No No for the polarizing filters. You can indeed follow a rule- when the sun has set, and the surroundings are getting dark, you should avoid using a polarizing filter. That should be quite self-explanatory, we would guess. The Polarizing filter is used to reduce the intensity of reflected light. When you do not have light reflection, we see no point in using the filter at all. Some such examples can include heavy and dense forests, canyons, shooting at dawn or dusk can be a few prime situations you should go without the polarizing filter.

Scenario 4 –  Rainbows

Using a polariser filter while shooting a rainbow can have a devastating effect on the intensity. In fact, ideally – a rainbow is a reflected light in itself and thus using a polarizing filter can reduce the impact of the view you are expecting in your shot.

The Concluding Thoughts

Well, those should be a few ideal situations where you would not want to use the Polarizing Filter. Of course, Polarizing filters can be used in several locations and use them is bound to improve your performance as a photographer. However, having a good knowledge of when to use them and when to turn them off goes a long way in enhancing the quality of your masterpieces. We assume the few selects scenarios that we have outlined in the above discussion should aid you in learning the right way to use polarizing filters. Not that this list is exhaustive in any case. The best idea you can opt for would be to shoot two images with and without the filter when in doubt. You can analyze the pictures, later on, to find out what suits which situation.

Is There A 6D Mark ii 4K Magic Lantern? Options or Features Available?

0
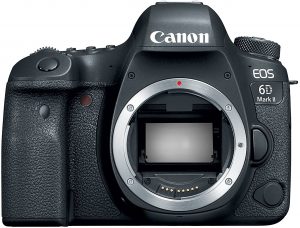
Canon has indeed been the best alternative to Nikon when it comes to the development of DSLR cameras. The EOS 6D Mark II is a capable device that has been one of the preferred budget full-frame cameras by any standard. If you are wondering what we mean by the Magic Lantern, possibly you are not aware of the development regarding the software tweaks. Let us find more details on 6D Mark ii 4K Magic Lantern in the following paragraphs.

Canon EOS 6D Mark II – An Overview

Designed as an upgrade to the EOS 6D, the EOS 6D Mark II is indeed one of the cameras with modern specifications. It is indeed the best cameras for those entering into full-frame photography for the very first time. Some of the features that would make it an excellent option are
  • It offers you an excellent live view focusing functionality.
  • You have access to a very comfortable grip.
  • The display screen offers you the best in class touchscreen control options.
  • The connectivity options offered by the camera should make it an ideal device in every right.
However, the camera buffs are rebuffed because of the lack of a few features. In spite of being a great device in most of the aspects, it does not offer 4K shooting capability. That is precisely one of the features that the tweaked ROM in the form of Magic Lantern plans is expected to take care of.

Why Does Canon 6D Mark II does not Offer 4K?

Yes, one of the latest entrants among the entry-level full-frame cameras from Canon, the 6D Mark II the full frame DSLR does not come with a 4K shooting compatibility. There is no specific reason for the lack of feature, but it has indeed been causing for huge outrage amongst Canon enthusiasts or the camera buffs out there. Why would have they left out the feature? Maybe they have their reasons. The camera is indeed not for the Pros. The camera is specially designed for the sake of beginners or semi-pro market, someone who is taking the plunge into the full-frame ecosystem. This is, in fact, the message being given out by Canon through its online board discussions. The focus seems to be on documentaries and other works in the similar genre. Now that beginners usually do not indulge in high-end videography or movies, and their basic needs are likely to be video sharing services like YouTube or Vimeo – they would probably need no access to 4K. Moreover, 4K is what a filmmaker will need. The EOS 6D Mark II is a camera designed for the photographers, not filmmakers. That is possibly yet another reason that Canon decided to opt out of 4K shooting capability on the mark II.

Check on Amazon

6D Mark ii 4K Magic Lantern: Are there any Hopes?

Magic Lantern is one of the influential ‘MOD’ communities involved in creating MODs or custom ROMs for cameras. They work, especially for Canon Cameras. If you are a photographer yourself and have been using a host of cameras, you might already have heard about Magic Lantern. If you are a Canon DSLR user, Magic Lantern should not be new to you. Aiding the Canon Camera users since the year 2009, it has been helping out millions of Camera users in addressing the shortfalls in their software. Magic Lantern is an add-on or software tweak that lets you add a few features that may not be available on the official firmware preloaded on the cameras. They work correctly in the arena of Canon EOS cameras. In sharp contrast to the custom ROMs used on smartphones, the Magic Lantern firmware does not replace the official firmware but runs along with the software. The community has already developed custom ROMs for 5D and 5D Mark II full-frame DSLRs. They have also come up with the options for the predecessor of 6D Mark II – the Canon EOS 6D.

Is the 4K Hack Available for Canon EOS 6D Mark II?

Well, as things stand as of now – No. You do not have any actual build available for the camera. But, you have a build for Canon EOS 6D. That would possibly indicate the possibility of the arrival of custom firmware for the 6D Mark II quite soon. And yet another point that made us believe that the Magic Lantern 6D Mark II hack would be available soon is the fact that the ROM Dumpers are already available for the model. That has probably given a hope that the 4K compatibility will be launched soon by the magic lantern.

What Features Does Magic lantern Introduce?

There is no development as of now for the Canon EOS 6D Mark II. But, when it comes, you can expect a host of features that would be introduced along with the base firmware already available on your camera. Magic Zoom is a feature commonly found on Magic lantern firmware. It lets you focus on the best possible to achieve the best sharpness levels. If you are into time-lapse photography, the Intervalometer option available on the device should provide additional functionality.

The Concluding Thoughts

Well, the Canon EOS 6D Mark II should be one of the best options when it comes to budget cameras for the beginners. However, it lacks a few features that you may be looking ahead to. Magic Lantern is the best tool for adding those missing features. Lack of 4K shooting mode is one of the features that Canon EOS 6D Mark II users are disappointed about. Magic Lantern has been considering the device for the development of their add-on the firmware. That should ideally be good news for the 6D Mark II users out there. The fact that Magic Lantern has already added the 4K on the sibling Canon 5D and 5D Mark II should hold hope for the Canon lovers. We would look ahead for the development soon. However, as things stand as of now – there is no active development as long as 6D Mark II is concerned. The ROM Dumpers have been indicating the future, and we would like to expect some announcements soon. Till that time, you may need to live with the lack of 4K shooting mode.

Canon 24mm Vs. 50mm Lenses For Video and Photography with Samples

0
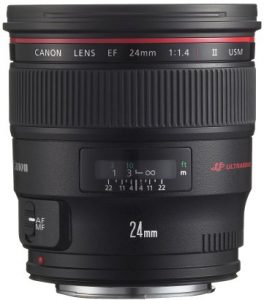
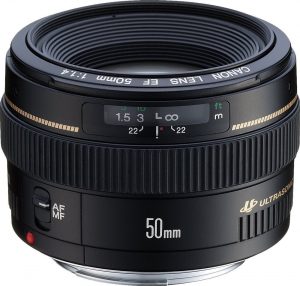
Photography is not only about what kind of camera you have been opting for. It also involves choosing for the best lenses that would let you shoot better images and videos. How would the lenses differentiate the functionality of your camera? What are the differences that a Canon 24mm Vs. 50mm Lenses would have on the proper shots and videos on your camera?

Canon 24mm Vs. 50mm Lenses – The Differences

Well, there would be a complete difference between the shots and videos you take from a 24 mm and a 50 mm camera lenses. We will find the inherent differences between the two types of glasses for a clear understanding of the differences you will be facing concerning the clarity and other aspects of your shots.

The Suitability

The 50mm lenses are best suited for the portraits. You will be able to get better head to shoulder snaps better on a 50 mm lens as compared to the 24 mm lens. In case if you want to shoot clear images with an emphasis on the faces while blurring the background, the 50mm is ideal. Bookeh! On the other hand, if you are looking for the details in the backdrop – a 24 mm lens would make a better sense.

The Details Expected

The exact choice of your requirements is what would decide your choice of lenses. If you are looking for details in the background and want the image to be readily convertible to black and white, a 24 mm lens should be the one that is most preferred. A 50mm lens would be the best choice when you are looking for the expressions on the faces of the subjects.

How Do Canon 24mm and 50mm lenses with f/1.4 compare with each other?

Well, the fundamental differentiation between the two types of lenses should be ideally available through the discussion we already have in the above discussion. We thought of opting for a tabular comparison for a better understanding of the concept.

Physical Dimensions

Features/ Particulars

Canon 24 mm f 1.4

[amazon_link asins=’B001GNCWCE’ template=’PriceLink’ store=’foi04-20′ marketplace=’US’ link_id=’bb832459-77e5-11e8-9c39-95944077b2d0′]

Canon 50 mm f 1.4

[amazon_link asins=’B00009XVCZ’ template=’PriceLink’ store=’foi04-20′ marketplace=’US’ link_id=’c6df2974-77e5-11e8-b758-7125e6e1291b’]

Front filter thread 77 mm 58 mm
Dimensions 3.29 x 3.42″ (83.5 x 86.9 mm) 2.91 x 1.99″ (73.8 x 50.5 mm)
Weight 650 grams 290 grams
Warranty One year One year

Performance Statistics

Features/ Particulars Canon 24 mm f 1.4 Canon 50 mm f 1.4
Focal Length 24 mm 50 mm
Apertures Max f/1.4 and Min f/22 Max f/1.4 and Min f/22
The angle of view 84 degrees 46 degrees
Minimum focus distance 25 cm 45 cm
Magnification available 0.17x 0.15x
Maximum Reproduction Ratio 1:5.88 1:6.7
Optical Design 13 elements in 10 groups 7 elements in 6 groups
Diaphragm blades 8 8, rounded
Format 35mm Film / Full-Frame Digital Sensor 35mm Film / Full-Frame Digital Sensor

The Features

Features/ Particulars Canon 24 mm f 1.4 Canon 50 mm f 1.4
Autofocus functionality Yes, available Yes, available
Built-in focus meter Yes Yes
Wide Angle Functionality Yes No
Inbuilt optical image stabilization No No
Focus motor availability Yes Yes
Weather sealing Yes No
Optical Zoom Yes, 1X Yes, 1X
Built-in lens hood Yes No
Infinity focus Yes Yes
Full-time manual focus Yes Yes
 

The Inferences from the Comparison

Well, based on the details that we discussed through the comparison Tables for the specific features in the above comparison features – you would find that both 24 mm and 50 mm lenses from Canon have almost identical features. Aperture – Both 24 mm and 50 mm lenses come with the same more full aperture of f/1.4. It goes a long way in enhancing the absorption of light and thus avoiding blur. In fact, it would allow you to create your own bluer effects by adjusting focus. Minimum Focus Distance –The minimum focus distance is the closest distance you can shoot with. A lower minimum focus distance can be the best if you are looking to shoot macro photography. You can find from above table that 24 mm lens works best for macro photography. Wide-Angle Photography –If you are looking to shoot your videos and photos with a lot of areas in the background, a lens with a broader angle should be your best choice. 24 mm lens can work as the best option for those needs. Taking care of out of focus areas – Rounded aperture blades can be much helpful in addressing the concern of out of focus conditions. Again, the 24 mm lens will take the lead in this aspect. Focussing on smaller objects–A higher focal length will ensure that you would be able to take better snaps. Concentrating on a minor part of the screen is made easy with at the highest focal length. 50 mm lens can focus on objects in a better way so that you would be able to get more explicit pictures. That would indicate that you can choose any of the lenses between them depending upon what type of composition you have been looking ahead to. We would hope that the descriptions provided against each of the features should help you make a learned choice of your lens.

Samples of Canon 50mm F/1.4: Source – Flickr

Samples of Canon 24mm F/1.4: Source – Flickr

The Concluding Thoughts

Well, that was the complete comparison between the Canon 24 mm and 50 mm lens with f/1.4 aperture. We assume the details we shared here would have helped you take a perfect call on the exact nature of your glasses. It should be noted that both the lenses have their practical features making them an excellent choice in their own right. What it would boil down are the exact requirements you may have concerning your shooting schedule. That is precisely why we have listed out the differentiating features and their usability in the practical conditions. We think this can be of best help in zeroing on the perfect lens that meets your needs. Which of those two equally capable lenses are you using for your photography needs? Do share your thoughts and experiences with either of those lenses. This would guide us further in choosing a perfect option for our needs.

Rebel T7i Canon 1500D vs. Nikon D3400 – Specifications Comparison

0
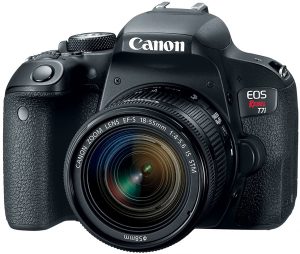
Are you looking for an excellent DSLR for your requirements? Well, Canon and Nikon have been the two popular manufacturers you would find coming up with world-class cameras that have focussed on providing you many practical use cases. In today’s post, we will focus on comparing the two best cameras from them and decide as to which one should you buy among the two. Now that we are aware of the popularity enjoyed by Canon and Nikon cameras, we thought of picking the two best devices from each of these two brands and comparing them. We will compare Canon 1500D vs. Nikon D3400 in this post.

The Canon 1500D – An Overview

Canon 1500D is an excellent camera for the beginners. The 24.1 MP MP sensor with APS –C size. Some of the features worth mentioning concerning the 1500D are its upgraded autofocus system and offers a better grip on the camera that helps you handle it with ease. Notably, it also comes with a WiFi and NFC connectivity options to help you share your photos and images almost instantly. Availability of 5 creative filters would serve to provide better shooting experience that suits the ambiance. The Live View mode should be your best bet against an assured fine-tuning of your composition.

The Nikon D3400 – An Overview

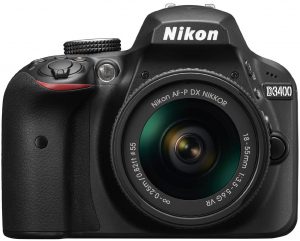
In case you are taking your first step towards the direction of DSLR photography, D3400 should be your best option. The SmartBridge technology that helps you connect to several devices right away. The 24.2 MP sensor has an 11 point autofocus system. The D3400 comes with a full HD video shooting capability at 1080p at 60 fps. The lightweight camera fits every situation quite well and works as your reliable companion to shoot your dream moments right away.

Which one should you Go With? Canon 1500D vs. Nikon D3400

Well, let us compare the two cameras based on separate parameters. That would help you transparently understand the two competitors so that you would be able to make a well-informed decision.

The Summary

Features/Particulars

Canon 1500D

[amazon_link asins=’B06VT2NQD8′ template=’PriceLink’ store=’foi04-20′ marketplace=’US’ link_id=’7b529769-77e0-11e8-b8bc-4f566888d218′]

Nikon D3400

[amazon_link asins=’B01KITZKDE’ template=’PriceLink’ store=’foi04-20′ marketplace=’US’ link_id=’843119fa-77e0-11e8-af0f-67e12828909d’]

Connectivity Options WiFi, HDMI, NFC WiFi, HDMI, SmartBridge
Sensor CMOS CMOS
Resolution 24.1 MP 24.2 MP
Flash Sync speed 200 200
Storage 1 Slot, SD/SDHC/SDXC 1 Slot, SD/SDHC/SDXC

Video Performances

Features/Particulars 1500D D3400
Resolutions available 1080p, 720p, VGA 1080p, 720p
FPS 1080p at 24,25 and 30 fps 720p at 60 fps VGA at 30 fps 1080p at 24, 25 and 30 fps 720p at 60fps
Video file format MOV MOV
Image Stabilisation Yes Yes

The Lens Capacity

Features/Particulars 1500D D3400
Auto Focus points 9 11
Shutter speed 30- 1/4000 30- 1/4000
ISO 100-12800 100-25600
Auto Focus system Contrast detect, phase detect, traditional autofocus Contrast detect, phase detect, traditional autofocus

Dimensions

Features/Particulars 1500D D3400
Physical Dimensions 101.3 x 129 x 77.6 mm 124 x 98 x 75.5 mm
Weight 475 grams 395 grams
Rugged build No No
Color Options Black Black
 

Sensor Details

Features/Particulars 1500D D3400
Model DIGIC 4+ Processor Expeed 4 Processor
Type CMOS sensor Digital SLR
Sensor size 22.3 x 14.9 mm, APS-C inch 23.5 x 15.6 mm, APS-C inch
Effective resolution 24.1 MP 24.2 MP
 

Image Preview

Features/Particulars 1500D D3400
Display Time LCD LCD
Display Resolution 920000 dots 921000 dots
Supported Languages 25 36
Display Size 3.0 inch 3.0 inch
Viewfinder Penta Mirror Penta Mirror
Brightness Adjustment Yes Yes
 

Flash Details

Features/Particulars 1500D D3400
Hot shoe support Yes Yes
Built-in Flash Yes Yes
Features External flash, Flash exposure compensation External flash, Flash exposure compensation
Flash Range 17 metre 12 metre
Viewfinder Penta Mirror Penta Mirror
Brightness Adjustment Yes Yes

Reasons in favor of Nikon D3400

Features/Particulars 1500D D3400
Sensor size for Image CMOS, APS-C – 22.30 x 14.90 mm CMOS, APS-C – 23.50 x 15.60 mm
Native ISO 6400 12800
Continuous shooting 3 fps 5 fps
Battery life 500 shots 1200 shots
Weight 425 grams 395 grams
Metering Method Center-weighted, Metrix, Spot Evaluative metering (linked to all AF points), Partial metering (approx. 10% of viewfinder at center), Center-weighted average metering
Audio Recording format PCM Linear PCM
USB Micro USB 2.0 Micro USB

What would we suggest?

Well, the comparison above should give you a definite idea about the differences between the Canon 1500 D and Nikon D3400. Ideally, the Nikon D3400 should be a good choice among the two for the obvious reasons as is evident from the comparison tables based on different aspects of the cameras. The Nikon D3400 should be your best option if you are looking for the better low light performance. The sensor on Nikon D3400 has a better sensor with more responsive to the light. Another feature you would love with the Nikon D3400 is the improved autofocus functionality. D3400 offers you an 11 point autofocus system as opposed to the 9 points available on Canon 1500D. Finally, impressive continuous shooting speed and better performance regarding video recording should make you opt for the Nikon alternative. One of the issues we came across while using the Nikon D3400 is, however, the slower wireless connectivity. We do not think it should have any bearing on your decision as the primary concern would be to get better pictures and videos.

The Parting Thoughts

That would conclude our comparison between the two ably popular and capable digital cameras based on the key features. We have sourced our information from the official sites and product descriptions. The hands-on experience with both the cameras has let us differentiate the features and functions of both the competitors in more exquisite detail. In fact, when you buy a camera, it depends upon the individual preferences you may have. That is precisely why we have opted for a tabular comparison. This should go a long way in pinpointing the exact feature you are interested in and choose a camera that best meets your expectations. Do let us know which camera you opted for among the two competing devices as featured in the above discussion. Your feedback can be helpful for us in making a learned choice for the best camera for your requirements.

Fujifilm X100T vs. Leica M9: Specifications Review and Comparison

A photo is better than thousand words, and a video is, even more, to portray something to the audience. To capture or record something marvelous, you need an excellent camera to freeze the moment. Generally speaking, it is not that easy to find a camera in your price point that takes fantastic stills and video. Fuji and Leica are two well-known names in the field of the camera. Fujifilm X100T and Leica M9 come under the not so same category and users are often confused which one will be better for them. Today’s post topic is the comparison of Fujifilm X100T vs. Leica M9. Both these cameras have been on the market for quite a long time. FujiFilm is the newest one among the two, but Leica M9 is a high-end still in demand among the camera enthusiasts.

Fujifilm X100T vs. Leica M9 – The Comparison

Fujifilm X100T vs Leica M9
Features

Fujifilm X100T

[amazon_link asins=’B00NF6ZGY6′ template=’PriceLink’ store=’foi04-20′ marketplace=’US’ link_id=’af80e268-760a-11e8-aae1-fd282d8414a1′]

Leica M9

[amazon_link asins=’B002NX13LC’ template=’PriceLink’ store=’foi04-20′ marketplace=’US’ link_id=’ba2a6123-760a-11e8-b2b0-47a68518428a’]

Number of effective pixels 16.3 MP 18.1 MP
Image sensor APS-C Full frame sensor
Body Type Fixed lens compact Rangefinder-style mirrorless
Supported Memory Cards Internal memory (approx.55MB) SD memory card / SDHC memory card / SDXC (UHS-I) memory card No inbuilt storage SD Memory Card, SDHC Memory Card
Display 3 inches LCD 2.5 inches LCD
File Format Still image: JPEG (Exif Ver 2.3) RAW (RAF format), RAW+JPEGMovie: MOV (H.264, Audio: Linear PCM / stereo sound) 1080p at 60fps Still image: DNG (RAW), JPEGMovie: Does not support
Exposure Compensation -3 EV to +3 EV range, in 1/3 EV steps -3 EV to +3 EV range, in 1/3 EV steps
Self-Timer Delay 10 sec. / 2 sec. Delay 12 sec, 2 sec
Continuous Shooting Speed 6 frames per second 2 frames per second
Image Sensor Size 23.6mm x 15.6mm 24 x 36 mm
Wireless connectivity WiFi IEEE 802.11b / g / n No
Wireless function Image transfer, Remote camera shooting, Instax printer print, PC Autosave No
Connectivity USB 2.0, HDMI Micro connector (Type D),2.5 mm audio input stereo mini connector USB 2.0 No HDMI
Battery NP-95 Li-ion battery (included) Lithium-Ion rechargeable battery
Dimension 126.5mm x 52.4mm x  31.0mm 139 x 80 x 37 mm
Weight 440 grams 585 grams
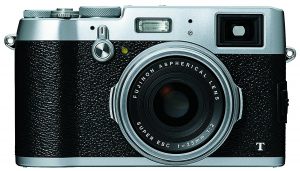
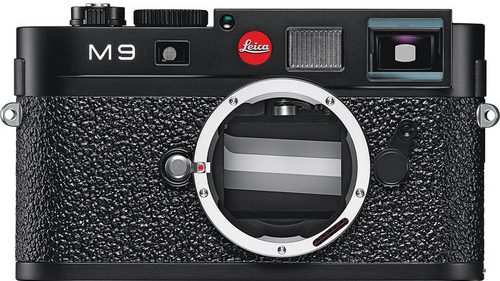
FujiFilm X100T is a fixed lens compact camera while the Leica M9 is a rangefinder style mirrorless camera. Now, starting with the camera dimension and weight. If we see both the cameras from the front, it is the Leica M9 which is longer and broader than the X100T. But the FujiFilm X100T has more depth that is because of the built-in lens. The Leica M9 is also heavier of the two with a weight of 585 grams as compared to 440 grams weight of the FujiFilm X100T. I found handling and ergonomics better on the FujiFilm X100T. You can easily access all the buttons without dropping it. But the Leica M9 is not bad either it has just more weight and slightly bigger size that creates a bit issue for some users. But the flexibility to change the lenses is excellent that the X100T mises.

Check out the X100T Pictures available on Flickr,

Now, its Leica M9s turn: Source: Flickr

Fujifilm X100T vs. Leica M9: Sensor Comparison

The sensor is the core of the digital cameras. The size and quality of the sensor being used play an important role in deciding the image quality. A large sensor is better for low-light sensitivity and rich color depth. It will offer users a wide dynamic range and better control over depth of field and objects. Out of the two cameras, the Leica M9 has a full frame sensor whereas the FujiFilm features an APS-C sensor. The M9 wins here with a 135% bigger sensor. Also, with the 18.1 MP, the M9 offers high resolution over the X100T 16 MP camera. The Leica M9 has a larger pixel pitch of 6.91 μm. Here again, the FujiFilm X100T loses with its 4.80μm pixel pitch. But the X100T is a much more recent model. It was launched back in 2014 five years after the M9. Its sensor has more technological advances over the Leica M9 which bridges the gap between the two cameras. But neither of the two cameras has an anti-alias filter. Leica M9 being the older one among the two does not offer movie recording capabilities. But you can do same with the FujiFilm X100T with the highest resolution of 1080p at 60 fps. If you are buying the camera for still photography, Leica M9 could be a better option for you. But for movie recording, M9 is not even in race and X100T is a clear winner here.

 Fujifilm X100T vs. Leica M: Features comparison

Apart from the dimension and sensors, few other features in a camera also hold importance in the overall performance of a camera. The FujiFilm X100T has an electronic viewfinder while the Lecia M9 comes with an optical one. Every technology has its advantages and disadvantages. While the optical viewfinder delivers lag-free viewing and clear image framing, the electronic viewfinder allows projecting supplementary shooting information. Overall few more things are in favor of FujiFilm X100T. The FujiFilm X100T has a relatively large 3 inches LCD as compared to the 2.5 inches in the Lecia M9. A large display is always better as it allows easy image review and settings control. The X100T also got faster burst time with 6 fps vs. 2 fps/sec in the M9. The FujiFilm also got a built-in lens which makes it ready to shoot out of the box. But you have to buy a compatible lens for the M9, as it does come with any in the box. Also, the X100T is more compact and easy to carry around. If you see above, as we have already stated, Leica M9 is not a wrong choice by any means. It has more megapixels, brighter framing. It is more flexible with the interchangeable lenses. You can use different lenses for different optics requirement. It still performs well but only with still images. It does not support video recording which is a significant drawback of this camera when we are in 2018. Overall, both the FujiFilm X100T and Leica M9 has their pros and cons. In some cases, M9 proves better whereas sometimes X100T comes out as a better choice. But if I have to choose one, I will surely pick the FujiFilm X100T. It is more technologically advanced and ahead of the Leica M9. There are a lot of other things that are in favor of X100T over the M9 which we have discussed above. Moreover, the FujiFilm X100T is cheaper. Thus it would not make any sense to choose the Leica M9 over the FujiFilm X100T.

Best Panasonic G7 Cine-Like D Settings for 4K Video Shooting

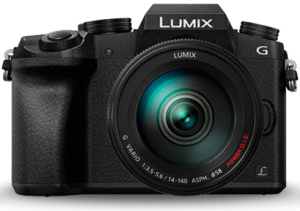
Panasonic Lumix G7 is one of the excellent cameras out there has been getting a few best rave reviews. In fact, what makes it one of the excellent choices is the host of settings that it packs in. One of them is Cine-Like D (Panasonic G7 Cine-Like d Settings). What precisely these settings are and how would you get the best video shooting for the excellent output? We will discuss the concept in more exquisite detail. Best Panasonic G7 Cine-Like D Settings for 4K Video Shooting

Check on Amazon

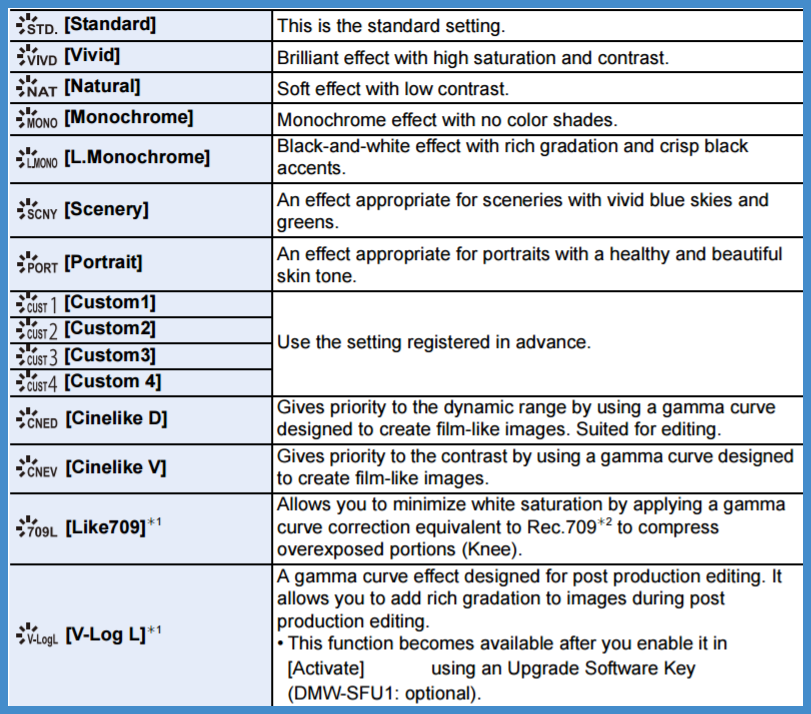
Panasonic Lumix G7 – An Introduction Well, the Panasonic G7 is one of the prominent cameras you can depend upon for an excellent performance regarding video shooting. It offers you a 16 MP resolution. That should be at par with the slightly higher 18 MP resolution found in most of the DSLRs out there. You cannot expect the best 4K or similar kind of shooting at that price range, but that should not be something you would need to worry about. Of course, you can rely on a few tips and tricks to achieve the best functionality as long as video quality is concerned. The camera comes with a host of preset settings. One of them is Cinelike D. This, along with another shooting mode referred to as Cinelike V have been specifically designed for video shooting. How to get the best settings for those modes and how to get the best cinematic level of video shooting? Let us check it out.

Panasonic G7 Cine-Like d Settings

Best Panasonic G7 Cine-Like D Settings for 4K Video Shooting
Source: Panasonic

What is Cinelike D Mode?

The Cinelike D on Panasonic G7 is one of the excellent features that would help you get the best settings for your videos. You can check out your subject and arrive at the best settings for your Cinelike D mode. The Cinelike D mode is specifically meant for those if you are someone who wants to do the color correction in the post-production. The mode would help you retain a lot of color and contrast while dealing with the post-production. The Cinelike V mode, on the other hand, would handle all the color corrections on the camera itself. We will be focussing on the Cinelike D mode for video shooting and check out which settings would work the best for a complete (or at least, almost) cinematic video shooting experience.

How to set up Cinelike D Mode on your Panasonic G7?

There are multiple videos available over the internet that suggest the best Cinelike D settings for Panasonic G7. In fact, the settings should be dependent completely upon your subject and the ambient conditions. Here is how you can set up the Cinelike D Mode on your Panasonic G7 –
  • Press the button for You need to press the middle button for the purpose. Consult your instruction manual for a better understanding of the buttons and controls.
  • Go to Photo Style
  • Press the left or right buttons until you find the Cinelike D
  • Confirm the action with the middle button.
That should do it. You have successfully activated the Cinelike D mode on your camera.

What are the Best Settings to be used with Cinelike D Mode?

As we stated before, that should ideally be dependent upon the ambient conditions to a better extent. Apart from choosing the shooting mode as Cinelike D, you would also need to complement it with a few other settings so that you would be able to shoot videos with a perfect and truly cinematic quality in your videos. The exact settings would be dependent upon your personal preferences. In fact, photography and videography are creative arts and that would emphasize the importance of the creative angle of the person who is shooting the videos. However, let us suggest a few settings that may be helpful so that you can experiment further. Most users suggest opting for as much natural or standard settings when you are shooting in Cinelike D mode. The LUT settings may not have any bearing on the quality you would get as far as our knowledge ( and even that of experts) goes. Combining the suggestions from a host of experts and common users, we would suggest the following settings for better and lively color settings –
  • Opt for a Natural Profile along with Cinelike D mode.
  • Customise it with these settings
Set Contrast to 0 Set Sharpness to 0 Set Saturation to 0
  • You can slightly alter the settings to match your perception of the color grading.
However, we have also come across a few users who have claimed that the following settings would work great.
  • Standard Profile
  • Set NR to -5
  • All other settings to 0
One other setting that would probably work great for an excellent color grading can be opting for Natural Profile along with Cinelike D mode and use it with a good Conversion LUT. You may need to look for a good Conversion LUT from reliable sources in combination with the Cinelike D mode. Ensure that the Conversion LUT you are using is compatible with your Panasonic G7.

The Concluding Thoughts

Cinelike D Mode on the Panasonic G7 has been touted as the best one for shooting cinematic quality videos on your camera. However, the feature does not seem to have received any good reviews from the users and experts alike. In any case, we would assume that a couple of settings that we have listed here should work towards offering you the best performance as long as the color grading is concerned. Use them in different combinations and check which settings provide you the best results. When it comes to quality videos, a trial and error option should indeed be the best you can opt for. Which among the above settings have you been using on your Panasonic G7 for a truly cinematic video shooting performance? Do share your inputs on the settings that we have shared. In case you are a professional photographer or someone who has a better experience in the field of videography, please chip in with your share of settings so that we and our readers would stand to gain from your expertise.

Best Dimmable LED Light for Video and Photography Kit Within Budget

If you are considering to improve your photography or videography with the correct amount of lighting, the On-Camera LED lights are what you should prefer. They can indeed be the most cost-effective and beneficial regarding added effects. We would indeed suggest the Dimmable LED light because of the vast list of advantages that the LED lighting would offer for your enhanced levels of photographic excellence.

Why use LED lights in Photography?

Well, the LED lighting would offer you a high degree of excellence and benefits. One of the significant advantages would be a cost-effective manner that these tiny lights provide. Apart from that they also help you out in several other ways that would be beneficial in its own right. Some of the advantages offered by LED lighting can be summarised as here below –
  • LED lights are cooler, as opposed to the heat generated by the traditional flashlights and other lighting arrangements in your studio, you would find LED lights running quite cooler. That would make the photography experience quite comfortable. A LED light can be fitted in a corner that may be inaccessible, where a traditional light source may not provide.
  • You can buy them in multiple colors and hues –LED lights are available in different colors, tones, and intensities. You can adjust them as per your needs in your camera settings and the exact ambiance that you are looking for, and in essence, they would help you be more creative. You can buy your LED lights in both tungsten and daylight balanced. Of course, the bicolor adjustments are essential as your camera can see the slightest differences in the intensity of the light.
  • LEDs are energy efficient –By using LED lights, you are bringing your overheads down. They convert almost 80 percent of energy into light and thus save your electricity. Experts say that an LED can provide the light that is equivalent to three tungsten bulbs.
  • They are Environment-friendly – If you care about the nature around you, we advise you to go for LED lighting. Also, they offer you more life, thus reducing the e-waste you may be generating. Less consumption of energy would make it another feature that would make LEDs an excellent option compared to the traditional lamps.
  • Use lighting as per your needs –Traditional flash guns produce a higher burst of light. The LED lighting will ensure that you get enough light to meet your needs. That would help let you get enough lighting as per the scene requirements you may have. The best way to get the right light is through LED light than going the hit and miss option available through traditional lighting systems.

Dimmable LED light – Our Picks

Having gone through the advantages of the dimmable LED lights that are effective enough for your camera, let us move ahead to list a few best on-camera LED lights for your needs.

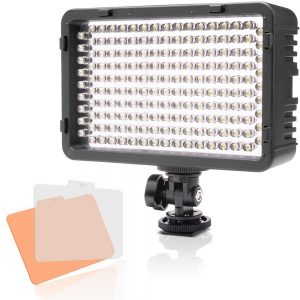
TOLIFO Photo Studio 176 LED

Check on Amazon

The dimmable LED light comes with 176 LED Bulbs. If you are looking for variation, the light offers you transparent and orange filters to soften the light. With the thread at the bottom end, you should be able to fix the LED bulb onto a stand easily. Some salient features that would make it an exceptional choice can be
  • You have access to broader lighting ranges to suit your exact photography needs.
  • They can work both on battery or DC supply.
  • It comes with a digital display screen design to get the most accurate settings.
  • Compatible with almost all major camera brands, including Canon, Nikon, Pentax, Panasonic, Sony, Samsung, and Olympus.
  • The LED light is durable and lightweight.
If you find it interesting, you can check it out on Amazon.

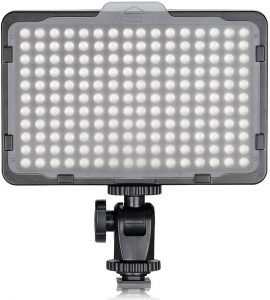
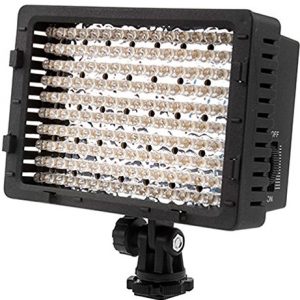
NEEWER 160 LED CN-160

Check on Amazon

Neewer has been a name to reckon with when it comes to LED flashes and LED lights for cameras. The NEEWER 160 LED CN-160 is one of the top-selling LED Light for your camera. The light comes with 160 LED bulbs for providing excellent illumination and diffusing needs. Some of the features that would make it an excellent service in its own right are –
  • It features 16 powerful LED bulbs for a complete illumination package.
  • The LED light also comes with a set of diffusers to soften the color temperature.
  • It can be your best bet for durability, portability, and lightweight features.
  • You have access to a standard shoe connection that would aid in making it usable with any camera brand.
  • It has a rotate switch for adjusting the brightness.
  • The light intensity can be adjusted as per your scenes.
Seems impressive enough? Why not take a look at it on Amazon.

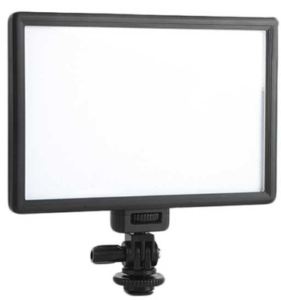
VILTROX L116B

Check on Amazon

Viltrox has been the recipient of several certifications, prominent among them being CE, EMC, FCC, and RoHS. That should prove the efficiency of the LED lights manufactured by Viltrox. The natural lighting is what they excel in. What makes us believe in them? Well, we assume these reasons would suffice –
  • The light comes with an efficient diffuser for avoiding harsh light.
  • The LED light offers you a bicolor adjustment. You can adjust both the color temperature and intensity of light output with the aid of a knob.
  • It ensures that you get perfect sunlight like lighting.
  • It makes use of PWM light adjustment technology.
  • Brightness can be adjusted by +10 to +10 percent.
If you think it is your best bet, you can check them out on Amazon.

Selens 168 LED Dimmable Ultra High Power Light

Check on Amazon

Selens 168 LED Light should solve all your issues in handling the low light situations that you may face when photographing your day away. The rotate switch can be used to adjust the brightness as per your needs and to switch on or off the LED light. Some of the features worthy of mentioning can be summed up as
  • You can adjust the color temperature of the light to meet your needs.
  • The LED light can be used with five different types of batteries and thus makes it one of the best options for your requirements.
  • The dimmable light intensity should make it one of the prominent choices for your needs in the adjustable light.
  • The LED light comes with a full shoe mount. That would make it an excellent option for almost all cameras.
  • You can use it with multiple installations.
If those features impress you and you would want to give it a thought, you can do so on Amazon.

Julius Studio 160 LED

Check on Amazon

The Julius Studio 160 LED is undoubtedly one of the excellent options for your needs in LED light for your photography requirements. And yes, what makes it a great choice is it comes with the light stand along with the package. Why should you opt for it for your needs in the LED light? Maybe the following can offer you a reason –
  • It comes with a set of LED light stands. That should make it a thoughtful decision on account of Julius.
  • The LED light comes with four color filters in white, orange, blue, and pink
  • The LED light is compatible with almost all models of Canon and Nikon cameras.
  • Lightweight and portable design should make it the best option for outdoor shooting needs you may have.
In case if you think that makes it an excellent option for your lighting requirements, look no further than Amazon.

NEEWER CN-216 216PCS LED

Check on Amazon

Last but not least – here is another great LED light from Neewer. One of the excellent options in the dimmable LED lights for an excellent natural lighting experience, the NEEWER CN-216 216PCS LED, produces brighter and clearer lighting. Want to know what makes it an exceptional choice? Check them out –
  • The LED light comes with 216 LED bulbs for perfect illumination.
  • You can use it in a broader variety of DSLRs and digital cameras.
  • The LED bulb comes with a standard general hot-shoe arrangement making it compatible with almost all major camera brands.
  • The LED light comes with multiple dimmer control switches. You should be able to adjust the brightness precisely to your requirements.
  • You can make use of it for a wide range of applications. Some of the possible applications include portrait photography, industrial product photography, and illumination.
In case if you are interested in LED light for your needs? Check it out on Amazon.

The Concluding Thoughts

That would conclude our top picks for the best dimmable LED lights for your cameras. Not that the list is exhaustive in any manner. However, this would let you gain entry into the exciting world of lighting. Check out the options you have at your disposal and enjoy the best indoor lighting for your needs. Have you used any of the LED lights we have featured in this compilation? Share your thoughts and experiences with the LED lights with us. Also, share any good options that we may have missed.

Shooting Tables For Product Photography Table Top Studio – DIY – Height

Product Photography is one of the primary photography categories that a corporate sector will most likely be offering. To master Product Photography, you would need to develop your work in a controlled studio environment. In today’s online market, Product Photography will help you work through the online and offline advertising channels of your corporate clients. The quality of product photography will ensure the marketability of the products that you are shooting images of. One of the essential elements you would need for efficient product photography is a Shooting Table for your product photography. Let us check out a few best Shooting Tables for product photography in the following paragraphs.

What is Product Photography?

Product Photography is what you would use to showcase the products attractively so that the clients would be enticed to buy your products. You, as a photographer, would make use of specific techniques to create the best product portfolios. Product Photography forms part of an efficient advertising campaign. It can be utilized for a wide range of advertising platforms including brochures, magazines, billboards, and websites. An essential tool you would need is the Shooting Table for your Product Photography requirements.

Shooting Tables For Product Photography

A Shooting table is a perfect lighting table that would help you illuminate the product at all levels. In fact, it would be quite ideal equipment in Product Photography while shooting smaller or medium-sized products. You should get a bright white background when you take photos of your products. Of course, a shooting table can be created within minutes if you are indeed an expert. However, if you are not, and looking for the best Shooting Table for your needs – here are our best picks for your needs. In many cases, the shooting tables come as part of a package that includes several other components needed for product photography. Let’s check them out!

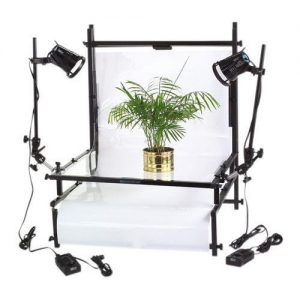
Smith-Victor TST Digital Desktop Studio Kit
Check on Amazon

It should be an ideal option for all your needs in product photography. The product comes complete with all the required components for your product shooting needs. Here are the features that would make it an excellent option –
  • The package comes replete with shooting table, lights complete with dimmers, and mounting arms.
  • You can get almost all types of lightings included dramatic lighting and high essential lighting.
  • The product comes with the Q250 light head that would provide excellent illumination.
  • You may also get diffusion agents for a softer tone.
Looks inspiring enough? Check them out on Amazon.

Flashpoint Shooting Table with Plexi Glass

Check on Amazon

In case if you are looking for an affordable option and just the shooting table for your needs? Well, the Flashpoint Shooting Table with Plexi Glass can be your excellent choice. The bright white background required by your product images can be quite comfortable and straightforward with the shooting table. Some of the salient features we would mention include –
  • It comes under the classic transit table that veteran photographers use.
  • It should be your ideal solution for shooting transparent items like crystal and glassware.
  • It can either be lit from the front to remove shadows or can be backlit for spotlighting the products.
  • You have access to a three-way translucency that can provide a shadow-free result.
  • Foldable design makes it extremely portable.
If you find it a practical solution for your needs, you may get more information from Amazon.

JTL Still Product Table

Check on Amazon

If you are into still product portfolio, the JTL Still Product Table can be your best option for your needs. The highly portable design is what would make it one of the excellent choices. What are the features that would make it a great alternative to the expensive options you may have? Here are our reasons –
  • It features a milky white surface that would provide an excellent background for all your needs.
  • The fabric used is made of durable nylon and thus can take loads up to 18 pounds.
  • Assembly and dismantling of your shooting table are quite simple and easy to follow.
  • Highly portable design.
  • You can use lighting from any side or even from beneath.
If those features impress you enough, you can check the more features at Amazon.

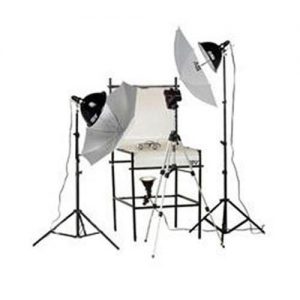
Smith-Victor TST-P2
Check on Amazon

Economical, durable, and space-saving – that is precisely what we can term Smith-Victor TST-P2 as. The shooting table is available as part of a kit and comes with all the essential elements like lights and filters. A few salient features we found interesting with the shooting table are –
  • It offers you a one-stop solution for all your product photography requirements.
  • The shooting table kit comes with one ST24 Opaque Base Module and CM24 Clear Module. You can use them together or separately.
  • The load capacity of the table is 30 pounds.
  • The package comes with two 12″ and one 5″ tungsten flashlights.
  • You have two white umbrellas as part of the kit.
If the features have made you opt for the product, you may consider checking it out at Amazon.

Kaiser 205906 Studio-Out-of-the-Box Kit
Check on Amazon

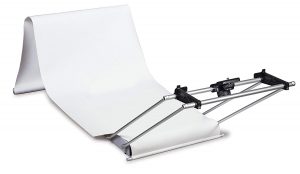
The shooting table kit in its utter simplicity. That should be what we treat the Kaiser 205906 Studio-Out-of-the-Box kit as. An affordable shooting table with smooth controls, it is one of the accessible tools for your product photography. A few excellent features that would make it an excellent choice can be –
  • It comes with a trapeze that helps to position the camera at any position.
  • The shooting table is positioned on the pivot table.
  • You can also lock it for any vertical shooting position as well.
  • You can also use it with smartphone cameras – thanks to the rubberized clamp for the purpose.
You can check it out on Amazon.

The Concluding Thoughts

The Shooting Table is one of the excellent options for product photography. However, choosing one may not be an easier task. In fact, we would suggest you opt for the complete kit as that would offer you a perfect option for your needs. Moreover, the additional items included in the package would be entirely compatible with the shooting table, and as such, you would not need to search for the components. What would you think of the products we have featured above as long as your product photography requirements are concerned? If you have used any of them, we will welcome your views, opinions, and experiences with the shooting tables featured in this compilation.

Best LED Ring Light For Macro Photography – Canon & Nikon DSLRs

Are you into Macro Photography and portraits? Ring lights and flashes are what you would invariably need for enhancing and improving the performance of your pictures and other masterpieces. The LED ring light would provide your objects with symmetrical lighting. Moreover, you can also use them for a wide variety of configurations for your creations. If you are using Nikon or Canon cameras and looking for the best-LED Ring light flashes for your portraits and macros – you have possibly reached the right spot. We are listing out the best-LED ring lights for Macro Photography for your world-class cameras.

Do you Need a Ring Flash?

Well, LED Ring Flash is an essential option if you are looking for even lighting on your object. They can indeed be the necessity in case you are into Macro photography. In fact, LED Ring flashes would be of much help in enhancing your macro photography to a greater extent. Macro Photography involves shooting the smaller objects from close quarters. Your built-in flash may work wonders for your regular shots but may underperform in case of close up shots. Moreover, macro photography needs you to use specialized settings and shooting from the closer distances. In fact, closeup shots of flowers, plants or insects bring about those aspects out that may not be visible to the naked eye. The closer distance will cast a shadow on the object and thus ruin your shots. A regular flash would not be practical in these cases. They would leave your shots either overexposed or underexposed. The LED Ring Flash would go a long way in solving these exposure and shadow related issues. These LED ring flashes produce an even illumination and enhance the effect of proper lighting. The possibility of getting diffused light from all directions would improve your macro masterpieces and get the desired effects easily.

LED Ring Light

Macro Photography needs closer attention to proper lighting. The shadows created by you or the lenses can ruin the entire experience of your photographs. That is precisely why you would need to have a proper light source to illuminate the object in an even manner. Let us find a few LED Ring Light flashes for Macro Photography for your Canon and Nikon Cameras.

Canon MR-14EX II

Check on Amazon

Coming from the well-known camera manufacturer, the Canon MR – 14EX II comes with ergonomics and better controls. The E-TTL II technology ensures the best performance in its own right. What are the features that we would appreciate on Canon MR-14EX II? Here are a few that may impress you –
  • It comes from two focusing lamps on either side for an efficient illumination.
  • An excellent focussing depth at lower aperture settings.
  • The 5.5 seconds recycling time will ensure that you can take a series of images so that you would not lose any moment.
  • You can control shades to provide different looks to your shots.
  • It comes with a unique carry bag that would make it easy to transport.
The Ring light LED flash from canon is outstanding with its features, but may not work with some cameras and you may need a special adapter for the purpose. Want to check it out? You can get more info on Amazon.

Neewer Dimmable 18-inch Ring Light

Check on Amazon

Neewer has been a name to reckon with when it comes to flashes and lights for your cameras. The Neewer Dimmable 18-inch Ring Light should be an ideal companion for your clearer portraits and macros. What are the features that make it one of the excellent options for your needs? Here are the features you may be interested in –
  • The LED ring flash comes with a hot shoe mount so that it can be used with any camera right away.
  • It offers you ample lighting and provides a high degree of flexibility and customization.
  • The height of the stand is quite suitable for most of your requirements.
  • A longer cord accompanying the light lets it be placed anywhere and thus ensures the kind of lighting you are looking for.
  • If you are into product photography for E-commerce sites, it can be a good option for your needs.
  • The ring flash comes with white and orange filters. You may use white filters if you are looking for milder light profiles, while the orange filter would help you get a better color effect.
The LED Ring flash has been considered to be your best option for all your needs in portraits, makeup, and video tutorials. Did those features impress you? You may check out other features on Amazon.

Sigma EM-140 DG

Check on Amazon

Sigma is involved in the manufacturing of cameras, light filters, flashes and other photography accessories. The Sigma EM-140 DG is the LED Ring flashes that have been manufactured in a customized manner to suit different cameras. We have focussed on the Ring Flashes made explicitly for Nikon. Here are a few excellent features that would make it a great option can be summed up as –
  • The flash is ideal for close up photographs.
  • The two lamps on the ring flash can work together or individually.
  • It comes with a high-speed synchro mode.
  • The recycling time for the flash is around 4 seconds, and thus should be enough for the series of photographs.
  • It is compatible with the latest TTL standards for the excellent automatic exposure.
  • They have been considered to be the best option for the medical applications.
  • Precise focusing is what you would love with the Sigma EM-140 DG.
The LED Ring flash comes with a four-year warranty which in itself should be a fantastic option. Want to give it a try? You may check them out on Amazon.

Polaroid 48 Macro LED

Check on Amazon

Polaroid has been the world-class manufacturer with the product portfolio ranging across multiple services and accessories. Some of the relevant products include ring flashes and LED lights for an efficient flash requirement. Versatility should be one of the features that would make it an excellent choice. A couple of the best features you would love with the Polaroid 48 Macro LED can be –
  • The Ring Flash LED is compatible with most camera models including Canon, Nikon or Panasonic.
  • It comes with eight compatible adapters for varied applications.
  • You can control the output to meet your needs – 48 LEDs for full-fledged lighting and 24 LEDs for purposeful shadows.
  • You may also choose the Continuous On functionality so that the camera can decide on the best exposure levels depending upon the lighting.
  • You have access to softening diffusers – translucent, warming, white, and blue. White would produce a milder light, while other diffusers would help you create excellent color effects.
  • You also have access to Power Saving LCD screen.
  • It works both as a ring flash and a ring light.
The ring flash should work best with your Nikon cameras. That is precisely why it comes with eight adapters to suit multiple lenses of your Nikon. Would you want to give it a try? You can check them out on Amazon.

AW Pro 19″ Light

Check on Amazon

It is quite more prominent, and, you would need a tripod or a stand to use it. The lightweight and highly portable Ring LED flash should be ideal for those who are looking for affordable options in a ring flash. It has been considered to be the biggest among the LED flashes that usually have been used. The salient features that we love with the ring flash LED are
  • It comes with a hot shoe mount for compatibility with almost all major camera brands.
  • The LED flash has been treated to be the best option for makeup and portrait light.
  • The wraparound light included would be helpful in reducing the wrinkles in your portraits.
  • Ease of setup can be one of the features that would help in an impromptu shooting mode.
  • The dimmable light feature lets you set the light intensity to a level that you are looking for.
  • It also has a bracket that would help you mount it on light stands.
If you are interested in opting for the Ring Flash, you can check it out on Amazon.

The Concluding Thoughts

Well, that was all we have concerning LED Ring Flash and its impact on the quality of your photography. We assume that we have been able to bring forth the practicability of using a LED flash for the Macro photography levels you may be planning to achieve. The Ring LED Flashes we have listed out in the above compilation should help you choose the best that would meet your requirements. Have you used any of these LED Ring Flashes for enhancing your Macro Photography performances? If you have, do share your thoughts, experiences, and views with the ring flashes we have featured in this compilation. Do share your thoughts with us as it would help us enhance our knowledge further.

Best Budget Rugged Underwater Camera Around $500 Point Shoot Options

The cameras have not remained to be what they used to be in the past. You want to carry them wherever you go – whether to you are on vacation or visiting a pool. That would make a waterproof camera a need you cannot live without. If you are looking for the best Underwater Cameras, your search should end with this post. We would assist you in searching for the best option in Underwater Cameras under $500.

Best Budget Rugged Underwater Camera – Our Picks

Of course, some cameras would suit every requirement. An Underwater Camera is the one that would resist water-based activities and can be one of the best options for those looking for the underwater photographs and videos. However, getting an underwater camera should not be a more onerous task as such. But what if you are looking for the affordability as well? That is precisely why we have set a cut off pricing of $ 500 for the sake of this discussion. Before making it to the list, we would also want to bring up a concept referred to as Underwater Housing. There are several housings available that would claim to convert your existing cameras into a waterproof camera straightaway, but that would be something that would only provide support against the accidental exposure to water. If you are looking ahead for a truly realistic underwater performance, you would indeed need to opt for a good camera that can provide the underwater performance on its own.

Check on Amazon Price: [amazon_textlink asin=’B00FAHFD6O’ text=’NIKON 1 AW1′ template=’PriceLink’ store=’foi04-20′ marketplace=’US’ link_id=”]

Nikon 1 AW1 is not only an underwater camera but doubles up as the best camera with interchangeable lenses. In fact, it is the only underwater camera that has the interchangeable lenses. Some of the features that would make it an attractive option would be
  • It suits a host of terrains and activities including kayaking, mountaineering, and underwater photography.
  • It has waterproofing capacity at up to 49 feet deep into the water.
  • The lightweight would make it the best when portability is concerned.
  • Shockproof 6.6 feet and freezer proof to up to 14 degrees Fahrenheit.
  • Faster focussing would help you miss those crucial moments. You cannot be sure of what you may come across when you are wandering in the wild.
  • Wireless sharing enabled on WiFi-enabled devices.
  • Shoot enchanting videos in full HD resolution.
It offers you a high-speed continuous focusing at 15 fps, making it the best option for taking the breath-taking shots in the wild. The interchangeable lenses are what would come as a handy surprise. In fact, it is the only camera with underwater functionality coupled with the interchangeable lenses that work effectively underwater.

Canon PowerShot D30 Waterproof Digital Camera

Check on Amazon, Price: [amazon_link asins=’B00I58LNF0′ template=’PriceLink’ store=’foi04-20′ marketplace=’US’ link_id=’079d7d77-7499-11e8-9fba-f51b9fac6ca1′]

Looking for a waterproof camera that is simple and intuitive at its best? Canon PowerShot D30 Waterproof Digital Camera can be your best bet. The camera has been treated to be the best choice for those who are always outdoors. It suits the extreme conditions like underwater to the hilt. The Canon PowerShot D30 Waterproof Digital Camera is undoubtedly the one that offers most in-depth underwater performance. What did we like the most about it? Here are our reasons –
  • It comes with an excellent scuba and snorkeling flexibility for up to 82 feet deeper into the water.
  • The Camera is shockproof up to 6.5 feet
  • You have temperature resistance between 14 to 104 degree Fahrenheit.
  • An excellent low light performance at 12.1 MP highly sensitive CMOS sensor.
  • You have access to a stunning 1080p video recorded with a dedicated button for the purpose.
  • Built-in GPS functionality would automatically timestamp your shots and videos with the location and time details.
  • The smarter camera ensures that you get better shots and videos.
The rubberized grip should be what would help you get the best option for carrying it underwater. Some of the features we indeed love with the camera are built-in GPS, electronic compass, mapping and 5x optical zoom capability.

Olympus TG-4 16 MP

Check on Amazon, Price: [amazon_link asins=’B072NDVNPN’ template=’PriceLink’ store=’foi04-20′ marketplace=’US’ link_id=’1ba66c73-7499-11e8-bcff-656c7a15f77c’]

Olympus has been a veteran in the field of waterproof cameras. The TG-4 is its fourth underwater camera that has been popular enough and capable at that! The camera can be the best accessory for the scuba divers with its waterproofing ability to up to 50 feet underwater. A host of underwater shooting modes that the camera offers you should be what you would appreciate. Here we go with a few features that we loved with the iconic camera –
  • At 50 feet waterproof capacity, it should be one of the best for snorkeling.
  • The camera comes with crushproof properties up to 220 lbs and a shockproof capability up to 7 feet.
  • The Olympus TG-4 is freezer proof for up to 14 degrees Fahrenheit
  • The 16 MP shooter allows you shoot the stills in RAW mode – an excellent gift for the professionals out there!
  • Specific underwater modes that would make your underwater photography one of the best. Some honorable mentions can be the snapshot, macro, and HDR modes.
  • It can capture brighter and darker areas and then arrive at beautiful night pictures. Olympus uses the proprietary Live Composite mode for the purpose.
  • Built-in GPS and WiFi connectivity.
Though the land photographs may not be impressive enough, the camera excels with its emphasis on the underwater shooting capabilities. It is indeed the best self-contained underwater cameras. In fact, it is the best after the Canon Powershot D30. The Olympus TG-4 packs in everything you would be looking in an underwater camera. The dustproof functionality and freezer proof functionality at sub-zero temperatures should make it an excellent option.

Panasonic DMC TS25D

Check on Amazon, Price: [amazon_link asins=’B00KHW3HRY’ template=’PriceLink’ store=’foi04-20′ marketplace=’US’ link_id=’25f45d4a-7499-11e8-9423-211e1908d65b’]

In case if you are looking for a cheaper option for the best underwater camera? Panasonic DMC TS25D lives up to your expectations. The camera offers you the essential features you would expect from a waterproof camera. We have included it in our compilation from the perspective of our readers who may be tight on budget. A few features that the camera can offer you include –
  • Waterproof up to 23 feet and meet almost all necessary underwater photography requirements you may have.
  • The camera offers you the shockproof capacity of up to 5 feet
  • The image quality may not be on par with the one from the other cameras in this compilation.
  • Though it has 4X optical zoom which it may not be sufficient enough, you can rely on the smarter digital zoom functionality provided additionally.
  • The camera can shoot your videos in MP4 through HD quality at 720p.
The dry land images do not inspire much. However, it can be a good option for those who are on a tight budget, yet want to experience the underwater photography at its best.

RICOH WG-30W

Check on Amazon, Price: [amazon_link asins=’B00OUX740W’ template=’PriceLink’ store=’foi04-20′ marketplace=’US’ link_id=’3049044a-7499-11e8-aca9-a9149deea026′]

If you are looking ahead for an overall best performance of an underwater camera? Check out RICOH WG-30W, and you will not be disheartened. In fact, it is the latest entrant to the waterproof cameras and performs well enough. What would make it an enchanting option would be the introduction of what is called the Mermaid mode. Specially designed for underwater photography, the camera shows excellent performance. Some salient features we loved with the tool include –
  • The camera offers you the underwater capability of up to 39 feet underwater for up to 2 hours continuously.
  • It has an excellent heavy-duty construction is capable of working under in any harsher conditions.
  • The RICOH WG-30W offers you a shockproof endurance of up to 5 feet.
  • Freezer proof capability is as low as 14 degrees Fahrenheit.
  • The camera also offers you crushproof properties to up to 100 kg.
  • The camera can be operated through a smartphone remotely through the WiFi connectivity.
  • The Macro mode comes with the Macro lights for excellent macro images.
The camera also features a microscope mode for an extreme close up image. The 16 MP camera offers you a standard 5x optical zoom feature out of the box.

The Concluding Thoughts

Waterproof cameras have been moving ahead with a host of features that were never heard of before. You have a brighter choice of cameras in this genre at a more extensive price range; it should be practically quite more stringent to zero in on a particular model for your underwater photography needs. That is precisely why we have compiled this list of our top five picks. We have ensured that we have been able to include the models that would suit almost all genres of buyers. We would assume that the list lives up to your expectations. Share your thoughts, experiences, and opinions about the cameras featured in this compilation so that our readers would get first-hand knowledge of the cameras we have featured here. Do let us know your experiences with any of the cameras we have featured in this compilation. You may also share any of your favorite underwater cameras here so that we would have a better horizon of choice.