Olympus – one of the prominent players in the realm of cameras has had a niche fan following in its circle. They have recently launched a new flagship camera with a few extra features. The Olympus E-M1X is indeed an excellent option in every right. But, how does it compare with the older brother Olympus E-M1 Mark II? Let us check out the features and compare the two siblings for a clear understanding of the two cameras.
Olympus E-M1X vs E-M1 Mark II – Key Specs
| Camera Name |
OM-D E-M1X
|
OM-D E-M1 Mark II
|
| Lens System | Micro Four Thirds (interchangeable lens) | Micro Four Thirds (interchangeable lens) |
| Card Compatibility | SD, SDHC, SDXC (UHS I & II)
Dual-Slot Settings: Standard, Auto Switch, Dual Independent, Dual Same |
Dual-Slots:
Slot1: UHS-I, II compatible, & Slot2: UHS-I compatible. Standard, Auto Switch, Dual Independent, Dual Same |
| Sensor Size & Type | 17.4 mm x 13.0 mm
4/3 Live MOS Sensor 20.4 million pixels Aspect ratio: 1.33 (4:3) |
17.4 mm x 13.0 mm
4/3 Live MOS Sensor 20.4 million pixels Aspect ratio: 1.33 (4:3) |
| Recording & File Format | 12-bit RAW (lossless compression)
JPEG, & RAW+JPEG (5184 x 3888 pixels – 1024 x 768 pixels – JPG) |
12-bit RAW (lossless compression)
JPEG, & RAW+JPEG (5184 x 3888 pixels – 1024 x 768 pixels – JPG) |
| Image Stabilization | 5-axis sensor-shift (yaw / pitch / roll / vertical shift / horizontal shift)
* When using M.Zuiko Digital lenses equipped with image stabilisation |
5-axis sensor-shift (yaw / pitch / roll / vertical shift / horizontal shift)
* When using M.Zuiko Digital lenses equipped with image stabilisation |
| Modes | 4 modes (S-IS AUTO, S-IS1, S-IS2, S-IS3), OFF | 4 modes (S-IS AUTO, S-IS1, S-IS2, S-IS3), OFF |
| EVF | 2.36M dots EVF
1.48x – 1.65x magnification Approx. 100% field of view |
2.36M dots Eye Level
2.36M dots EVF 1.48x – 1.65x magnification Approx. 100% field of view |
| Display | 3.0-inch electrostatic capacitance touch panel vari-angle monitor
1037k dots (3:2) Aspect Ration |
3.0-inch electrostatic capacitance touch panel vari-angle monitor
1037k dots (3:2) Aspect Ration |
| Auto-Focus System | 121-point cross-type phase detection
High-speed imager AF EV -3.5 – 20 (S-AF, ISO approx.100, with a F2.8 lens) |
121-point cross-type phase detection AF and 121-point contrast AF |
| Shutter | Focal-plane shutter (mechanical shutter): 1/8000 – 60 sec., with selectable EV adjustment steps (1/3, 1/2, 1)
10-15 FPS (Depends on Lens) |
Electronic shutter
1/32000 – 60 sec. (Speed) 0, 1/8, 1/4, 1/2, 1, 2, 4, 8, 15, 30 sec. (Delay) Speed: 1/8000 – 60 sec. |
| ISO Sensitivity | AUTO ISO (default): LOW (approx.64) ‐ 6400 with customizable default and upper limit (200 – 6400)
Manual ISO: LOW (approx.64, approx.100), 200 – 25600 (adjustable in 1/3 or 1 EV steps) |
AUTO ISO (default): LOW (approx. 64) ‐ 6400 with customizable upper limit (200 – 6400)
Manual ISO: LOW (approx. 64), 200 – 25600 (adjustable in 1/3 or 1 EV steps) |
| Video Recording | 4096 x 2160 (C4K) / 24p / IPB (approx. 237 Mbps)
3840 x 2160 (4K) / 30p, 25p, 24p / IPB (approx. 102 Mbps) 1920 x 1080 (FHD) / 30p, 25p, 24p / ALL-I (A-I), IPB (SF, F, N) 1920 x 1080 (FHD) / 60p, 50p / IPB (SF, F, N) 1280 x 720 (HD) Recording Time up-to 29 minutes |
4096 x 2160 (C4K) / 24p / IPB (approx. 237 Mbps)
3840 x 2160 (4K) / 30p, 25p, 24p / IPB (approx. 102 Mbps) 1920×1080 (FHD) / 30p, 25p, 24p / ALL-I (A-I), IPB (SF, F, N) 1920×1080 (FHD) / 60p, 50p / IPB (SF, F, N) 1280×720(HD) Recording Time up-to 29 minutes |
| Audio | 16-bit Stereo | 16-bit Stereo |
| GPS & Sensors | GPS (GLONASS, QZSS), compass, manometer, temperature sensor, Acceleration sensor | Via smartphone GPS data |
| Dimensions | W: 144.4 mm, H: 146.8 mm, D: 75.4 mm | W: 134.1 mm, H: 90.9 mm, D: 68.9 mm |
| Battery | Two BLH-1 Li-ion batteries | BLH-1 Li-ion battery (Single) |
| Connectivity | USB-type C
3.5 stereo mini jack (1 Mic & 1 Headphone) Bluetooth V 4.2 BLE WiFi 802.11a / b / g / n / ac Micro HDMI (type D) AC-5 compatible DC Connector |
USB-type C
WiFi 802.11a / b / g / n / ac 3.5 stereo mini jack Micro HDMI (type D) AC-5 |
Olympus E-M1X vs E-M1 Mark II – A Comparison
The Olympus E-M1 Mark II was launched back in 2016 and was an excellent camera for the days gone by. The faster sensor, burst speeds of up to 60 fps and a Pro Capture feature what made the best camera available at the time. It was the advanced mirrorless camera at the time.
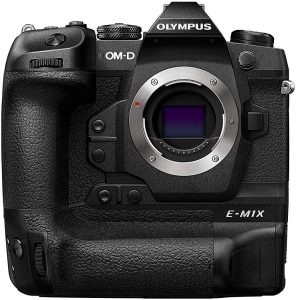
Now after a gap of four years – the manufacturer has introduced a new flagship camera in the form of Olympus E-M1X. It is one of the excellent cameras that came in the mirrorless genre with the vertical grip. It should be noteworthy to understand that the feature is only available with the high-end DSLR cameras.
Let us compare the two cameras based on how do they perform concerning the key features.
The Design
The E-M1X comes with a built-in vertical grip, and that should be the major difference between the two capable options. This makes it considerably larger than the E-M1 Mark II. However, from the comfort point of view, you would find the E-M1 Mark II lighter and compact.
That does not mean we do not like the E-M1X. The vertical grip is indeed a welcome gesture. Even the front grip is larger enough and offers a superior build quality. While the predecessor does have excellent build quality, but it gets better with the E-M1X.
There are a lot of similarities as well. Both of them come with a magnesium alloy body and excellent weather sealing functionality. The cameras are dust, splash and freeze proof. The E-M1X offers the weather sealing even with the cables connected.
You will find a new button layout on the latest model. There is an AF joystick as well. The 12 customizable buttons can be another added advantage when the E- M1 Mark II had 9 of them. You will also find four custom modes as opposed to the three on the main dial.
Image Stabilisation
One of the features that would make the E-M1 Mark II a great option is the 5.5 stops image stabilization. You can get a 6.5 stops performance with the specific lenses. However, you can expect a better configuration on the new model now.
The E1MX comes with a new gyro sensor. It now offers 7.5 stops of compensation with the stabilized set up. It has been considered to be the world’s highest correction as such. The official rating for the image stabilization is 7Ev as compared to the 5.5 Ev on the EM1 mark II.
Battery Life
The new design on the Olympus EM1X comes with the additional battery. The two batteries come with the BHL-1 configuration and with the two batteries, you should be able to shoot around 870 frames on a full charge. The EM1 mark II, on the other hand, offers you 440 frames per charge.
Another advantage from the battery point of view should be the ability to remove and replace the battery while the camera is mounted on a tripod. Also, you should also be able to charge the batteries through the USB port on the camera. It should take around two hours to load it to the full capacity.
Enhanced Viewfinder
This is yet another new feature introduced on the new EM1X. It comes with a newly revised viewfinder. The resolution remains the same across the two offerings at 2.36 million dots, but the magnification levels have been given a boost.
The older EM1 Mark II comes with the 0.74X magnification when compared to the 0.83x magnification on the EM1X. This should help you check out your subjects in a better manner and position it correctly. The optics of the viewfinder have also been enhanced with aspherical and high reflective index elements. This improves clarity. You also have access to the 120 fps refresh rate.
An Improved Supersonic wave filter
The two cameras share the same 20.4 MP sensor, but the new model has the supersonic filter enhanced. This wave filer helps remove the dust, and similar particles creating issues with your images and are available on both the Olympus cameras.
The supersonic wave filter on both the models vibrate at the same 30000 times a second, but the EM1X has implemented a new coating. Olympus claims that this additional enhancement improves dust removal by 10 percent.
Shutter actuation improved
Ideally, you will find the DSLR cameras and other mirrorless cameras with the shutter actuations that range across 200000 to 300000. The two siblings from Olympus also live up to this standard. The EM1 mark II comes with a respectable 300000 shutter actuations, while the new EM1X offers you an improved 400000 shutter actuations.
The shutter is protected with a great deal of weather sealing, but again the EM1 X takes the lead here by keeping the weather sealing functionality working even when you are using a microphone, a USB connection or any other accessory on your camera.
Enhanced Autofocus settings
The autofocus points on the new model remain unchanged as on the older brother. Both the cameras come with 121 all cross-type phase detection points on the chip, while there is an equal number of contrast detection points.
However, the new EM1X offers you an additional functionality in the form of the AI-powered Intelligent Subject Detection AF feature. It should help you detect and lock into focus on any the subject. A good example can be shooting moving objects. The AF Target function is yet another advantage.
The GPS Functionality
You may not find the location functionality on most of the cameras. Most of the cameras tend to achieve functionality through the connected smartphone. Even the EM1 Mark II uses this technique to tag the images and videos with the location information.
The EM1X comes with a built-in GPS sensor and thus should help tag the location quite accurately even without the paired smartphone or any other extra device. Also, the EM1X also comes with additional sensors in the form of a temperature sensor, manometer and a compass built into the camera.
Handheld Resolutions
Olympus is perhaps the first and the only camera manufacturer to offer a handheld mode for the high-resolution photography with the handheld functionality. Olympus claims that the camera outputs the images as if they are from a 50 MP sensor.
The mode was somewhat available on the older EM1 Mark II, but it has been made a reality on the new EM1X with an enhanced High-resolution mode for the handheld mode.
What makes Olympus EM1 X stand out from the EM1 Mark II?
The new EM1X introduces a few features on the device making it a suitable upgrade over the EM1 Mark II. Some significant advancements can be summed up as
- An anti-flicker mode for the stills and videos
- USB charging with the Camera turned off
- New dust reduction system with an extra coating
- Focus stacking improved to 15 shots instead of 8.
- Bluetooth connectivity. It also supports RAW files transfer.
- Shutter actuation hiked to 400000
The Concluding Thoughts
Well, which one among them will we recommend? The new EM1 X should be the best option if you are looking to buy one among those two options. There are several reasons for reaching this conclusion, and a few may have already been answered through the detailed comparison of the key features we have had in the above paragraphs.
The EM1X packs in a whole lot of features and the high-resolution mode are just one of them. This should help you avoid the need to bring a separate tripod for your shooting events. The camera is more significant, and some of you may consider this as a disadvantage, but we would take it as an advancement. The bigger size will mean you have access to a better grip. The ergonomics offered by the camera should be the most advantageous functionality.
Of course, the EM1 Mark II can be one of the best options from the portability and price perspective. But the EM1X beats it by comfortable margins if you consider the most important aspects that a camera should offer – image quality and the set of features.
What are your views? Share them with us through the comments here below.