In this article, we are going to list out Microsoft Teams Certified Webcams. We have picked up the ones that we liked amongst the officially supported list.
So, what are the features that a modern webcam should support? In our opinion, the following are some of the must-have:
- 4K Video Resolution @ 30 or 60 FPS
- Wide-Angle View
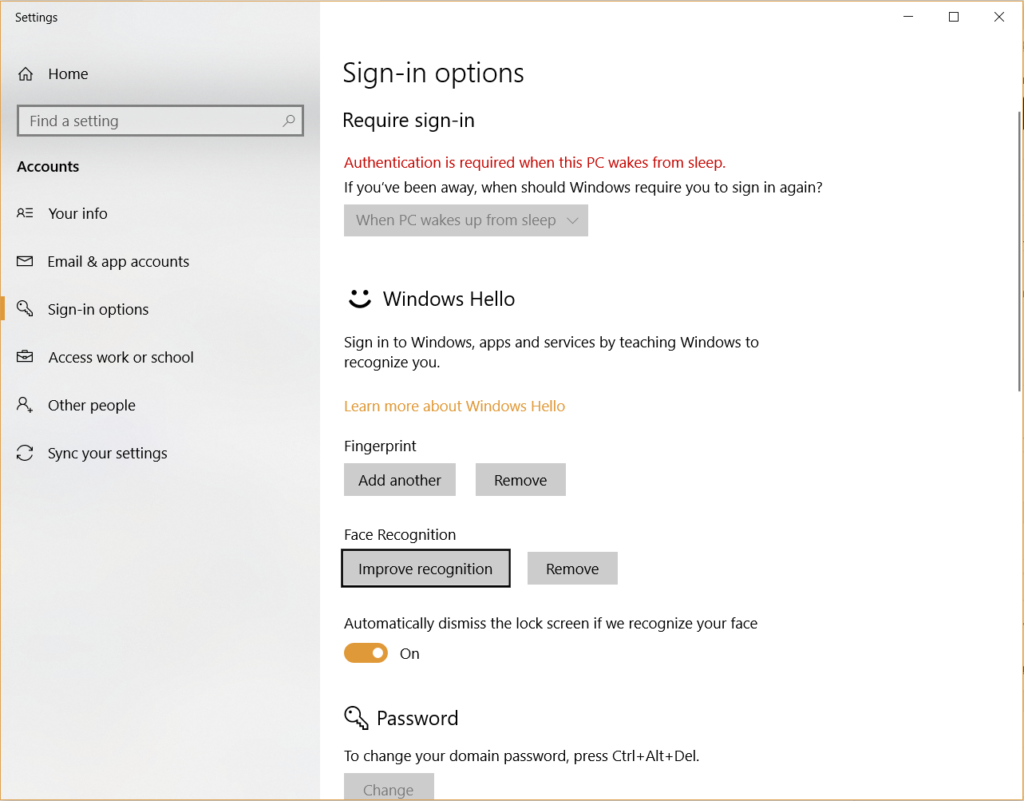
- Windows Hello Compatibility
- High-Resolution still images
- Automatic exposure and contrast control to compensate for glares and office backlighting.
In the era of high-resolution front-facing cameras on smartphones and laptops, the webcam isn’t dead yet. Instead, we are thankful for the competition that compelled the manufacturers to pack more features and better online experiences.
Also Read: Top Windows Hello Webcams
When we looked for shortlisting webcams, we also need to ensure that they are Enterprise-ready and support popular Unified Communications platforms such as Skype for Business, Cisco Webex, GoToMeeting, etc.
However, in this post, we will focus on Microsoft’s unified communications platforms such as Teams & Skype for Business. So, let’s get started.
Microsoft Teams Certified Webcams – Our Recommendations
Microsoft Teams still runs the Skype infrastructure as the backbone for enterprise voice and video, so fundamentally, no changes. Teams and Skype for Business leverage a standard set of media technologies and capability for hosting online meetings.
Note: Skype for Business (SfB) certified peripherals and devices will work with Microsoft Teams, but Microsoft will not give Teams certification until they meet new requirements with notifications and integrations.
Overall, when it comes to video conferencing, we will technically be using the same platform underneath.
With that being said, let us list out the best Webcams that we feel are suitable for hosting the online Microsoft Teams meetings.
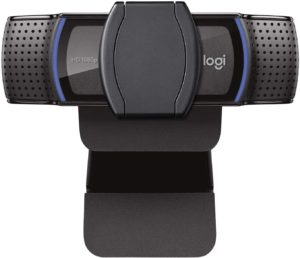
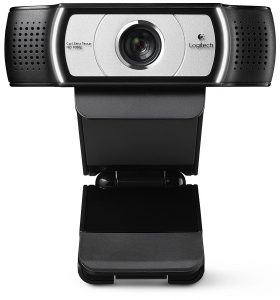
1. Logitech C930e Full-HD Webcam
Check on Amazon
The C930e is a business-grade Webcam that offers 30 fps of high-resolution videos and is ideal for hosting web conferences. It also happens to be one of the least expensive devices on our list.
The camera comes with a 90-degree wide field of view with support for Pan & Tilt. It also comes with a software-controlled 4x optical zoom. The videos are captured with the standard H.264 Encoding for optimal compression and bandwidth savings. You can download and use the Logitech Webcam Software if you want more control over the device. However, Logitech assumes that you are already using professional-grade software to control the device and not include them as a bundle.
The only negative that we found with the C930e is the jumpy autofocus under low-light scenarios, which should not be a deal-breaker since it’s meant to be used in conference rooms.
Here are some of its high-level specifications:
- Full-HD 1080p video at 30fps
- 90-degree (diagonal) field of view
- Dual Omni-directional noise & echo canceling microphones.
- Digital Pan & Tilt function
- External Privacy shutter
- Plug n Play support for Windows 10 and Mac OS.
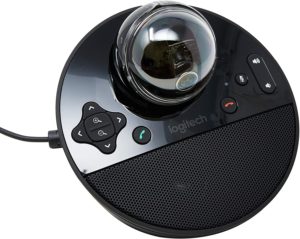
2. ConferenceCam Connect from Logitech – Full HD Video Collaboration Solution
Check on Amazon
The Logitech ConferenceCam Connect is a bit different from a traditional webcam. Just like an AIO (All-in-One) printer, this is an all in one Web-conferencing solution for smaller teams over Skype or Teams. The key selling point is its portability and features rich functionality.
It is compatible with most UC (Unified Communications) and web conferencing solutions. It comes with a wide 90-degree field of view and in-built 360-degree speakers for audio output. The full-duplex Omni-directional microphones do the job of noise cancellation pretty well.
It comes with an easy to use USB connectivity that enables you to connect a TV screen from a tablet or even your smartphone. Here are some of its high-level specifications:
- Full HD Video @ 30 FPS
- Full 90-degrees wide FOV, digital pan & tilt function with mechanical tilt wheel
- Up to 3 hrs. battery backup for videoconferencing (15 hours of audio playback)
- External IR remote with a range of up to 10 Feet.
- Integrated Bluetooth, NFC & USB plug n play.
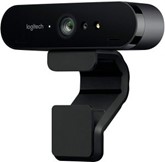
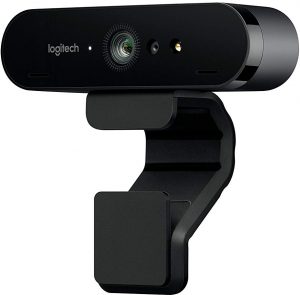
3. Logitech Brio Webcam (Windows Hello Support)
Check on Amazon
One of the most advanced webcams, the Logitech Brio Webcam, is quality personified in terms of image quality that it offers you. An astonishing 2160p resolution and HDR compatibility would make it an excellent choice in every right.
Some of the features we would focus on include.
- A stunning 4K compatibility
- The lightweight three-light correction technology for quality video quality, streaming, and recording.
- Assured true to life HD video with autofocus and premium glass lens.
- Support for multiple connectivity options including USB 2.0 Type-A and USB 3.0 Type A and C connections
- Certified for Skype for Business and Cisco, it offers you excellent enterprise functionality.
Equipped with an easy to use stand, that is the best you can opt for. You have access to a 5X zoom compatibility.
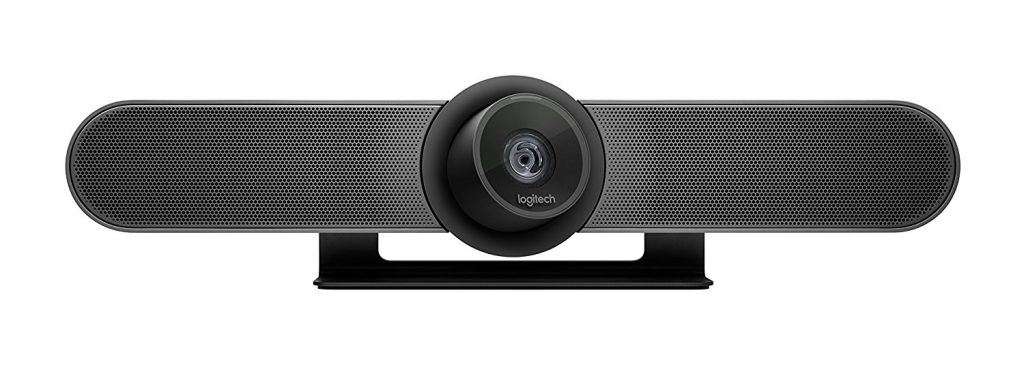
4. Logitech MeetUp for Small Meeting Rooms
Check on Amazon
The MeetUp from Logitech is the priciest device on our list. The webcam is tailored for business-grade audio and video meetings, especially for small huddle rooms and conference rooms.
The most extensive field of view comes at 120 degrees that provide sufficient coverage for everyone in a small-sized conference room.
The In-built audio system also features a triple microphone setup and custom-tuned speakers specifically optimized for conversations in huddle rooms. The speakers also double up as a speakerphone, thanks to the Bluetooth connectivity. The device also offers you the option of integrating a mic expansion pod if you want more coverage.
Here are some of the specifications below:
- 4K Ultra-HD video (3840 x 2160 pixels @ 30 fps)
- 120-degree FOV
- Triple-microphone setup
- Motorized pan & tilt functions
- Integrated Bluetooth and RF Remote controls
- Powerful “rare-earth” magnet speakers.
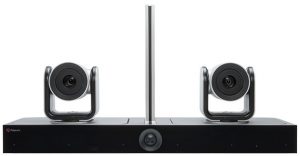
Polycom EagleEye IV USB
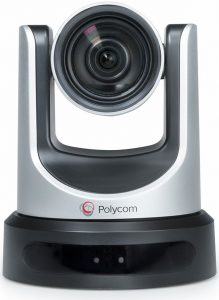
Check on Amazon
Offering natural colors and high-end details in full 1080p, the Polycom EagleEye IV USB has been one of the highly recommended cameras for Microsoft Skype Room Systems. It has been certified as the Skype Room System camera peripheral and provides you access to a premium HD video experience. The pan, tilt, and 12x optical zoom functionalities provide you with an excellent option for medium to large meeting rooms.
The camera can cover a wider field of view. You should be able to control it with a simple handheld remote. The Home preset function is yet another worthy feature that lets the camera quickly recalled to the Home position. You have access to a broader field of view to up to 72.5 degrees.
Some of the features offered by the web camera include
- 5° Diagonal field of view camera with +/-170° pan
- 1-year return to factory parts and labor warranty
- Wired connectivity with USB
- +90/-30° tilt
- 12x optical zoom
- Low light sensitivity
- 1920 x 1080 sensor resolution
Logitech PTZ Pro 2
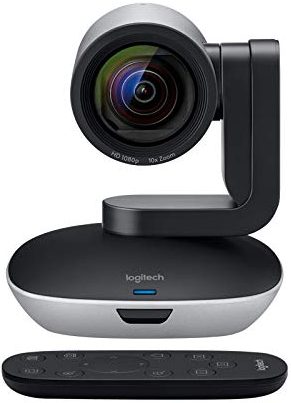
Check on Amazon
If premium optics and lifelike images are what you are looking ahead to, the Logitech PTZ Pro 2 should meet almost every one of your needs. An optical accuracy par excellence and a true to life color reproduction are a few features that should make it one of the preferred choices. It is quite easy and simple to install and does not need any specific technical expertise. The easy USB connectivity would make it breezy enough to get, set, and go.
The camera works efficiently for use in cases of video conferencing applications on Windows and Mac. The handheld remote provides a completely simple and easy to use pan, tilt, and zoom. You can also control the camera with downloadable software as well. It is an excellent option for the classroom and larger meeting rooms.
The premium lens offers you a broader view of angle and excellent autofocus functionality. High-end flexibility and a great zoom are a couple of features that should ideally make it one of the most preferred options you would want to work with. The camera provides you with a better and easy to use set up.
A few features offered by the camera offers you would include
- Wired connectivity through USB
- 90° Diagonal field of view
- 10x HD zoom
- Easy functionality with pan and tilt
- The 1080p resolution
- 2 Year limited manufacturer hardware warranty
- A 10-foot USB cable with power adapter connection
UVC30 Room by Yealink
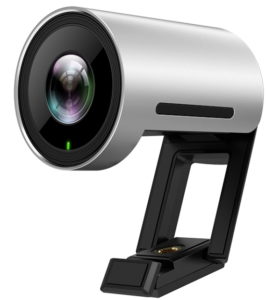
Check on Amazon
It is a premium USB camera designed for focus and small meeting rooms. Offering a sharp image and accurate color reproduction and dynamic range. It rewards you with a bright face-to-face video meeting experience in ultra HD 4K resolution and higher frame rates.
A wide field of view ensures every participant can be seen. It supports auto framing features to accomplish a much more exceptional meeting experience based on AI facial detection. An included flexible clip gives many options to mount the camera.
Camera: 120° Diagonal field of view front of the room with 4K resolution, automatic people framing
Wired connectivity: USB 2.0
Product weight: 6.3 Ounces (180 grams)
Dimensions: 59 x 45 Millimeters
Cable length: 9.8 Feet (3 meter) USB 2.0 cable
Warranty: 2 Year limited manufacturer hardware warranty
What’s included in the box:
- UVC30 Room camera
- USB 2.0 cable (3 meters/9.8 feet)
- Flexible clip
- Camera lens privacy cover
- Documentation
Logitech – C925E business webcam
Jabra Panacast
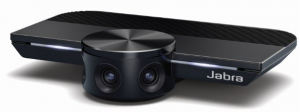
Check on Amazon
The plug and play compatible camera come with improvement options for the huddle rooms. The Jabra Panacast comes with three cameras with 13 MP resolution. The patented real-time video stitching is yet another excellent option. The 180-degree angle would make it one of the much-preferred options ever for a natural experience.
The camera comes with an intuitive technology that enhances the optimization of the field of view. It can detect the individual participants and includes every participant in its field of view. Resolution and video quality are continually optimized by offering consistent and automatic optimization. It adjusts to the varying light conditions.
This can go a long way in promoting a better viewing experience. The panoramic view in 4K offered by the three 13 MP cameras is wonderful. It can be an excellent partner option for use with the Jabra Speak Audio performance. Instant installation and collaboration are the two features you would find impressive.
Polycom EagleEye Director II
Check on Amazon
The Polycom webcam is an excellent option with a wide range of functions and features. The camera can automatically zoom in on the active speaker without the need for any sort of remote control. You do not need to worry or be concerned about whether you are in the camera viewpoint. It comes with an efficient facial recognition technology to make your video conferences special in more ways than one.
The automatic people tracking technology is one of the innovative features offered by the webcam recognized by Microsoft Teams. Get access to improved performance with an intimate and highly productive video conferencing experience. This will bring up the best possible natural meeting experience ever.
You can be in for the best possible TV production level of performance—no need to adjust the camera angles or zoom in.
Logitech Rally Camera
Check on Amazon
Logitech has impressed us with a huge list of cameras certified by Microsoft Teams. The new Rally camera from Logitech should ideally be the best and perfect option in many ways than one. The mechanical pan, tilt, zoom functionality offered by the camera makes it extremely efficient enough for almost every one of your requirements.
The 90-degree field of view would bring the next level of natural meeting feel in a virtual world. The camera offers you an industrial level and a high definition video conference quality for all your meetings. The 4K sensor on the webcam is yet another added advantage.
The camera can shoot 4 K ultra HD video quality with 30 frames per second. You can be assured of excellent and enhanced video performance, with a sharp video and an exceptional color reproduction. You can even go with a high degree of accuracy in your shots. The camera should be the right option for almost every one of your needs through training facilities, boardrooms, and lecture halls.
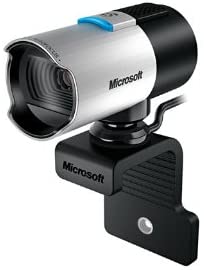
Microsoft LifeCam Studio for Business
Check on Amazon
The camera comes with a 1080p HD widescreen sensor that should ideally be one of the exciting options for both businesses, gaming, or streaming. It provides you access to a very high degree of superior sharpness and excellent image quality. The camera is equipped with an advanced degree of high precision optics to offer you access to improved performance.
The camera offers you an outstanding set of features and functions that would include plug and play compatibility and an enhanced picture and video clarity. The high precision glass lens is one of the features that provide it with improved image sharpness features.
A few features worthy of mentioning would include
- It provides you with a 75 degree of field of view.
- An excellent 720p video resolution at 30 fps.
- The 360-degree rotation will provide you with an enhanced option.
- You also get access to face-tracking and TrueColor Technology.
- An extremely rugged build quality
- Easy to set up and work with
The 1080p compatibility is available only through third-party software. The camera, by default, provides you access to 720p resolution alone.
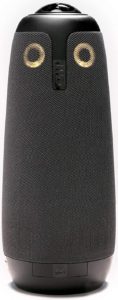
Owl Labs Meeting Owl
Check on Amazon
The Original 360-degree webcam from Owl Labs should be yet another excellent that would prove to be one of the unique options. It has been designed as a quick 360-degree video conferencing camera ever. The camera works seamlessly with Microsoft Teams, Zoom, and Skype. It provides you access to a space-saving and features packed construction.
The plug and play compatibility would make it one of the best options ever for every requirement you may have. It can be the best option for all your meeting needs. The 360° lens and eight built-in noise-canceling mics provide you with a truly 360-degree experience.
A few features that it provides you would include –
- An attractive and space-saving design
- Speakers automatically track and highlight the surroundings.
- Plug and play compatibility
- A perfect option for compact space applications.
- The pick-up range is almost 12 feet.
- An extremely portable design
They may not be the right options for the larger rooms. It may show a short lag when connecting in a more significant place. The 720p quality may not live up to the expectation.
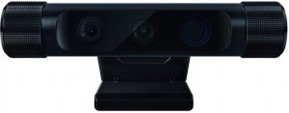
Logitech Brio 4K Webcam
Check on Amazon
The webcam provides you access to a wonderful performance for a wide conferencing with excellent performance. It can be used for a wide range of applications across multiple video requirements. Some notable mentions would include video conferencing, streaming, or recording.
The camera comes with the 4K Ultra HD performance standard that provides you access to a 5 X digital zoom option. A few of the excellent options would include higher frame rates and superior low light performance as well. It also provides you access to HDR and RightLight 3.
The autofocus provides you access to a perfect option for delivering wonderful true to life videos. Certified for Skype for Business, it is quite compatible with a host of other UC solutions. A few notable names that the camera supports would include Zoom, WebEx, BlueJeans, and Facebook Messenger. The high-end security options would make it a great performer.
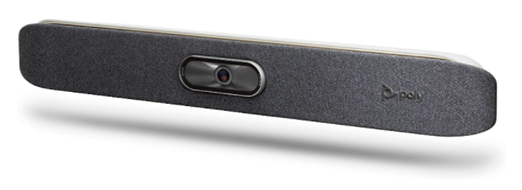
Poly Studio
Check on Amazon
A pure performer with a perfect Audio and video performance would be an excellent option for home office use every day. It is one of the top choices for the USB video bar for small rooms or huddle spaces. You will find the plug and play compatibility with popular operating systems to make it one of the compelling opportunities.
The camera comes with audio that fills up your room and provides you access to an improved, accurate unidirectional microphone. The built-in mic gives you access to enhanced and improved pinpoint microphones. The features such as Poly Acoustic Fence and NoiseBlock would make it one of the best options you would find quite impressive. The Poly Studio camera is capable of removing unwanted audio and background noise automatically.
Get access to a notably exceptional business-class video performance with UC platforms such as Microsoft Teams, Gotomeeting, Zoom, etc. The automatic group farming is one of the prominent options we found appealing. The camera is straightforward to manage and provides you with an exceptional experience.
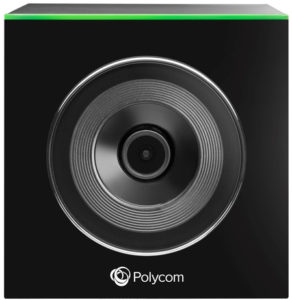
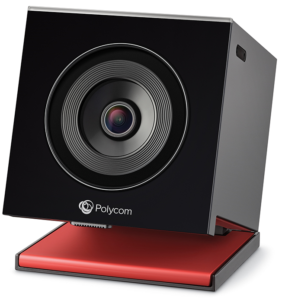
EagleEye Cube USB
Check on Amazon
The camera is known for a wide field of view and an intelligent group framing. You can be assured of everyone being able to be visible in the frame. The HD resolution and a 5X zoom are the two features you would find practical and useful in the long run.
The camera is one of the excellent options for your needs in a very productive collaboration. The 4K sensor would ideally deliver a new and enhanced performance standard. The Horizontal field of view 110° and Automatic exposure and white balance are a couple of features that would offer you a new performance standard.
Logitech Conference Cam (BCC950) For Content Creation
Check on Amazon
If you are looking for the best webcam for content creation, the Logitech Conference Cam For Content Creation can be your best bet for most of your expectations. The improved features and high-end functionality are a few features that would make it stand out from the rest. Despite the high-end features, you would find it offering a reasonable price. It can double up as an excellent option for small spaces.
The 78-degree field of view and HD video quality further enhance your experience. The ultra-wide lens and pan- tilt – zoom functionality are a few features that would help you get the best possible experience. The Echo cancellation is yet another worthy option that would make it one of the best options to go with. The easy noise cancellation and a more comfortable setup option are a few of the options you would find quite rewarding.
Amazon
Meeting Owl Pro For Interviews

Check on Amazon
You can get access to the best team meeting experience with the Meeting Owl Pro webcam. The top-end 1080p recoding and 360° smart video conferencing features would further make it one of the thoughtful options for all your needs in an enhanced degree of experience ever. The new version has 2X louder sound and 2X sharper video quality than the previous generation of the webcam.
A quicker and easier setup can make it a blessing for the urgent meetings called up at short notice. An essential tool for smart video conferencing, the webcam comes with a huge number of useful features. The built-in Owl intelligence system is designed to bring you more enhanced functionality and improved productivity. The webcam can be an excellent option for huddle spaces. Automatic speaker focus is one of the huge options.
Amazon
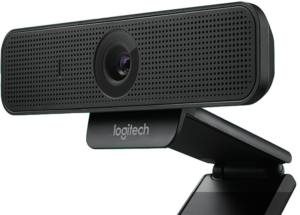
Logitech C920s
Check on Amazon
Logitech C920S has been rated to be one of the most professional cameras for working with Microsoft Teams. A couple of the features that we loved the most with the webcam include a high-quality image and a useful privacy shutter. The webcam provides you access to advanced image tweaking features that further enhance your experience. The high end 1080p video recording capability further improves your experience and delivers a sharper video clarity.
The stereo audio with mics has been designed to capture the natural sounds. Affordable pricing is yet another worthy factor we found interesting enough. However, you may face image stuttering issues in low light conditions. It does not need you to use any software for use with the webcam.
Amazon
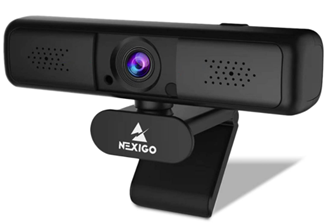
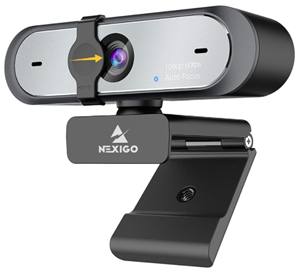
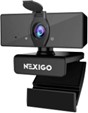
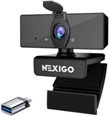
7. NexiGo 2K QHD Webcam:
 Check on Amazon
Conduct your online class or Skype calls or Teams meetings, or Zoom meetings with this 2K webcam. It offers outstanding video quality with true-to-life color images. You smoothly rotate it 360° both left and right. It is possible to move the device to any angle you want. There is a universal clip with a scope of adjustability. Use the clip properly to mount the webcam on a PC or Mac, or LCD monitor.
The instant you plug this webcam into your device, it becomes ready to use. Your device must have a USB 2.0/3.0 interface—no need to set up drivers on Windows 10. Moreover, digital zoom functions without the need for any software.
Features:
- The resolution for video recording is 2560 x 1440 pixels.
- With the 3X digital zoom, you can vary the viewing distance as per the needs. The available levels for zoom are 1x, 2x, and 3x.
- For exceptional video clarity, even in low lights, there is an automatic low light correction.
- The latest H.264 encoding technology leads to stable streaming. The transmission rate is fast.
- Various encoding formats supported are YUV, MJPG, and H.264.
- The snug fit cover defends the lens.
- A shutter is included for privacy.
- Compatible software/apps are Skype, Zoom, Facetime, YouTube, and Facebook.
- It is optimized for and XSplit and OBS.
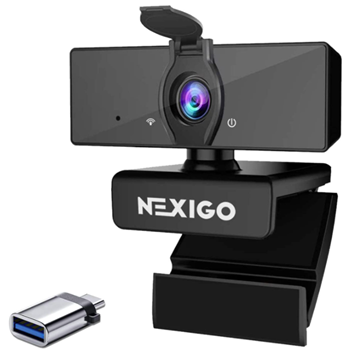
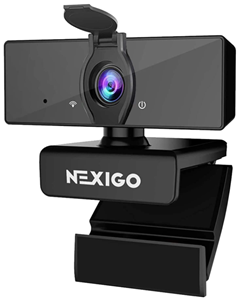
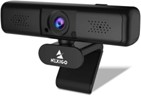
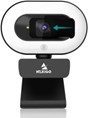
6. NexiGo AutoFocus 1080P Webcam 2021:
 Check on Amazon
Whether it is an online training or Microsoft Teams meeting or streaming, etc., autofocus may be your prime need. NexiGo designs this 1080p webcam with the ability to precisely and accurately focus on the subject. You can connect it with a PC or Mac or desktop or laptop. In any light condition, the image and video outputs appear clear.
You can swivel the webcam 360° left and right. Also, you can rotate it 180° up and down. The incorporated cover defends the lens. It also deters web hackers from spying on your communication. You can accomplish the setup very quickly right out of the box. Just plug it into the USB interface of a PC. Now, wait for a minute for installation.
Features:
- The video recording at 30fps leads to a stable and smooth video output.
- The autofocus feature offers clear and sharp images.
- With the 90° field of view, you can observe more details. When there are more persons at a conference, this feature helps.
- The contained stereo microphone receives your voice. Simultaneously, it filters out unwanted background noise.
- The automatic noise reduction ensures zero distortion and noise.
- Cutting-edge features like HDR technology and automatic light correction are implemented.
- The above features allow the webcam to adjust color and brightness automatically. Hence, you appear natural and bright even in low-light conditions.
- Platform compatibility includes Skype, Facebook, WhatsApp, Twitter, YouTube, Hangouts, FaceTime, Zoom, Twitch, MSN, Yahoo, etc.
5. NexiGo FHD 1080P USB Webcam:
 Check on Amazon
It is better for live streaming, video calling, and video recording if the video output is in Full HD. This USB webcam supports this resolution to provide excellent video quality. For adding enough sharpness, there is the inclusion of a 3.6 mm glass lens. The full HD resolution also benefits you for gaming.
There is a 2 mm wide joint available along with the slim Type-C connector. This connector can fit the Type-C interface of any device—no need to take out the cover of your laptop or smartphone. The plug & play system removes the need for extra setup. So, the webcam is compatible with most recording and streaming apps.
Features:
- The Full HD 2MP CMOS sensor provides outstanding video quality. The frame rate is 30fps.
- Maximum data rate up to 5 Gbps is achieved with the SuperSpeed USB 3.0. This speed is 10 times more than that of USB 2.0.
- The 4K HD movies get transferred in seconds.
- The lens stays protected with the privacy cover. It deters web hackers from spying on your communication.
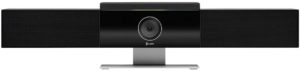
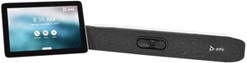
4. Poly Studio X30 Conferencing System:
 Check on Amazon
An all-in-one video bar from Poly, this webcam comes is Microsoft Teams certified. Irrespective of the size of your room, this webcam can connect wirelessly and seamlessly. Even in a huge conference room, both its audio and video outputs are of decent quality. It works with most video collaboration software. With this device, you get outstanding quality audio and cutting-edge camera capabilities. Moreover, it comes with the ability to share content wirelessly.
Due to the touch interface, there is no need to use a computer. With the built-in cloud service platform support, this webcam eliminates the need for using a PC or Mac. All the features are packed into a compact bar. The lightweight, compact design lets it accommodate below or above a display. Owing to comprehensive design and easy setup process, you can easily turn any small room into a conference room.
Features:
- The Poly Studio X30 is best suitable for a room of up to 6 participants.
- It delivers professional-quality audio and production-quality video output.
- The NoiseBlockAI blocks out machine learning.
- The content sharing can be wired or wireless.
- It comes with the native support for Video-as-a-Service (Vaas) platforms like Microsoft Teams and Zoom. No need to connect a PC.
- The SIP and H.323 lets you connect this webcam to any VaaS gateway or standards-based video solutions.
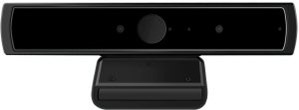
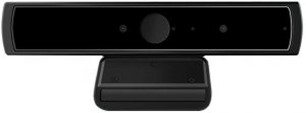
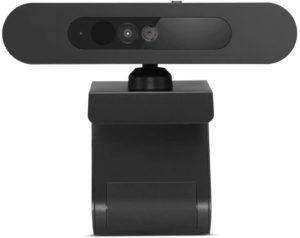
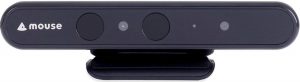
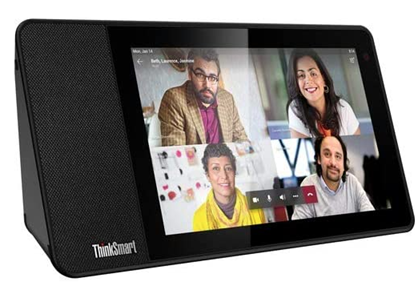
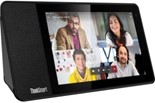
3. Lenovo ThinkSmart View webcam:
 Check on Amazon
Enhance the multitasking potential of your PC with this Lenovo webcam. The ThinkSmart View is Microsoft Team certified. It can deal with administrative and shared aspects. The meticulous design incorporates the implementation of advanced features that are helpful for conferences. The touchscreen interface is intuitive. With a simple touch, you can access Microsoft Teams. No need to wait, unlike the dials found in traditional webcams. Furthermore, the device is well-known for freeing up the resources of your PC.
The flexibility is great for use at phone booths and several other collaborative places. You can access video conference features, files, calendars, and more in a hands-free manner. For any home office, workspace, or conference room, this device is beneficial.
Features:
- This video conference equipment can handle calls, chats, videoconferencing, voicemail, scheduling, and more.
- The mute button on the mic and the camera shutter offers privacy.
- When you don’t use the display, it remains locked through a 4-digit PIN. When it is paired with your system through Bluetooth, it locks in synchronization with your PC.
- The touchscreen comes with a Cortana* smart assistant that activates through your voice.
- Its 8-inch display has a resolution of 1280 x 800 pixels. The display includes a 10-point multi-touch IPS touchscreen.
- The built-in processor is a Qualcomm Snapdragon 624 running at a base speed of 1.8 GHz.
- The GPU contains Qualcomm Adreno 506 GPU.
- The chipset is the Qualcomm SoC platform.
- The built-in storage space is 8GB eMMC, and the memory is 2 GB LPDDR3.
- There is a 10W speaker and 2 microphones in the array.
- The resolution of the front camera is 5 MP.
- For wireless connectivity, it supports Bluetooth 4.2, WiFi 802.11ac, and WLAN.
2. NexiGo N660P Pro HD USB webcam:
 Check on Amazon
There are plenty of applications where you can use the N660P Pro HD webcam. Use it for online teaching, video calling, video conferencing, live streaming, and social gaming. No worries about the deterioration of video output due to noise and echo. This is since the dual stereo microphone captures natural audio-only. Even if you are located far from the camera, your voice will still be heard. The video experience is excellent though the environment is noisy.
The USB cord is 6.5 feet long. Use it to instantly plug the webcam into a device—no need for downloading or installing any complex driver software. In addition to Microsoft Teams, you can also use this USB webcam for Zoom, Skype, and Facetime.
Features:
- The resolution and frame rate are respectively 1920 x 1080 pixels and 60fps.
- The auto white balance and auto-exposure are available. They provide the best quality output even in dim light conditions.
- The omnidirectional microphone filters out background noise.
- For your security and privacy, a privacy shutter is present. It avoids anyone spying on you while using the webcam. When not in use, you can shut down the cover.
-
NexiGo 1080P Business Webcam:
 Check on Amazon
Now it possible to record videos in any alignment you want. This business webcam supports 360° rotation in left and right directions. So, record the surrounding at any angle you want. Generally, the device is found perfect for video conferencing, webinars, and live streaming. Apart from Microsoft Teams, it can also be used for Zoom meetings, and Skype calls.
The picture output is sharp and clear every time. Even when there are more people in a conference room, it can clearly capture the entire scene. You can mount it on a tripod and can access it from the front of a monitor. For security purposes, a privacy cover is available. It wraps up the lens when not in use. No more worries of anybody spying on you. Just clip it on over your desktop or monitor or laptop or Macbook. The outstanding video clarity makes the webcam pertinent for video conferencing, callings, recording, streaming, and gaming.
Features:
- There is a 2MP CMOS sensor built inside. It supports 1920 x 1080 pixels resolution and a 30fps frame rate.
- The glass lens has a 3.6 mm focal length. It provides sharp and clear images.
- The included USB connector follows standard UVC/UVA protocol. It can connect with almost any device having a USB port.
- With the noise-canceling microphone, there is a significant reduction in ambient noise. So, the sound quality in the videos is superb, even in a noisy environment.
- Plug & play setup removes the need for extra software or driver.
Best webcams for professional usage:
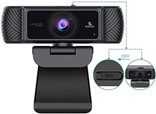
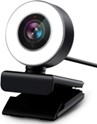
4. Vitade 960A USB Pro Web Camera:
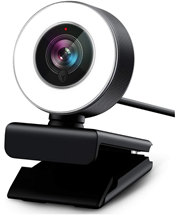 Check on Amazon
Both for professional usages and gaming, you can use this Vitade web camera. It can be connected to a laptop, Mac, or PC. Since it comes with a long cable and universal clip, it becomes easy to mount it on a laptop, tripod, desktop, LCD, or monitor. Compared to other standard webcams, the quality of images and videos is far better. Moreover, it is easy to adjust the position for the appropriate angle.
The audio output from the microphone is clear and audible to everyone in the room. With the hassle-free plug & play setup, you can start using the device in 5 minutes. You will relish impressive HD video performance and fast transmission speed.
Features:
- The 80° wide-angle lens can capture HD images and videos in 1080p resolution at 30fps.
- The advanced H.264 encoding efficiently compresses a digital video file. Compared to the MPEG format, the videos in this webcam occupy half the same. Still, there is no compromise in video quality.
- The autofocus and automatic low-light correction offer realistic video output in any light conditions.
- With real-time autofocus, the device can capture more details of the subject.
- Through the touch interface on the ring light, you can vary the brightness in 3 levels.
- The facial enhancement technology automatically optimizes images. Also, it lets your videos appear more professional.
- The OS compatibility includes Windows 7/8/10, Mac OS 10.6 and higher, Android 5.0 and higher, and Chrome OS.
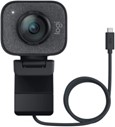
3. Logitech StreamCam:
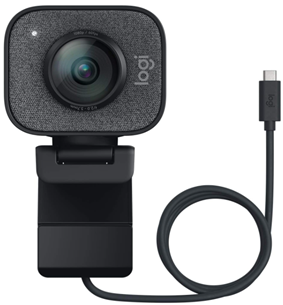
Check on Amazon
When it comes to videoconferencing or broadcasting, or streaming, you can use StreamCam. Use it to stream rapidly on Twitch, YouTube, and Instagram stories, etc. In case you demand high-quality streaming, you can use Logitech capture. It is an efficient streaming app that turns content creation intuitive and fast. This app allows you to customize settings and recordings. Moreover, this app provides the webcam with features like stabilization, framing, and automatic exposure. Henceforth, you can focus on creating the best content.
Another famous aspect is it comes with flexible mounting options. These options help you attain the perfect angle for video recording and streaming. For ease of mounting, a tripod mount and a monitor mount are included. The streaming output shows precise and smooth motion. It is helpful for the audience and content creators.
Features:
- The Logitech StreamCam records video in full HD 1080P resolution at 60 fps.
- It allows you to connect with devices compatible with USB-C. With this connection, the video transfer becomes speedy.
- The Logitech capture app supports AI-enabled facial tracking. It provides precise auto-focus and smart exposure irrespective of your position.
- The webcam can be turned 90° to change into portrait mode.
- No more shaky effect in the output due to the built-in electronic image stabilization.
- The white LED lights work as live indicators.
- The OS compatibility is Mac OS 10/14 or above and Windows 10.
- It is optimized for and XSplit and open broadcaster software (OBS).
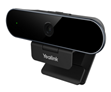
2. Yealink UVC20 Webcam:
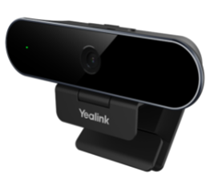 Check on Vendor Website
Are you looking for a professional webcam at a cost-effective price? You can go for this Yealink webcam. It is a full HD webcam suitable for videoconferencing, live streaming, distance education, open meetings, working remotely, and more. Its plug & play interface is convenient for diverse video conferencing platforms and apps. With the UVC20 webcam, you can access the device info, supervise usage, perform diagnoses and firmware updates. Therefore, the device saves you a lot of time and effort.
The lens cap fully protects the camera lens. For security and privacy during the conference, this lens cap helps you. Moreover, UVC20 is compatible with almost all video conferencing software. The setup process is easy and quick. Whenever you use it, you obtain premium quality audio and video with exceptional clarity.
Features:
- The 5MP glass lens provides lifelike clarity and 1080p HD video output.
- This lens is rotatable and comes with auto-focus ability.
- The built-in microphone can accurately pick up voice within 4.9 feet of distance.
- Even in dim light conditions, the Smart light optimizes the video and image outputs.
- The UVC20 allows you to focus on any subject without any manual adjustment. This is possible with its rotatable lens having auto-focus and EPTZ control capabilities.
-
NexiGo StreamCam N930E:
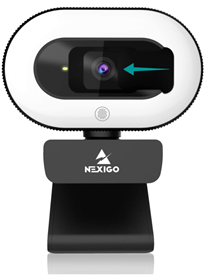 Check on Amazon
For Skype calls, Zoom meetings, online learning, streaming, video recording, conferencing, gaming, etc., you can set up this NexiGo webcam. Connect it to a PC or Mac or desktop or laptop. For proper illumination, there are 12 white LEDs available. The corresponding illumination is brighter than other webcams equipped with lights. The soft, milky white light is free from glare. During live streaming, facial enhancement technology gives you a professional look.
It is a plug & play webcam that can work with a USB 2.0 interface—no need to download additional drivers. Within 1 minute, you can set it up and start using it. The included mounting clip offers ease of mounting. It lets you set up the webcam on a desktop, laptop, monitor, PC, tripod, smart TV, and Chromebook.
Features:
- The 75° wide-angle lens can capture lifelike videos and images in 1080p resolution at 30fps.
- Built-in lens has autofocus ability to provide the optimal focus position—no need to adjust the focal length manually.
- The included noise-canceling mic decreases ambient noise. It improves the audio quality.
- The audio quality is uncompromised even in a noisy environment.
- Automatic low-light correction offers outstanding video quality even in low lighting conditions.
- The ring light provides you with 3 levels of lighting compensation. Choose any level with the touch control.
- Though the environment is dim, you can get enough brightness by fine-tuning the ring light.
- Names of software and apps it can work with are FaceTime, Zoom, Facebook, YouTube, and Twitch.
- It is optimized for open broadcaster software (OBS).
- The included privacy cover helps you during personal video conferencing sessions.
Conclusion
Logitech is currently manufacturing almost all the webcam range that is Microsoft Teams certified. Some devices from Polycom, such as Eagle Eye IV USB, are essentially a conference room system and do not strictly come under the Webcam category.
We hope to see more manufacturers offering competitive products for Microsoft Teams in the future.
We hope you like our article. Please do provide us suggestions and feedback in the comment section below.
Thanks for visiting!


 – Mirrorless Options")
")


")