Lumix FZ1000 vs Lumix FZ1000 II Bridge Cam Specifications Comparison

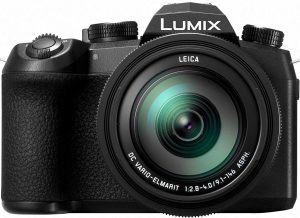
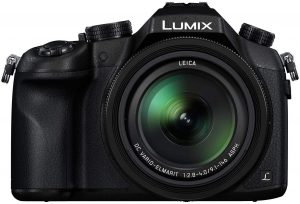
Wondering what would be the differences between the Lumix FZ1000 vs Lumix FZ1000 II since they almost look the same from the product images? Read along to find out! The photographers around the world have been witnessing launch after launch events and have found it hard to find the right camera. Panasonic has recently under the shadow of the S1, launched a new camera in the form of Lumix FZ1000 II. Yes, it is designed as the upgrade or sequel to the existing Lumix FZ1000. How does it compare with the already existing device? We will check out the two cameras in more detail.

Lumix FZ1000 II – An Overview

Check on Amazon

The FZ1000 II is designed for the photographers, video bloggers and other camera users who want to upgrade from the smartphone camera experience. When comparing the device to its predecessor, we came to know that the two cameras are almost equivalent to one another in terms of sensor size and the lens system. The massive changes are in the realm of shooting functionality and the user interface.

The Image sensor

The FZ1000 and FZ1000 II have the same sensors – 1″ 20.1 MP MOS sensor and Leica 25-400mm f/2.8-4 lens. Panasonic has stuck with the same Sony sensor because the predecessor has had the best performance in terms of the functionality and picture quality.

Post Focus Mode

This is the new functionality added to the successor. The Post Focus functionality lets you focus the image after it has been taken. We have all experienced an issue where we have shot a picture and find that the image has not been focussed well enough at the right spot. The post focus mode lets you focus on the intended subject even after you have finished shooting. This can be an excellent option for an enhanced shooting experience, especially in situations like macro photography or portraits in low-light conditions.

4K Photo Mode

Well, this has nothing to do with the 4K resolution that we use while shooting videos. The 4K Photo Mode takes multiple shots of the same subject. The camera comes with one of the best frames per second performance with 30 fps functionality. Once these multiple shots are taken, they are analyzed, and the best among them is chosen as the primary photo and saved. This feature can be one of the best options for shooting moving objects. If you are a sports photographer, you will find it quite interesting and useful.

Focus Tracking

This is a feature that is equivalent to 4K photo functionality. The difference lies in the fact that the older functionality chooses the best photo from among the multiple shots. The focus tracking feature takes various images at different focal lengths and combines them. This can help you improve the depth of field in the final image. This additional functionality in the shooting features helps you in macro photography or any other shooting modes.

User Interface (UI)

This is yet another area that has found a few improvements when compared to the Lumix FZ1000. The touch screen interface has been a welcome gesture. Given the fact that it has been one of the most common features on DSLRs and digital cameras, it should indeed make a lot of sense. The screen has received a bump in terms of the resolution. It has now been upped from 921k-dot to 1,240k. The screen tilts at a 270-degree angle and thus should be an excellent option. You can take photos from virtually any perspective.

A few other changes

Apart from the significant differences that have been outlined above, there have been a few subtle differences. A new Zoom Compose Assist feature now comes built-in along with 4K Photo and Video. Some of the best features that the camera offers you include a new minimum aperture of f/11, 5-axis Hybrid O.I.S.+, high-speed burst shooting, wi-fi, and various photo styles. The camera is now Bluetooth compatible and offers you the options of sharing your content right away to a smartphone or laptop without having to connect the devices through wired connectivity.

The Comparison Chart: Lumix FZ1000 vs Lumix FZ1000 II

Having understood the minor tweaks that Panasonic has introduced on the new Lumix FZ1000 II, it may be a good idea to compare them in a side by side comparison chart. Such a head to head comparison will help you compare the features of the two cameras at one place.
Features / particulars

Lumix FZ1000

[amazon_link asins=’B00KOUIBZW’ template=’PriceLink’ store=’foi04-20′ marketplace=’US’ link_id=’de94ccfb-5f17-4bd8-b4ee-e4f7f7569355′]

Lumix FZ1000 II

[amazon_link asins=’B07NQDGBPN’ template=’PriceLink’ store=’foi04-20′ marketplace=’US’ link_id=’4b975cdf-3030-44d8-9721-aedd2987fa2a’]

Sensor Size 1″ 20.1 MP MOS sensor 1″ 20.1 MP MOS sensor
Lens construction 25-400mm f/2.8-4 25-400mm f/2.8-4
Lens Type Leica DC Vario-Elmarit Leica DC Vario-Elmarit
Video resolution 4K at 30 fps 4K at 30 fps
Zoom functionality 16x optical zoom 16x optical zoom
Viewfinder 2,359K-dot OLED 2,360k-dot OLED
Screen size 3.0 inches 3.0 inches
Screen type and resolution LCD at 921k dots LCD at 1240k dots
The frame rate for continuous shooting 12 fps at 8 MP 30 fps at 8 MP
Touchscreen No Yes
Image stabilization Yes, HYBRID O.I.S. 5-Axis Image Stabilization Yes, HYBRID O.I.S. 5-Axis Image Stabilization
Flash Yes, built in Yes, built in
Post-focus functionality No Yes
Image auto marking feature No Yes
Phot presets Yes Yes
WiFi Yes Yes
Bluetooth No Yes
Focus Stacking No Yes
4K Photo Yes Yes
Zoom Assist No Yes
  The above comparison should provide you a useful input into the features and functionality offered by each of the two competing cameras. So, which among them should you go with? Well, the decision should be dependent upon what you own right now. If you already are a proud owner of Panasonic Lumix FZ1000, it may not be a great idea to upgrade to the new Lumix FZ1000 II. The two cameras do not differ too much, and it may ideally not be an upgrade in the real sense. However, if you are considering buying a new camera, the Lumix FZ1000 II should be one of the prime choices for your needs.

The Concluding Thoughts

The Lumix FZ1000 II brings in a few new changes to the Lumix FZ1000 launched a few years ago. However, the changes are not so massive that you can dump your FZ1000 and lay your hands on the new FZ1000 II. These are minor tweaks as we have discussed in the above comparison, and as such may not be the right upgrade. But yes, if you are buying a new camera and confused between the Lumix FZ1000 and Lumix FZ1000 II, it would be a great idea to go with the new FZ1000 II for obvious reasons.

Samsung Isocell GM1 vs IMX586 Imaging Sensor Specs Comparison

Smartphone photography has grown by better standards aided by excellent camera sensors. The megapixel count has gone through a significant upgrade over the years. Gone are the days we are satisfied with a Megapixel count of just 3 MP. Moving beyond the 12 MP or 24 MP count, we have now come to a day where we have been witnessing a whopping Megapixel count of 48 MP. Recently we have seen the launch of two excellent 48 MP sensors. We will make a comparison between the two outstanding options in this sphere – Samsung Isocell GM1 and Sony IMX586. How do they compare against one another (Isocell GM1 vs IMX586) and how are they similar to one another? Check it out in this discussion.
Related: Sony IMX519 vs. IMX486 vs. IMX386 vs. IMX586 vs. IMX377

Isocell GM1 vs. IMX486 vs. IMX386 vs. IMX586 vs. IMX377 – Comparison Table

Specification Isocell GM1    

Sony Exmor RS IMX 486


IMX386

 IMX 586  IMX377

Effective Pixels / Video 48 MP 12 MP (4032 x 3016) 12 MP (3968 x 2976) @ 4:3 9.03 MP @ 17:9 48 MP (8000 (H) × 6000 (V)) 4K(4096×2160) @ 90fps 1080p @ 240fps 720p, 480p 12.2 MP (4032 x 3024) 35 FPS @12 Bit 40 FPS @ 10 Bit  
Sensor Size 6.4 * 4.8 mm or 1/2″ 6.2 mm (1/2.9”) 6.2 mm(1/2.9”) 8.0 mm diagonal (1/2-type) 7.81 mm (1/2.3″)
Unit Cell Size 0.8 um 1.25 um 1.25 Microns 1.6 μm pixels 1.55 μm
Sensitivity 133-LSB
Sensor Saturation Signal 4500e
Video Output   MIPI C-PHY1.0 (3 trio) / D-PHY 1.2 (4 lane)
Subpixel Layout RGB RGB RGB RGB RGB (On-chip mosaic filters)
Phase Detection Autofocus Yes Yes Yes Yes Yes
Gyro Image Stabilization
Built-in DRAM Memory
Release Date October 2018 February 2018 Jul 2016 Jul 2018 April 2015
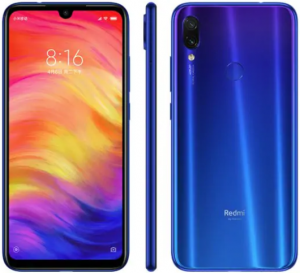
Utilizing Devices Redmi Note 7 Xiaomi Redmi Note 5 Pro Xiaomi Mi 6X

Huawei Mate 10 Pro

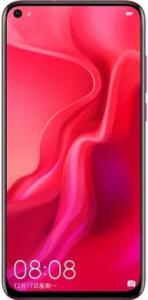
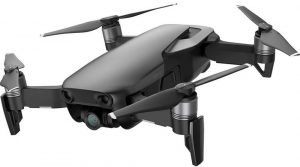
Huawei Nova 4 LG Nexus 5X Huawei Nexus 6P HTC 10 Xiaomi – Yi 4K Action Camera DJI Mavic Pro (Drone)

Samsung ISOCELL GM1 – An Overview

One of the significant performance improvement observed on the Samsung ISOCELL GM1 is the smallest pixels so far at 0.8-micrometer. This should be an excellent option in terms of the smaller camera modules. This aids in greater flexibility in improving the image quality of your smartphone cameras. The Samsung ISOCELL GM1 will offer you a 48 MP sensor. To put it in the words of Ben K. Hur, vice president of System LSI marketing at Samsung Electronics, “ Demand for ultra-small, high-resolution image sensors are growing as smartphones evolve…we are committed to driving innovation in image sensor technologies.” The sensor is based on the latest Samsung technology ISOCELL Plus. The improved pixel isolation technology from Samsung has been capable of optimizing the performance of smaller-dimension pixels. This has been helpful in the high-resolution cameras that have become one of the essential options. The new sensor from Samsung is have gone into large scale production from the fourth quarter in 2018. We expect the camera modules are coming up with the Samsung S10, and S10+ devices planned to launch next year.

Sony IMX586 – A Sneak Peek

That brings to the competitor to Samsung ISOCELL GM1 from none other than Sony. Sony has been a fierce competitor to Samsung in terms of camera modules. The Sony IMX586 is a strong competitor to the Samsung offering and has been introduced with the pixel count of, yes – what else, 48 MP. Once again, the camera module comes with the same 0.8 micrometers and has been offered to the smartphones launched from the later part of 2018. The press release has stated that the high pixel count will provide high-quality photos. And to think you would get an excellent performance even when you are using a digital zoom. The sensor comes with a Quad Bayer 2×2 pixel array. This will ensure that you have access to bright low light imagery. It will also help you shoot better videos even at night. In effect, you will be getting a high resolution 48 MP shots in the daylight or a well-lit environment. For shooting the images and videos at night, you will be shooting in a classic 12 MP standard for better performance. You have access to the 4K recording at 90 fps and 1080p at 240 fps. The specifications of the Sony IMX586 as available on the official website read –

Features

Sony IMX586

Effective Pixels 6000 x 8000
Unit cell size 0.8μm(H)×0.8μm(V)
Full frame rate 30 fps
Video recording 4K at 90 fps 1080p at 240 fps 720p at 480 fps
Functions image plane phase-difference AF, HDR imaging
Color filter array Quad Bayer array

How do the two sensors differ from one another? (Isocell GM1 vs IMX586)

As we have already been observed, both the Samsung ISOCELL GM1 vs Sony IMX586 come with the same functionality and features. However, the Sony IMX586 comes with an added advantage. The Samsung sensor offers you 48 MP resolution, but in effect – you get only 12 MP resolution. Of course, the camera module can output a 48 MP image, but it would be an extrapolated result. The Sony IMX586 indeed offers you a 48 MP resolution and delivers excellent performance in brightly lit situations. Samsung has not come forward with any specific specifications as such. We scraped through their website for the relevant information, but it only focusses on the smaller sensor size and the 48 MP resolution, but there is no further information available about other specifications. Samsung has been quite secretive with the details about the features and specifications.

The 48 MP Count – It isn’t a new technology

The story of 48 MP sensors is not exactly something new. While it has been making heads turn, it didn’t matter when Nokia launched the Nokia Pureview 808 with the 48 MP sensor and a few added advantages. The technology was way ahead of its time. Sadly enough, the tech world could not understand the importance back then. It wasn’t only the megapixel count mattered back then, but there were excellent optics and usage of Carl Optics lens for enhanced performance.

The Competition

The rivalry (or should we say healthy competition because of the presence of the sensors from both the manufacturers on the same phone – a classic example can be Redmi Y2 from Xiaomi) between Samsung and Sony has been offering excellent performance improvements for the consumers. The two new sensors are entirely identical in terms of performance. The functionality of these cameras is entirely similar. The spec sheet is almost identical in most of the aspects. In any case, except for the significant difference we outlined in the above discussion, the two sensors offer you nearly similar features and functions.

The Concluding Thoughts

That was a fair competition between the Samsung ISOCELL GM1 vs Sony IMX586. You would find that the two sensors come with most of the identical features and functions. The real test between the two competing camera module manufacturers would be evident only when the two are put to the actual performance. With the Samsung ISOCELL GM1 available on the Remi Note 7 and the Sony IMX586 coming on the new Huawei devices, we may be able to arrive at the real performance test after the consumer reviews coming up from the respective users. Have you checked the sensor performance on any of the smartphones? Do share your inputs with us.

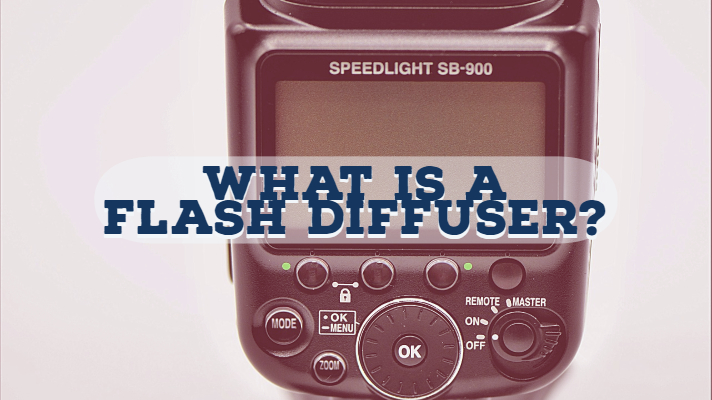
What is a Flash Diffuser? Which ones? Lightsphere Magmod or Lambency

0
Most of the entry-level DSLR cameras these days come with pop-up flash. You can even use an external flash if your lighting requirements differ for your particular shooting needs. However, flash or the light emitting from it can cause major disruptions in some of your shots. This is where you would want to make use of flash diffusers while shooting with your flash activated. What exactly is a flash diffuser and why do we need to use it? We will check out the advantages that flash diffusers bring to you and also share a few tips on how to use flash diffusers.
Also Read: Speedlite vs Strobe – Whats the Difference?

What is a Flash Diffuser?

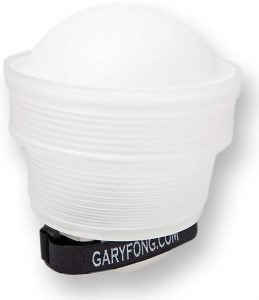
Gary Fong Collapsible Speed-Mount LightSphere
A flash diffuser is what its name suggests. It helps you diffuse the flash or rather the intensity of it. It is a type of light modifier and is generally placed on the upper part of the flash, generally on the external flash system. It is used for softening the hard light emitted by the flash. The flash emits the concentrated light, and a flash diffuser will help you create more flattering and more evenly distributed light as compared to the direct light from the flash. There are flash diffusers explicitly designed for specific conditions and scenarios.
Related: Best Flash Trigger Kit for Canon and Nikon DSLRs

Why do you need to use a Flash Diffuser?

Well, the camera flash can produce undesirable results in many cases. Some of the issues you may face include harsh shadows that lack details, colors washed out and even a few other adverse effects that make your shots unusable. This kind of lighting can result in unnatural pictures and non-flattering lighting and thus damage your shots. That is precisely why you would be advised not to use flash in certain circumstances. However, what if you are needed to shoot your images in ultra low light scenarios? What if there is little or no light available where you get access to no natural or artificial light of any nature? Of course, the modern cameras tend to offer you excellent low light photography and even night photography with the built-in flash. However, in some situations, an external flash can be an issue and create the undesirable effects we just mentioned. That is precisely where a flash diffuser can come quite handy enough and address your concerns to a great extent. The diffuser will help you take care of the light conditions and soften it to meet your requirements.

How does the Flash Diffuser work?

Most conventional flash diffusers available are made of plastic and come a rectangular snap on a dome box type construction. The material used usually is white and has a semi-transparent build. This type of diffuser can create a softened light effect and remove the harshness of the flash. However, the actual flash diffusers you would be opting for will be dependent upon the exact requirements you may have and are available in multiple shapes and sizes. You need to analyze your exact requirements before choosing the flash diffuser you want to buy. Some professional photographers even consider opting for some “Do It Yourself” or DIY options as well. White coffee filters and plastic food containers can also do the trick if you are aware of how to do it.
Related: Best budget Speedlight Compatible Flash for Canon DSLRs

How to use a Flash Diffuser?

The flashes – external or built-in – emit a sharp and unidirectional burst of light. It will illuminate whatever it is pointed at. A Flash Diffuser can help you spread the cone-shaped light rays and thereby soften it for enhanced performance. This will help you illuminate more part of the scene that you are photographing and thus produce an even light effect that will help you do away the shadows and other undesirable effects of the flashlight. However, if you are planning to use a flash diffuser with a horseshoe mount flash, it may not be easy to find the exact effects you are trying to get with your shots. Of course, the diffuser will help you diffuse the light and make it less concentrated, but still, it will still be harsh and pointed in one direction. If you want to use a flash diffuser, it should be practical to go with the external flash unit. One of the best results you would be able to achieve would be to try different angles and directions for the light. This will help get a better effect. Bouncing the light from the flash onto the ceiling or a wall can produce a few good results.

A Few Tips for using a Flash Diffuser

A plastic flash diffuser can be one of the best alternatives than opting for other expensive options. These diffusers can help you achieve the results in a few regular days to day scenarios where you want to use the flash diffuser and avoid the issues you may be facing with the harsh light emitted from the flash. One of the other options you can check out would be to use a Flash Light Shaper. It is also referred to as Flash Bounce. This accessory lets you bounce the light from the ceiling or the wall. This method can be used for converting any of the surfaces into a diffused light source. This can also provide a professional look to your business if you are opting for photography as a business. You can also get creative with your flash diffusers and provide a new look and appearance to your photography. You will be limited only by your creativity and come up with as many multiple ideas as would be feasible. One such example will involve using colored flash diffusers. This can help you achieve a dramatic appearance to your shots.

The Concluding Thoughts

Well, if you are looking for gathering the information on how diffusers can be helpful and how are they used for improving the light performance of your photographs, we assume we have been able to provide enough information on the concept. Of course, the flash diffusers can help you achieve the best results for enhanced performance in terms of your flash photography, but the study of these options can be a separate subject and needs to be learned professionally. However, this article should be one of the best alternatives to understand the basic concepts of flash diffusers and choosing the right option for your requirements.

Speedlite vs Strobe – Whats the Difference? A Quick Spec Comparison

0
How to choose Speedlite vs Strobe in a studio setup? We help you decide! Photography is often referred to as “Painting with lights.” When it comes to photography, one of the major requirements you are expected to take attention of is to arrange proper lighting, especially in studio settings where you are entirely in control. You need to master the light, and you use multiple options for the purpose. Two most widely used options for regulating lights are Strobes and Speed lights. How do they differ from one another and which among them would be a better option to go with. Let’s find out!
Also Read: Best Flash Trigger Kit for Canon and Nikon DSLRs

What is Speedlight?

A Speedlight is a portable flash that can either be flashed on the hot shoe of a camera or fired separately on the cold shoe (passively) through wireless radio communication. They are also referred to as Flashgun. A Speedlight is quite portable and affordable. They usually run on standard AA batteries and thus can be carried easily in your camera bag without the need for a separate, dedicated power source. It is an add-on flash in additions to the built-in flash that your camera comes with. While the high-end Speedlights have the wireless compatibility built-in and offer you to use them as off-camera flash or OFC, however, if you are using the affordable Speedlights, you will need to have a separate transmitter for use with your Speedlight. These Speedlights emit a short burst of light, and you should be able to control it through specialized lighting modifiers. Speed lights frequently make use of TTL or the Through the Lens functionality. This will be helpful as an auto mode for flash. You can also have Speedlights with a tilting head that will help bounce the flashlight for providing a softer light effect.
Also Read: Best budget Speedlight Compatible Flash for Canon DSLRs

What is Strobe?

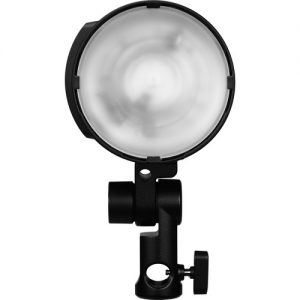
A Strobe is a short form for the Studio Strobe. The term Strobe used in the regular context means just the flash. We will be referring the Studio Strobes in the context of a comparison with the Speedlights in this post. A Studio Strobe is a more powerful source of light and works more effectively than the Speed light. It works on a dedicated AC power source and needs a particular arrangement, typically not easily movable. You will either need to have access to a battery pack or need to power it into a wall outlet. They offer you faster recycle times. This will make them the best ones to use when you cannot wait for the flash to get ready for the next shot. Studio Strobes are the ideal options for use in a studio or any indoor environment. Strobe photography helps you go with many options for modification of the light. A strobe comes with a built-in modeling light option. This can help you to get a continuous light and decide where you would want to place the light for the effect that you are looking for. Since the Strobes provides more extensive options for the lighting in your shots, they cannot be fixed on the camera directly. That would mean you will need to depend upon other possibilities to make the strobe and camera communicate with each other. Most of the strobe lights come with the option to connect it wirelessly with the camera. You can even check the possibilities of attaching the strobe with the camera through a wired connectivity option. Some strobes are designed to catch the flash of light and flash themselves. This can help make your camera flash trigger the strobe light work remotely.

How is a Strobe different from a Speedlight? Speedlite vs Strobe

In terms of the functionality, both the studio strobe and Speedlights have a similar purpose. However, the way they work and the scenarios that they work with are different. That would mean there is no specific area that each lighting type will work for each of the shots. The studio strobe lights are more powerful than the speed lights. However, that should not mean you will be using the complete power of a strobe light in your photography. If you come to that – you will not even use a speed light to its fullest capability. There are areas where a strobe light may be necessary. A studio strobe light can easily overpower sunlight or brightly lit conditions, whereas a Speedlight option will not be able to achieve it. Moreover, the studio strobe lights will be quite a good option if you are looking to continuous and faster flash recycle times. Since they have a larger battery ( and work on the AC power whenever possible), they tend to offer you speedier flash recycles. A Speedlight will need a gap of a few seconds between two consecutive flashes. However, if you are opting for a high-end Speedlight, you will find the same functionality on both studio strobes and Speedlights. If you are going on an outdoor shoot or event shooting in the open, you may not be able to use studio strobes. They need more power options and may not be portable. Speedlights are quite compact and thus will offer you an excellent choice for portability. This can be beneficial when your photography schedule needs you to move around the venue quite frequently. The Speedlights are more flexible when you compare them to the studio strobe lights. You can even use it as on-camera flash so that you do not also need to carry your Speedlight separately. There is one more difference between the studio strobe light and Speedlights. The power of these two light sources is not measured through the same units. For a Speedlight, the power consumption is measured in terms of GN or Guide Number. The Strobes are measured in terms of Watt Seconds or W/s.

Which one Should you go For?

Well, that would be dependent on multiple factors. Like we have already found out from the discussion above, it should be clear enough that there is an apparent overlap between the use of a studio strobe and a Speedlight. The exact choice will be dependent upon the exact requirements you want to photograph. If you are looking for portability as a significant advantage, you may need to think of Speedlights as one of the best options to go with. They do not require additional power requirements as in the case of studio strobes. However, what if your requirements are not only limited to portability, but there are other requirements as well? If your shooting location and the shooting schedule needs you to overpower the sun, studio strobes should be the only option you can go with. A Speedlight, no matter how high end, will not be able to achieve this requirement. Are you planning to shoot moving objects? In those circumstances, a strobe light is once again a winner and the best option. A moving object requires a faster flash recycle time. Since a Speedlight will not be able to provide you with the option, you will find the studio strobes an excellent choice for the purpose. Another important feature you need to give a thought to would be your budget. Of course, if you want to get the best, you would not be worrying about the price. Even then, if you are not into the kind of photography that a strobe light will demand, you may not need to spend money unnecessarily on them. The strobe lights are expensive and also come with heavy paraphernalia. Go for them only if they are required.

The Concluding Thoughts

The essence of the discussion so far has been able to provide a considerably good deal of information on Speedlights and studio strobes. The strobe lights offer you lighter, give a faster flash recycle time and a modeling light built within for enhanced performance. The Speedlights provide you with the advantages in the form of portability, versatility and offers you the same photographic effects as on the studio strobes. If you are into traditional photography and are not using a studio environment or any such professional level photography as yet, you can invest in a good quality Speedlight kit. However, if you have been working in a studio or into sports photography (or for that matter, any photography that involves moving objects), it would be advisable to go with the studio strobes. Ultimately, the final decision should rest on you depending upon your budget, exact requirements and the kind of photography you are into. Choose the best option you want to go with and share your reasons for opting for it with us the comments section here.

Sony A6300 vs Sony A6400 – Mirrorless Camera Compare Specifications

0
If you are searching for a Sony A6300 vs Sony A6400 camera comparison, chances are high that you are a mirrorless camera fan. Sony, one of the pioneer manufacturers of mirrorless cameras, has recently announced the launch of a new iterative update for their entry-level mirrorless camera – the Sony A6400. It is the latest addition to the camera series with APS-C mirrorless genre already available in the form of A6000, A6300, and A6500. How do the Sony A6300 and Sony A6400 compare with one another? Let us check out the two and find the differences between the two competing siblings.
Related: Best In Body Mirrorless Cameras With Built-in Image Stabilization

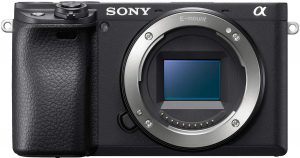
The Sony A6400 – What special features does it bring along?
Check on Amazon

Well, one of the most valuable additions that the Sony A6400 come with is the LCD touchscreen that it offers you along with a 180-degree rotation. This can be one of the excellent features that the camera packs in, and it should definitely be a feature most useful for those YouTubers who can shoot a video standing in front of the camera and yet check how does the video take shape. The new Eye Autofocus feature should be one of the features you would indeed love. This feature helps you focus on the eye of the subject for an enhanced image. The feature works both with humans and animals alike. There is also an HLG picture profile to assist you to shoot and stream the HDR content on the compatible televisions.

The Sony A6300 vs Sony A6400 – The differences

We will not go into the complete details of how the two cameras are made and what features do they offer individually. Instead, we will focus on the differences that these two cameras come with. That would perhaps help you make the right choice between the two offerings from Sony.

Autofocus

The A6400, as we have already mentioned, offers you a unique concept in terms of the focusing technology used in the camera. The Eye autofocus is a unique feature, and we expect it to be a standard feature in the future devices from the manufacturer. To begin with, the Sony A6400 has a faster autofocus functionality. It can lock into focus in just 0.02 sec, while the Sony A6300 is a little slower than the A6400 to offer you an autofocus speed of around 0.05 sec. If you are watching the phase detection points, both the camera models do have the same number of points i.e., 425. However, the Sony A6300 comes with a lower number of contrast detection points which read 169 compared to 425 on the A6400. The Sony A6400 will offer you a new algorithm and provides you with a faster and efficient motion tracking compatibility. The minimum sensitivity in low light is -2V in case of A6400 compared to -1V on the Sony A6300. The A6300 shares the Eye Autofocus along with the Sony A6400, but the A6400 does not need a custom button as in the case of the A6300 model.

In Body Stabilisation

Well, both Sony A6300 and A6400 do not come with any in body stabilization. That would make both of them similar in terms of the features of stabilization. On both the cameras, you will need to be reliant on the specific lenses to provide optical stabilization.

The LCD screen

Well, this is again an area where the Sony A6400 takes the lead over the A6300. The LCD screen on the A6300 is not touch enabled and comes with a standard up and down movement and no tilting mechanism beyond that. The Sony A6400, on the other hand, is equipped with enhanced touch functionalities. Moreover, you also have access to the 180-degree screen rotation feature making it one of the preferred options for the selfies and video blogging tasks. Who said selfies are possible only on a smartphone camera? The feature is now available on the conventional camera as well, thanks to the innovative thinking by Sony. The LCD features remain the same on both the models – you get a 3-inch screen with 921k dots resolution.

Continuous Shooting performance

Both the cameras are capable of shooting at 11 fps with the mechanical shutter. However, if you are shooting with an electronic shutter, the A6400 provides you up to 8 fps performance while the A6300 offers you the maximum performance at 3 fps. When it comes to the buffer depth, the Sony A6400 is capable of shooting 99 JPG files and 46 RAW frames at full speed. For the A6300, these numbers are quite low in comparison at just 44 and 23 respectively.

ISO Sensitivity

This is yet another area that the Sony A6300 and A6400 differ from one another. Both the cameras come with the 24.2MP APS-C Exmor CMOS sensor and thus share the same features. However, the A6300 does not come with the LSI chip as the A6400. This results in offering an increased processing capability on the A6400 in contrast to the A6300. Having said that, the ISO range offered on the Sony A6300 is 100 to 25600. If you are looking for extended values, they reach up to 51200. In the case of the A6400, you have a slightly enhanced range up to 32000 that can be extended up to 102400.

Video Compatibilities

Both A6300 and A6400 come with the 4K recording capabilities up to 30 fps. The recording works the entire width of the sensor and offers a full pixel readout. For the 1080p recording, you can have both them record at 120 fps. Slow motion videos on the Sony A6300 can be recorded directly on the A6300. For Sony A6400, you can go with the Quick and Slow functionality with the frame rates ranging from 1 fps to 120 fps as per your preferences. The inclusion of SLog2, SLog3, and HLG modes on the Sony A6400 makes it an exceptional choice.

Time lapse video recording

The Sony A6300 lets you record Time-lapse videos using the PlayMemories Camera Apps. These apps offer you additional features as well, but sadly enough – these features come with a cost. These apps are not available for free. The Sony A6400 comes with the time lapse functions in camera, and the feature is available built in by default.

The Comparison Chart: Sony A6300 vs Sony A6400

Having understood the differences between the two cameras in the above description, how about checking out the features that the two cameras offer in a head to head comparison? In fact, the comparison chart in a side by side comparison will help you choose the perfect camera based on the exact features you are looking for.
Features / Particulars

Sony A6300

Sony A6400

Camera Format Mirrorless camera Mirrorless camera
Mounts supported Sony E Mount Sony E Mount
Sensor 24 MP APS-C sensor 24 MP APS-C sensor
Weather sealing Yes No
Sensor type CMOS CMOS
Image resolution 6000 x 4000 pixels 6000 x 4000 pixels
Autofocus points 425 phase detection/169 contrast detection 425/425 phase detection and contrast detection
Continuous shooting speed 11 fps 11 fps (Hi+) 8 fps (Hi continuous mode)
Image processor BIONZ X BIONZ X
Maximum Shutter speed 1/4000s 1/4000s
Connectivity options USB 2.0, micro HDMI, WiFi, and NFC USB 2.0, micro HDMI, WiFi, and NFC, Bluetooth
Storage media MS and SDXC cards MS and SDXC cards
Video resolution 4K 4K
ISO Range 100 – 25600 Extended 51200 100 to 32000 Extended 102400
Image stabilization Not available Not available
Viewfinder 3 inches – 921k dots 3 inches – 921k dots
Viewfinder type Touchscreen Touchscreen
Screen articulation Standard up and down movement 180-degree rotation
Battery backup 400 shots per single charge 410 shots per single charge
Physical dimensions 120 x 67 x 49 mm 120 x 67 x 50 mm
Weight 404 grams 403 grams
  The comparison, as shown above, should be enough to provide your input about the best choice between the two cameras. From the outline of the above comparison, it should be clear enough that both A6300 and A6400 offer you almost similar features with the latter taking the lead in a few features.

How do they compare with one another? Sony A6300 vs Sony A6400?

What conclusion can we draw based on those comparisons? So, which among the Sony A6400 and Sony a6300 should you opt for? Here is the summary of the review comparison between the two capable mirrorless cameras coming from the house of Sony. Advantages offered by the Sony A6400 can be summarised as
  • It comes with a few numbers of buttons. Touch sensitive screen makes the tasks easier.
  • The camera is best suited for the selfies on a conventional camera.
  • The camera lets you transfer your files seamlessly over Bluetooth connectivity
What are the advantages that the Sony A6300 offers you? Here are the features
  • The camera comes with weather sealing in sharp contrast to the A6400
  • The camera is less expensive than the A6400
You would find the Sony A6400 better equipped for enhanced performance. Not that the Sony A6300 lacks in many features, but the comparisons offered above should provide you a complete summary of the two competing siblings and offer you a good option to choose the best among the two. Go through the comparison above and choose the best camera that meets your exact needs. Do not forget sharing your experiences and opinions of your choice and the reasons thereof. Also Read:

Best Nikkor Z Lenses & Primes For NIKON Z6 VS Z7 MIRRORLESS

0
Are you looking for the best Nikkor Z Lenses? Nikon’s Z series cameras have been a significant changeover for the company’s strategy concerning full-frame mirrorless cameras. One of the significant changes that have come across would be the Z Mount introduced with the new cameras. So, are there any compatible lenses for the Z mount? Let us check out the options currently available for the Z Lenses in this post.
Related: Best Budget Nikon F to Z Mount Adapters

What is Nikkor Z Lens?

Well, Nikon changed one of the most common aspects of their cameras – the mounting system for the lenses which have been used for over 60 years, the Nikon F mount has now given way to the Nikon Z mount. The Nikon Z mount is specially created to work with the new Z series cameras – Nikon Z6 and Z7. The new mount has been designed for improving the performance of image quality and focusses on reliability and performance. Of course, there are not many lenses currently available that will comply with the new Z mount. However, Nikon has released a few great options in the form of the Nikkor Z Lenses. We will check them out one by one.
Also Read: Nikon Z6 vs Z7 Mirrorless

Best Nikkor Z Lenses

As of now, Nikon has announced three lenses compatible with the Nikon Z mount. Before you may get confused with the concept of Z mount and the lenses thereof, here is a little background information that may prove to help understand them. Nikon will do away all the nomenclatures currently in use and stick to only one in the form of S. All the lenses that have been launched so far and the subsequent launches in the year ahead will come with the suffix S to indicate that they belong to the new generation of the mount. Almost all the lenses under the Nikkor Z category will come with nanocrystal coating and offer you freedom from glare and reflection issues to a significant extent. The glasses have also been designed to make use of the new stepping motor and thus let you experience the best in class autofocus functionality that tends to be noiseless.
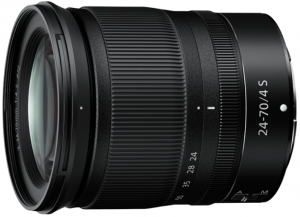
Nikon Z 24-70 F4 S

Check on Amazon

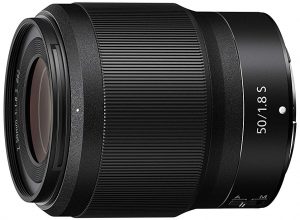
Nikon Nikkor Z 50mm F1.8 S

Check on Amazon

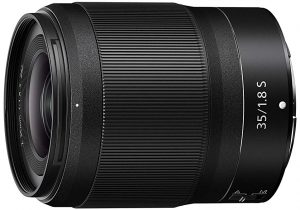
Nikon Nikkor Z 35mm F1.8 S

Check on Amazon

Nikon Nikkor 58mm F0.95 Noct

Check on Amazon

Nikon Nikkor Z 14-30mm F4 S

Check on Amazon

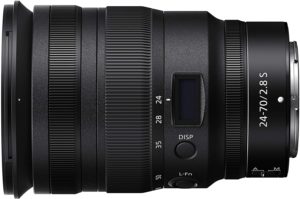
Nikon Nikkor Z 24-70 F2.8 S

Check on Amazon

Nikon Nikkor Z 14-30mm F4 S

Check on Amazon

Nikon Nikkor Z 24-70 F2.8 S

Check on Amazon

Nikkor Z 24-70 F4 S

Check on Amazon

This forms part of the standard lens kit that comes with the Nikon Z6 and Z7 cameras. The lens is lightweight and comes with a buttonless retractable design. The constant aperture lens is made of 14 elements in 11 groups. In addition to the nano-coating we just mentioned, you will also find the fluorine coating that should make it easier for cleaning the moisture and fingerprints. While the autofocus functionality is offered through the stepping motor, the manual focus option is also available. You can also make use of the control ring to allow the control over aperture or for exposure compensation depending upon your exact needs. The features that the lens offers include
  • Lightweight, but a well-made design
  • A minimum focus distance of 30 cm
  • Filter thread value of 72 mm
  • Weight – 500 grams

Nikkor Z 50mm F1.8 S

Check on Amazon

It is one of the standard prime lenses and one of the best from Nikon for the Z mount. The company claims that the lens is one of the best with virtually zero aberrations. It comes with a nine-blade design and is made of 12 elements in 9 groups. This Nikkor Z lens also comes with the nano-coating along with the fluorine coating for enhanced performance. The autofocus system seems in tune with the other non-Z mount Nikkor lenses we have come to find. The lens offers you a minimum focus distance of 40 cm. One of the best additions to the nifty fifty lenses, it comes with the following features –
  • Weight – 415 grams
  • Minimum aperture – f/16
  • Maximum aperture – f/1.8
  • Nine-blade construction.

Nikkor Z 35mm F1.8 S

Check on Amazon

The medium prime wide lens, the Nikkor Z 35mm F1.8 S, is almost similar to the 50 mm lens we just checked out. It is made from 11 elements in 9 groups – This lens is an excellent option for sharper photography. The optical construction of the lens has a nano-coating and fluorine coating for the apparent benefits that we have already covered. The minimum focus distance offered by the glass is 25 cm. Featuring a nine-blade aperture, it has the same 62 mm filter thread. This is the lightest lens among the Nikkor Z lenses launched so far. The bokeh effects are impressive enough. Some of the features worth mentioning:
  • Weight – 370 grams
  • Diaphragm – nine rounded blades
  • Minimum aperture – f/16
  • Maximum Aperture – f/1.8

Nikkor 58mm F0.95 Noct

Check on Amazon

The lens has not yet been launched and is likely to make its appearance in early 2019. As per the company updates, the lens will be designed as the best lens for excellent rendering performance. It has been stated to be one of the best options for transitioning between the in focus and out of focus areas. The lens is also expected to come with a new ARNEO coating for the best anti-reflective performance. The lens will also offer an LCD panel for displaying aperture, depth-of-field, and focal length.

Nikkor Z 14-30mm F4 S

Check on Amazon

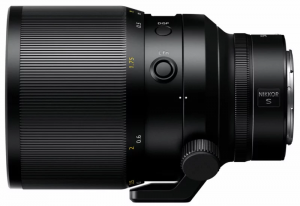
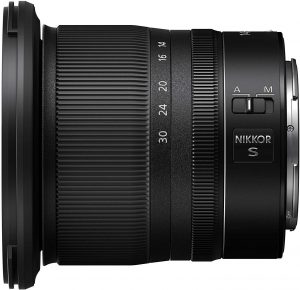
One of the prominent wide-angle zoom lens, the Nikkor Z 14-30mm F4 S is highly compact and portable in every aspect. It offers you a constant aperture for better results. The lens is constructed with 14 elements in 12 groups, and four of them are extra-low dispersion glass. Four other elements have aspherical surfaces. The lens has a flat front and thus is capable of handling a standard 82 mm screw-in filters. You also have access to a quiet stepping motor and an internal focusing system. The minimum focus distance reads 28 cm. The lens also has the option to reduce the focus of breathing and its effects.

Nikkor Z 24-70 F2.8 S

Check on Amazon

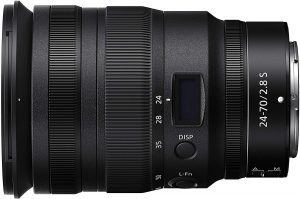
The lens comes with a standard zoom performance. This has been considered as the faster cousin of the Nikkor Z 24-70 mm F 4S. The lens is supposed to be the best option for use with the professional and dedicated professional enthusiasts. It can be the right choice for those looking for a restricted depth of filed. The lens construction is made of 17 elements in 15 groups. This includes two ED low dispersion elements and four aspherical elements. The focusing is internal, and this will be helpful enough in assuring that the lens does not change the length when it is focussing. You also have access to a weather sealing and also offers you access to a small LED screen.

<Update> Best Nikkor Z Lenses:

Nikkor Z 14-30mm F4 S

Check on Amazon

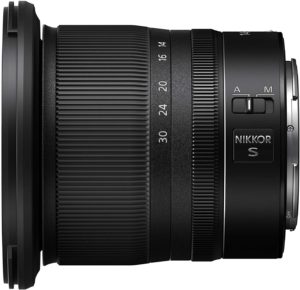
One of the prominent wide-angle zoom lens, the Nikkor Z 14-30mm F4 S is highly compact and portable in every aspect. It offers you a constant aperture for better results. The lens is constructed with 14 elements in 12 groups, and four of them are extra-low dispersion glass. Four other parts have aspherical surfaces. The lens has a flat front and thus is capable of handling a standard 82 mm screw-in filters. You also have access to a quiet stepping motor and an internal focusing system. The minimum focus distance reads 28 cm. The lens also has the option to reduce the focus of breathing and its effects.

Nikkor Z 24-70 F2.8 S

Check on Amazon

The lens comes with a standard zoom performance. This has been considered as the faster cousin of the Nikkor Z 24-70 mm F 4S. The lens is supposed to be the best option for use with the professional and dedicated professional enthusiasts. It can be the right choice for those looking for a restricted depth of filed. The lens construction is made of 17 elements in 15 groups. This includes two ED low dispersion elements and four aspherical elements. The focusing is internal, and this will be helpful enough in assuring that lens does not change the length when it is targeting. You also have access to a weather sealing and also offers you access to a small LED screen.

How do Nikkor Z Lenses differ from the Nikkor Z Lenses?

There are a few unique features that make the Z lenses an excellent option for your photography requirements. Some of the subtle options that the glasses offer you can be summed up as
  • The Z lenses come with a stepping motor. This will help you focus through the electrical means and thus provide access to silent autofocus.
  • The Z lenses have an 11 point contact functionality as compared to the 8 point contact observed on the traditional glasses. This will translate into an improved shooting experience.
  • Using and managing the buttons and aperture controls would be better and smoother on the Z lenses.

Any more Nikkor Z Lenses?

Well, Nikon has a streamlined roadmap planned for the Nikkor Z lenses. The scheduled launch of the lenses is spread over three years. Initially, Nikon has already started with the launch of three lenses so far. Here is the roadmap for the Nikkor Z lenses going forward –

Lenses Lined for 2019

Lenses Planned for 2020

There are further plans that run through to 2021, but Nikon has not yet revealed them as yet.

The Concluding Thoughts

That was the list of the currently available Nikkor Z Prime lenses so far. However, if you find the number of lenses presently available is not enough, you may opt for the Nikon FTZ adapter that lets you use any of your existing lenses with the F mount with your new Z series cameras. We will keep updating the post as and when we find new launches for the Nikkor Z lenses. Meanwhile, you may keep referring to the roadmap cited above and share with us whenever you notice any of the new lenses are launched.

Best Budget Nikon F to Z Mount Adapters (FTZ) For Mirrorless Cameras

Already invested into the Nikon ecosystem? Looking for cheap Nikon F to Z Mount Adapters? If yes, then you have landed in the right spot! The new Nikon Z7 and Z6 created a massive interest in the hearts and minds of the photography enthusiasts. However, one of the huge concerns that they bought up was the focus on the new lens mount system. The new Z mount has created havoc and made the photographers who have opted for the new cameras search for the compatible lenses. However, what if you already have a good collection of lenses and want to use them with your new Nikon Z mirrorless cameras? Nikon understands this concern, and that is precisely why the options of using an FTZ mount so that you can use the F mount lenses with your new shining Z6 or Z7 easily.
Related: List of Canon EOS R Adapters

What advantages does the Nikon Z provide?

Those of us who have got used to the Nikon F mounts have been confused about the need for a new mount. This has made most of them postpone their decision of buying the new cameras until there is a considerable number of Z mount lenses. Some of us are also worried about the usability of the good old collection of lenses that we already have with us. Why was the new Z mount system introduced and what advantages does it come with? If those are the queries even you have, these points may clear your doubts. To begin with, the Nikon Z mount is much larger than the traditional Nikon F mount. The F mount has an inner diameter of 47 mm, while the Z counterpart comes with a whopping inside diameter of 55 mm. That would perhaps make it the most substantial full frame mount we have across manufacturers. The larger angle of incidence will help you design the high-performance lenses easily. Besides, the mount has been so designed that it can adapt to any of the lens adapters being manufactured by the third party providers. The system should suit even the other mirrorless systems. The last, but not the least advantage is the Z mount lets you bind the lens more closely to the camera body, thanks to the four claws now, instead of the previous three found on the FX mount and DX mount systems.

Best Nikon F to Z Mount adapters

Well, Nikon has opened the doors for the third party developers and manufacturers to come up with their adapters for the Nikon Z mount. Of course, we may not be able to find many of the options as of now, but it can be too early to rule out the possibilities. Let us check out the best options currently available from that perspective.

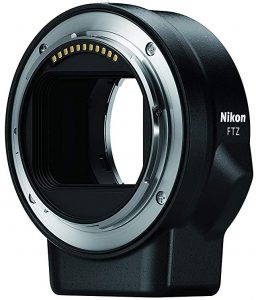
1. Nikon FTZ Mount adapter

Check on Amazon

The first option comes from the house of Nikon itself. Yes, Nikon does not want till the third party operators begin launching their adapters and has come up with its solution. The Nikon FTZ Mount adapter is the best Z mount adapter you can go with for obvious reasons. The features that will make it the main choice can be summarised as follows:
  • The adapter is precisely engineered for using the Nikon F mount lenses on the Z series cameras.
  • The adapter is compatible with more than 360 F mount lenses from Nikon.
  • While the lenses attached will retain their features, they will gain additional benefits in the form of in-camera VR, Hybrid AF*, silent shooting, and Focus Peaking.
  • The mount is manufactured with magnesium alloy and offers you weather sealed performance.
Against:
  • High Price
If you find it interesting, you can check it out at this link o Amazon.

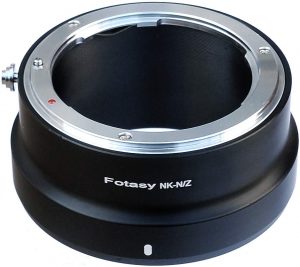
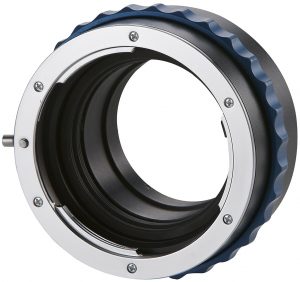
2. Fotasy Nikon Lens to Nikon Z Mount

Check on Amazon

This is one of the third party Z mount options we were mentioning a few moments before. The mount adapter is designed to suit almost all the Nikon F lenses to your Nikon Z mirrorless camera. You need not shim or collimate the lens to suit the adapter. Some of the features that the adapter offers you can be summarised as
  • It can be used with all Nikon F lenses. The adapter supports Ai, non-AI, and AIS lenses.
  • The finest and precise finishing will help you fit and remove the adapter with ease as it suits your needs.
  • It provides you extreme protection with the built-in hood
  • In addition to the Nikon Z series DSLR cameras, it can also be used with the other mirrorless cameras as well.
If those features impress you, it may be a good idea to know more about the adapter here from Amazon.

3. Novoflex Adapter Nikon F-lenses to Nikon Z-Mount

Check on Amazon

Coming from Novoflex, a company known for the best adapters for a wide variety of camera mounts and lenses, the Novoflex adapter for Nikon F to Z mount lives up to the expectations. The precision based design fits the lenses and the Z mount precisely the way you expect it to. Some of the features worthy of mentioning can be
  • The lenses you connect to the camera can be used with infinity focus.
  • You can use the exposure metering in a manual mode or through aperture priority mode
  • The mount adapter comes with the exact compensation for the flange focal length.
In case you are interested, you will need to check out the lens mount adapter from the official Novoflex and Amazon sites at this link.

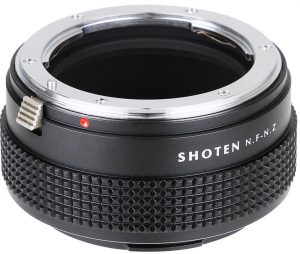
4. SHOTEN adapter for NIKON AUTO AIS AI F mount lens to Nikon Z mount

Check on Amazon

The Shoten NF – NZ adapters are exclusively sold on eBay and not available anywhere else. While they have several lens mount adapters for the Nikon Z mount, we have chosen the product as our focus is on the F to Z adapter compatibility. Some features that the adapter packs in can be listed as
  • It offers you a high-quality performance with a good build quality
  • The lens adapter is made of brass and aluminum and provides you a durable functionality.
  • The compact design should ideally make it one of the preferred choices.
  • The internals has matt finish painting and thus reduces the internal reflection to a greater extent.
If you want to give them a try, you may check them out here.

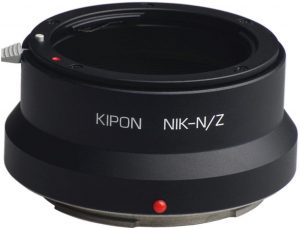
5.  Kipon Nikon F Mount Lens to Nikon Z Mount Camera Adapter


Check on Amazon

After Novoflex and Shoten, Kiplon is perhaps the next best options for the mount adapters for any cameras. Having launched mount adapters for the other mounts, they have now released a series of Z mount adapters. The NF – NZ adapter will help you mount the older F mount lenses easily onto the Nikon Z series cameras. Some salient features worthy of mentioning can be
  • Only manual focus will be available while shooting as the mount does not come with any electrical components.
  • The adapter is manufactured using the High-quality aviation aluminum
  • It features an excellent solid coupling while fitting it with the lens.
  • The adapter offers a nice infinity focussing with ease.
The Kiplon range of mount adapters is exclusively available on Adorama. You can find the F to Z mount adapter for Nikon Z series cameras at this link.

The Concluding Thoughts

Well, the Z series cameras from Nikon are a new breed as of now and finding the perfect Nikon Z mount adapters is not that easy. Moreover, we found that a few of them are not available on the known E-commerce sites like Amazon. We have featured the best options we could scrape through while surfing for the best FTZ mount adapters. As things stand as of now, opting for the Nikon FTZ mount adapter should be a great option as it comes straight from Nikon and should offer you better compatibility with both the Z mount on your camera and the Nikon F lenses you are going to use with them. Have you used any of these mounts for your older F mount lenses? Do share your experiences with those adapters so that our readers get hands-on details. You may also share other adapters we have not featured here, but you have found interesting enough.

Fujifilm Instax Mini 9 vs 25 Polaroid Cameras Specifications Comparison

Still a Polaroid Camera fan? If yes, then check out our Fujifilm Instax mini 9 vs 25 comparisons before buying one! Of course, there are several camera options when you set out to search for a good Instant-camera for your hobbies. The DSLRs and such high-end options may be the best tones for the professionals out there, but for the hobbyists like us, the instant film cameras can be one of the excellent options by every standard and nostalgic. The cameras are best suited for the easy shoot options and the instant printing that we have always wanted to show off on the social media profiles. If you are looking for the best instant film cameras, the Fujifilm Instax Mini 9 and Fujifilm Mini 25 are the two viable options to try out for the best results. How do these two cameras compare between themselves? We will check out the functionality in finer detail.
Also Read: Best DSLRs with HDR Built-In

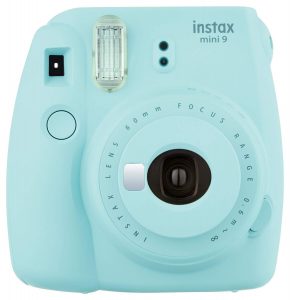
Fujifilm Instax Mini 9 – An Introduction

Check on Amazon

Well, Fujifilm focusses on making the instant camera a perfect choice in almost every standard. You need to buy the instant film separately for the needs you may have. Though it comes with an entire plastic build, it has a significant degree of professional design. The camera provides you access to the instant film sheets of 62 x 46 cm. What makes it even more interesting is it will offer you the same additional functionality that you may have come to expect from the Polaroid camera. You also have access to personalization of your photos with messages and drawings. It has a two element lens with the fixed shutter speed of 1/60th of a second. The camera has an always-on flash that flashes irrespective of the light conditions. You should be able to shoot close enough to the subject  – as close as one foot. You don’t have any display to judge the quality of the image as on a digital camera. You will get the print on the sheet, and that is all about the quality. When it comes to the performance, you will find it easy to handle for one-handed use. However, positioning the image can be an issue as the viewfinder is to the left and may need some practice to get used to. Outdoor shoots may get a little overexposed if you are taking them in the daylight. The shots in the indoor atmosphere come out well enough. If you are shooting in low light, make sure you are shooting. It may be a good idea to use the ‘Hi’ key mode for better effects. We would not advise using it for close up shots as you may find a little overexposure.

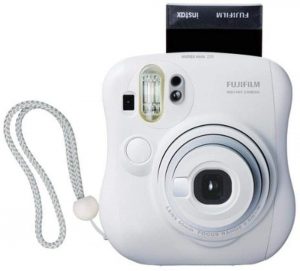
Fujifilm Mini 25 instant camera – What it is?

Check on Amazon

Another Polaroid camera that offers you features almost equivalent to the Instax Mini 9. The camera is more into automatic mode when compared to the previous versions of the devices. The camera does offer an auto exposure mode for the shooting ease, but if you are looking for the additional control over the functionality, you can do it through the digital control screen. The camera is not heavy. It is quite light and has an excellent curvy design to make it more good looking. The camera can shoot images sized 2.13″ x 3.4″. The functionality is quite excellent, and even the kids can take their turn to shoot the photos. It is equipped with a high-quality Fujinon lens. The exposure is easy and straightforward enough with the auto built-in intelligent flash. The lens is motorized with three positions collapsible design.

How do these two compare with one Another?

Having understood a little enough detail about either of the cameras, let us now check out the cameras in a side by side comparison. This should be helpful for you if you are looking to clearly understand the difference between the two options from Fujifilm and choose the one that best meets your requirements.
Features / Particulars

Fujifilm Instax Mini 9

Fujifilm Mini 25

Type of camera Instant photos  camera Instant photos  camera
Battery Type Standard AA battery Rechargeable Li-on battery
Exposure Modes Complete manual Automatic Mode, Program Mode
Exposure Lock Not available Not available
Weight 307 grams 275 grams
Physical Dimensions 118.3 x 116 x 68.2 mm 112 x 121 x 50.5 mm
Weather sealing No No
Scene Modes Indoor and self-portrait Self-portrait
White balance modes Cloud, Sunny Auto
Iris control Yes No
Warranty Two years One year
Lens type Prime Zoom (3 Positions)
Viewfinder Yes, available – Optical type Yes, available – Optical type
Brightness adjustment Yes, through levels Yes, lighten darken control levels
Flash range 2.7 meters 2.5 Metres
Color Options Cobalt Blue, Flamingo Pink, Ice Blue, Smoky white, Lime green White
Shooting range 0.6 meters to infinity 0.5 meters to infinity
Shutter speed 1/60 sec 1/3 to 1/400 sec
  You would see that while both the cameras are excellent regarding their functionality, the Fujifilm Mini 25 comes with a few additional features packed in. In any case, you can choose the camera that best meets your shooting requirements by making a perfect comparison based on the above chart. The Polaroid cameras are not used widely enough. You can opt for it if you love the retro look that these cameras offer you. These shots can be excellent for those social media shares.

The Concluding Thoughts

The Polaroid cameras have not yet gone out of fashion, though we do not use them like the DSLRs or other similar options.  However, the two offerings coming from Fujifilm should help you achieve the best performance about Polaroid cameras. The Fujifilm Mini 25 is one of the prominent choices among the two and come with a few salient features that borrow a few options from the mainstream cameras in the digital era. Have you used any of the two polaroid cameras – at least for fun or the functionality? If you have used them at least once, you may share your experiences and opinions with either of them so that our readers will get a piece of good information about the cameras and make a learned choice.

Waze Cam vs Ring Stick Up Security Camera Specifications Comparison

Security cameras have been one of the essential choices in today’s world filled with frauds and other safety concerns. If you are looking for the options to check out the best security cameras for your home or office, we have two most popular options you can have a look at. Yes, we are talking about Waze Cam vs Ring Stick Up security cameras. How do these two cameras compare against one another? We will check out the two well-known security cameras and compare them with one another.
Also Read: Amazon Cloud Cam vs Ring Stick Up Cam

Wyze Cam – A Sneak Peek into it

Check on Amazon

When the first version of Wyze cam was introduced, it had all the features you have come to see in a high-end security camera. It featured the two-way audio, HD recording, best in class night vision and motion sensors and all this was made available at an affordable price – in fact, at an unbelievable amount of under 30 bucks. The Wyze Cam 2 comes with all these features and more. The camera now comes with a matte finish and a unique hideaway stand. Wyze Cam offers you an exceptional image quality and a fantastic two-way audio performance. The camera features a powerful 1/2.7″ CMOS sensor that gives you amazing 1080p HD recording. The sensor offers you a smoother night vision and better clarity during the day time recordings. The power audio chip inside the cameras and the Class K amplifiers are the two factors that help you with the best in class audio performance. The enhanced motion detection technology should aid you in following the moving object right from where the activity initiated to all the way till where it goes. The Wyze cam also has an excellent personal assistant integration making it easy to communicate with the camera. It supports IFTTT and Amazon Alexa. The companion app comes is polished and provides you access to a great deal of performance and camera controls. While the clips are saved to the cloud, you can configure them to be recorded on the SD card as well. However, accessing the triggered recordings can be a little difficult to find.

The Pros

  • Integration with Amazon Alexa and IFTTT.
  • It offers you 14 days rolling history for free.
  • The excellent motion tracking functionality.

The Cons

  • The recorded video may not have found easily.

The Ring Stick Up Cam – An Introduction

Check on Amazon

This is one of the most versatile security cameras we have ever come across. It offers you multiple features and functions. You can use it both indoors and outdoors, and it offers you a slighter degree of weather sealing (Read: Splash Proof) as well. Another feature that made us go gaga over it is the support for either WiFi or Ethernet connectivity – thereby enhancing its versatility. The image quality and the motion tracking functionalities are one of the best when compared to the competitors. Setting it up should not take more than five minutes. However, you may need enough time to install the system on the wall mount. The camera can record the videos in 1080p HD resolution and offers you a 155 degree of diagonal field of view. The 150 degrees horizontal and 85-degree vertical field of view should be able to provide you access to a broader view no matter where you have installed it. The camera also comes with a motion detection functionality that can be switched on or off as per your needs. However, an automatic recording of motion detection will need a paid Ring Protect plan which is optional. The motion detection sensitivity can be adjusted as per your needs. If you are looking for smart home integration, the camera offers you both Google Assistant and Amazon Alexa integration. The Alexa integration is full-fledged, while the Google Assistant integration covers only a few areas.

The Pros

  • The camera offers you a versatile functionality and can be used both indoors and outdoors
  • You can use it over WiFi or through an Ethernet connection.
  • The image and video quality along with the motion detection work great.
  • The night vision performance tends to be top notch.

The Cons

  • The two-way audio can get a little choppy sometimes

Comparison Chart for the security cameras: Waze Cam vs Ring Stick Up

That was a brief review of the two powerful security cameras you can make use of for your security concerns. Having gone through those details of either of the cameras, how about checking about the features in a head to head comparison? The side by side comparison should help you make your choice in a better manner.
Features / Particulars

Wyze cam

Ring Stick Up cam

Physical Dimensions 2.2 x 1.97 x 1.97 inches 2.4 x 1.4 x 5 inches
Weight 100 grams
Weather sealing No Yes, IPX5 “splashproof.”
Suitability Indoor use only Indoor and outdoor
Connectivity WiFi WiFi and Ethernet
Personal Assistant integration Amazon Alexa Amazon Alexa and Google Assistant
Video Quality 1080p HD 1080p HD
Field of view 110 degrees diagonal 150 degree horizontal, 85 degrees vertical and 155 degrees diagonal
Option for Siren No Yes
Power connections USB USB and Ethernet
  The above table should provide you a fair idea about the functionalities offered by the two competing security cameras. The Ring Stick Up cam tends to give you a few additional features and makes it one of the prominent options to go with. The versatile functionality, suitability for both indoor and outdoor usage and multiple personal assistant integrations are a few features that make it an excellent option for your safety.

The Concluding Thoughts

That was a precise comparison between the two capable security cameras offering you respite from the possible to your property or loved ones. Based on what your exact requirements are, you can go with either of them after comparing them through the chart and concise review above. Have you used either of the security cameras for your needs? Why not share your thoughts, experiences, and opinions with us through the comments here below? That can perhaps help our readers arrive at a wiser decision to choose the best among them.

Amazon Cloud Cam vs Ring Stick Up Cam Specifications Comparison

Why an Amazon Cloud Cam vs Ring Stick Up Cam article you ask? It is because in today’s world of nuclear families and a hectic lifestyle comprises of 21st Century risks and safety concerns, a security camera should be one of the prominent choices you need to make. With such a massive number of security cameras available at our disposal, it may be a little difficult task to find the best cameras that meet most of your requirements. Of the currently available breed of cameras, we have picked two most capable and popular options and will make a comparison between the two compelling security cameras.
Also Read: Best Windows Hello Compatible Webcams

The Amazon Cloud Cam – An Overview

Check on Amazon

As with most of the Amazon products, you will find that the packaging and contents out of the box are impressive and satisfying. The box contents include Cloud Cam itself, a USB wall adapter, nine-foot USB power cable, a mounting plate, and wall-mount hardware. The Amazon Cloud camera is capable of shooting in HD and offers you 30 frames per second clarity. You should shoot high-quality videos, unlike most security cameras. During dusk or lower light levels, the images and videos get a little blurry, especially when things are moving faster. However, the night videos are quite crisp and clear. The faces and clothing patterns in night shooting are visible. The clips could be viewed only through the app initially, but Amazon has now introduced the options to see them on your computer as well. One of the features we loved the most is the two-way audio communication that it offers you. That means while you can hear the sounds of the video clips being recorded, you will also be able to talk to the people on the other side of the camera from afar! The speaker and microphone are quite capable enough. It can, of course, pick the raised voices – but also, it can also get the lower level in room conversations as well. The camera can record up to 24 hours of footage, but you may buy additional footage and storage options from Amazon. There are a few plans available which go like Basic, Extended, and Pro. Coming from Amazon, the security camera is equipped with the options for activating and interacting with Alexa, Amazon’s in-house AI Personal voice assistant.

The Pros

  • Easier setup options
  • The video quality is quite good including the best night vision
  • The two-way audio functionality is much better than the competitions and clear enough.
  • You can customize the motion sensing

The Cons

  • You will need to opt for a subscription if you want to download the videos.
  • If you are opting for basic tier, the motion sensing can be an issue.
  • Though night vision is excellent, low light performance tends to be blurry

Ring Stick Up Cam – An Introduction

Check on Amazon

As with Amazon Cloud Cam, the Ring stick cam comes with an attractive package with almost all the accessories, and mounting paraphernalia included. The sales pack comes equipped with the camera itself, the base, two USB power supply options (indoor and outdoor), a Power over Ethernet cable, and all the anchors, mounting screws, and wire clips. The configuration of your camera is quite simple and easy to work with. Just download the app, scan the barcode and follow the instructions on both the app and the device. You should be done within around five minutes. Of course, mounting the camera on he wall should take more time. The feature that we love the most with the camera is the ability to be used under a wide range of options. It can be used indoors or outdoors, can work with WiFi or ethernet, and can be placed on a table or used on the wall. The app lets you perform an infinite range of options to manage your camera. Some of the options worth mentioning can be viewing the live or recorded footage, setting up motion sensors and zones, or even adjust the motion sensitivity. The app also lets you set off a siren or even talk to the others on the other side of the camera. The Stick Cam can record the footage in 1080p HD and offers you a 150 degree horizontal or 85-degree vertical field of view. As for the low light performance or the night vision functionality – you will find the camera performing quite well enough. Just the way you can do it with the Amazon Cloud cam, you can also use the two-way audio functionality on the Ring Stick up cam as well. The protect plan comes with subscription charges of $3 per month. That should be a good option for every standard.

The Pros

  • Versatile functionality makes it one of the prominent selections
  • It can be used both for indoor or outdoor usage
  • You have access to full HD video recording at 1080p
  • You can choose between USB usage or Ethernet connectivity

The Cons

  • The siren tends to be low volume
  • The two-way communication is not up to the mark.
  • The subscription charges may not be something you will be comfortable with

The Comparison Chart: Amazon Cloud Cam vs Ring Stick Up Cam

After having gone through the details of the two cameras, it may be practical enough to understand the differences between the two cameras. We thought of sharing the differences in a side by side comparison chart for a better understanding of the two cameras and their features.
Features / Particulars

Amazon Cloud Cam

Ring Stick Up Cam

Indoor / Outdoor usage Indoor only Outdoor and indoor usage
Power connections MicroUSB and Ethernet MicroUSB
Connectivity options Ethernet and WiFi WiFi
Weather Sealing No IPX5 “splashproof.”
Field of view 120 degree diagonal 150 degree horizontal, 85 degrees vertical and 155 degrees diagonal
Video Quality 1080p HD 1080p HD
IR Night Vision Yes, available Yes, available
Siren functionality No Yes
Two-way audio Yes, crystal clear Yes, but a little choppy
Personal Assistant Integration Google Assistant and Amazon Alexa Amazon Alexa

Which One should you Go With?

The Amazon Cloud cam comes from a huge brand, but still, the Ring Stick Up Cam has a lot of features and functions making it one of the prime choices. The versatility, better connectivity options, and outdoor visibility are a few features that would make it a formidable choice in comparison. However, that should not make Amazon inferior in any manner. In fact, when it comes to the features available on the free tier, you will find the Amazon Cloud Cam one of the good choices. Even in terms of other functions, it offers you a couple of good features. The clear two-way audio communication is one of the prominent options.

The Concluding Thoughts

So, that was what we have to do with the two cameras for your security requirements. In fact, we would consider both of them capable enough when it comes to the features and functions that they offer you. Have you used either of those options for your security needs? If you have, do share your thoughts and experiences with those two cameras with us through the comments here. This will help our readers make a valuable decision.